3 - Module Setup
Goals
In this task, you will learn how to:
- Prepare your GitHub account for NCAE module development
- Create your own NCAE module with the integrated wizard
- Enable your GitHub repository for automated container builds
- Deploy the container image on your NCAE
- Install your module on your NCAE instance
- Run the provided example services from your module
Prepare your GitHub account
The NCAE module wizard can automatically push the created module template to a Git repository of your choice. As part of this training course, you will be using GitHub for this purpose. Before you can dive into the module creation, you need to prepare a new GitHub repository for your module.
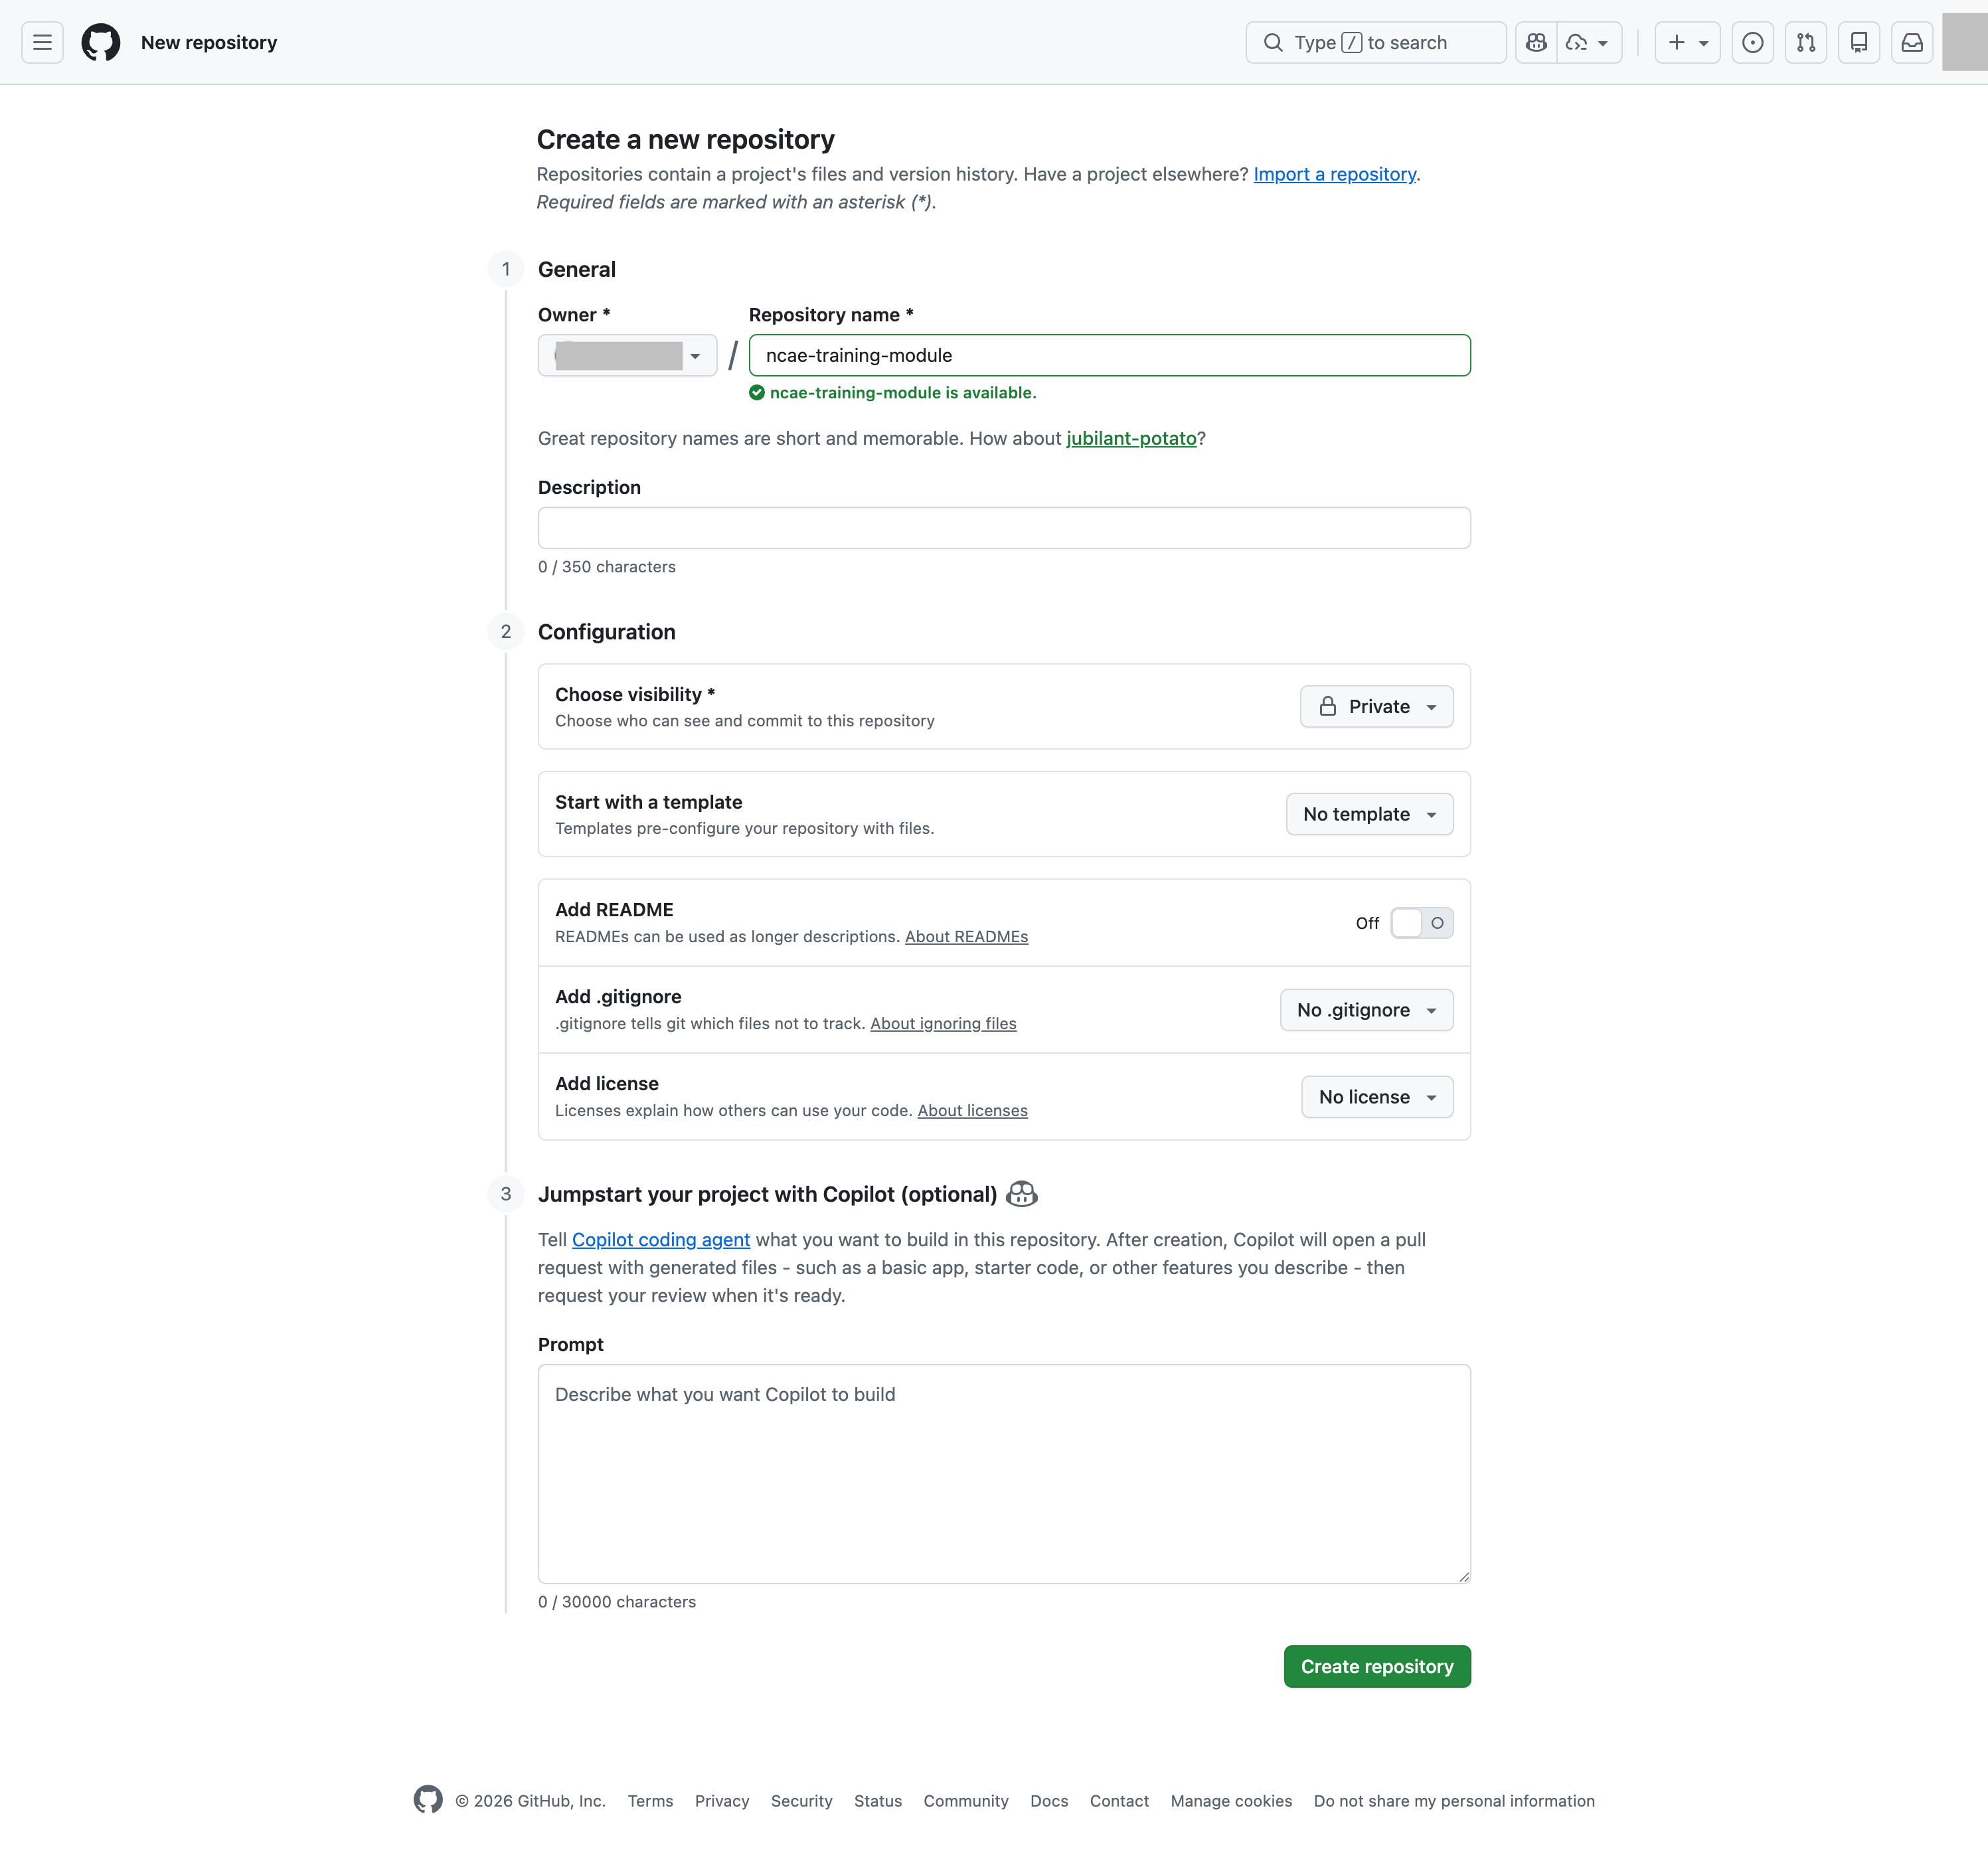
Sign in to your GitHub account, or if you don’t have one yet, register a new account via https://github.com/signup instead. After you have signed in, head over to https://github.com/new to create a new repository:
- Owner: should be your GitHub username
- Repository name: should be
ncae-training-module - Description: can be left empty
- Choose visibility: should be set to
Private
Leave all other settings as-is, so that you are not using any kind of pre-defined README, license file or other kind of template. When your form looks like in the screenshot below, click the “Create repository” button to continue:
After your repository has been created, you should see the empty repository page from GitHub. You do not need to complete any of the instructions provided by GitHub, as the NCAE module wizard will take care of this.
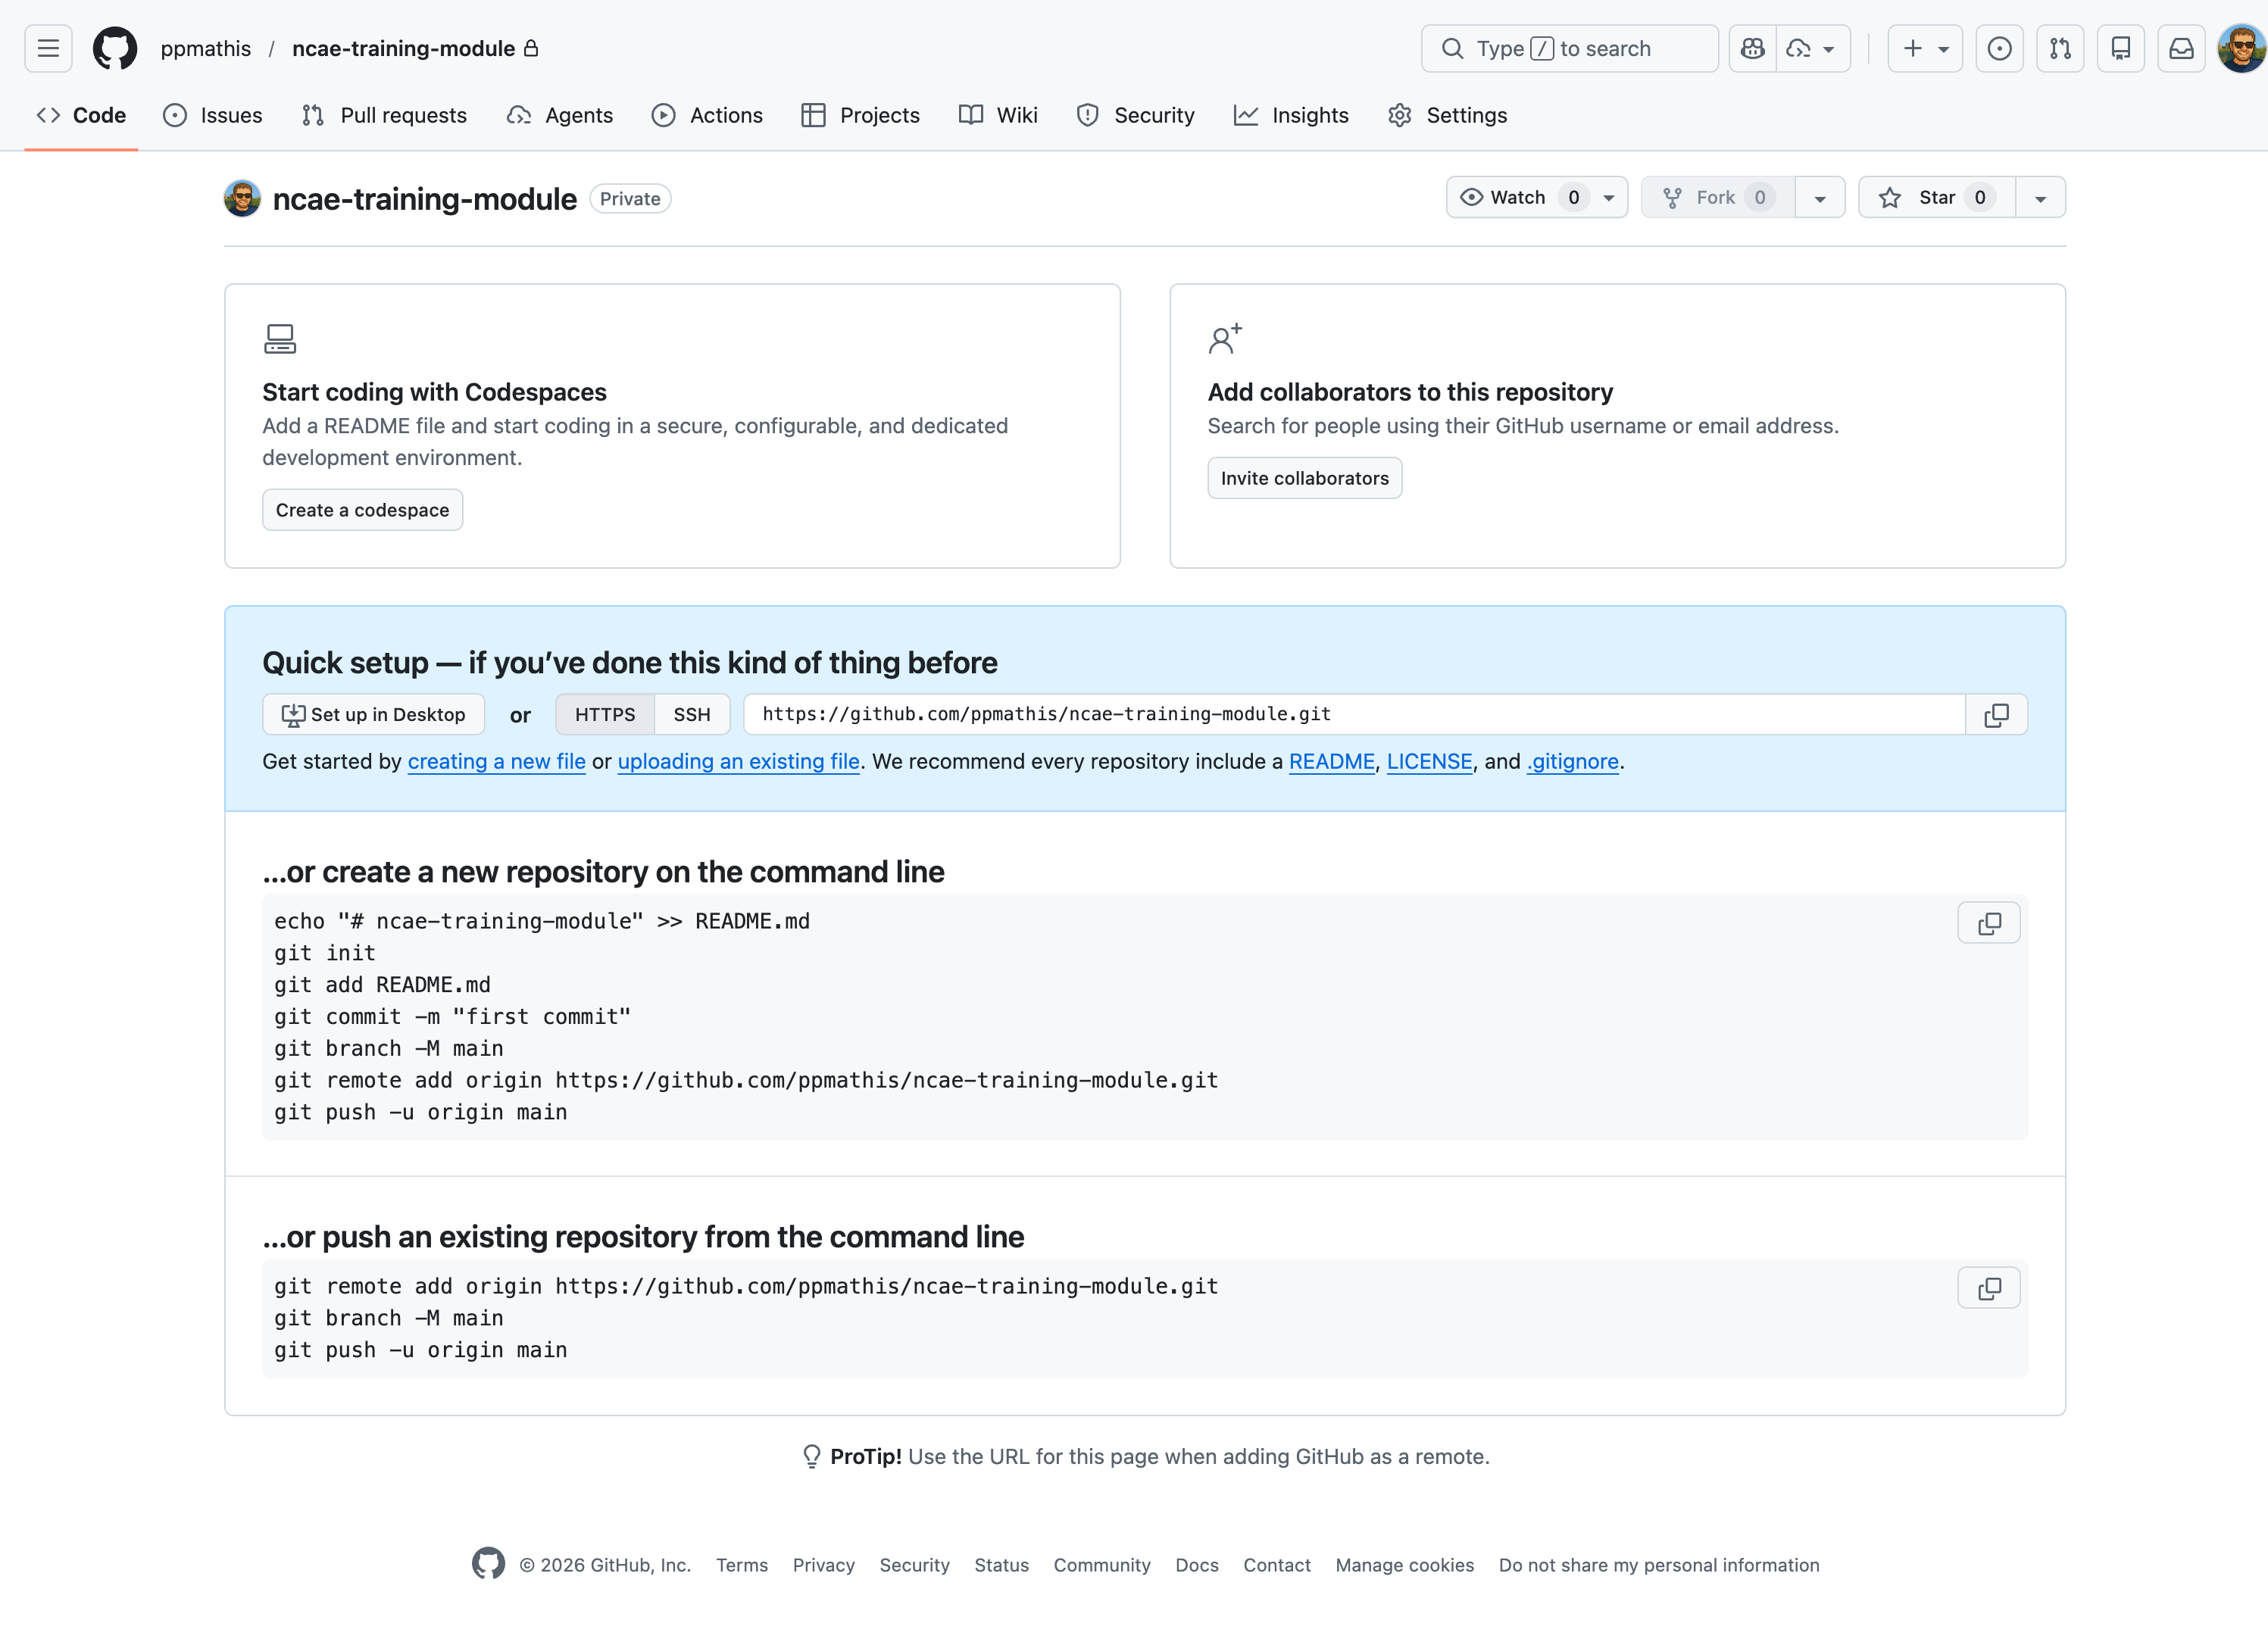
Copy the URL of your repository within the blue “Quick setup” box, and store it for later use. Make sure that the
“HTTPS” toggle is active, and not “SSH”. The URL should look like this:
https://github.com/<username>/ncae-training-module.git.
Next you will need to create a new Personal Access Token (PAT) for your GitHub account, so that NCAE can push the created module to your repository. Head over to https://github.com/settings/personal-access-tokens/new and verify your two-factor authentication if enabled and prompted by GitHub. Then proceed by filling out the form as follows:
- Token name: should be
NCAE Training Module - Description: can be left empty
- Resource owner: should be your GitHub username
- Expiration: should be set to
7 daysfor security reasons - Repository access: should be set to
Only select repositories, then select thencae-training-modulerepository you just created to scope the token to this repository only - Permissions:
- Contents: should be set to
Read and write - Metadata: is automatically added with
Read-only
- Contents: should be set to
With all details entered, your form should look like in the screenshot below:
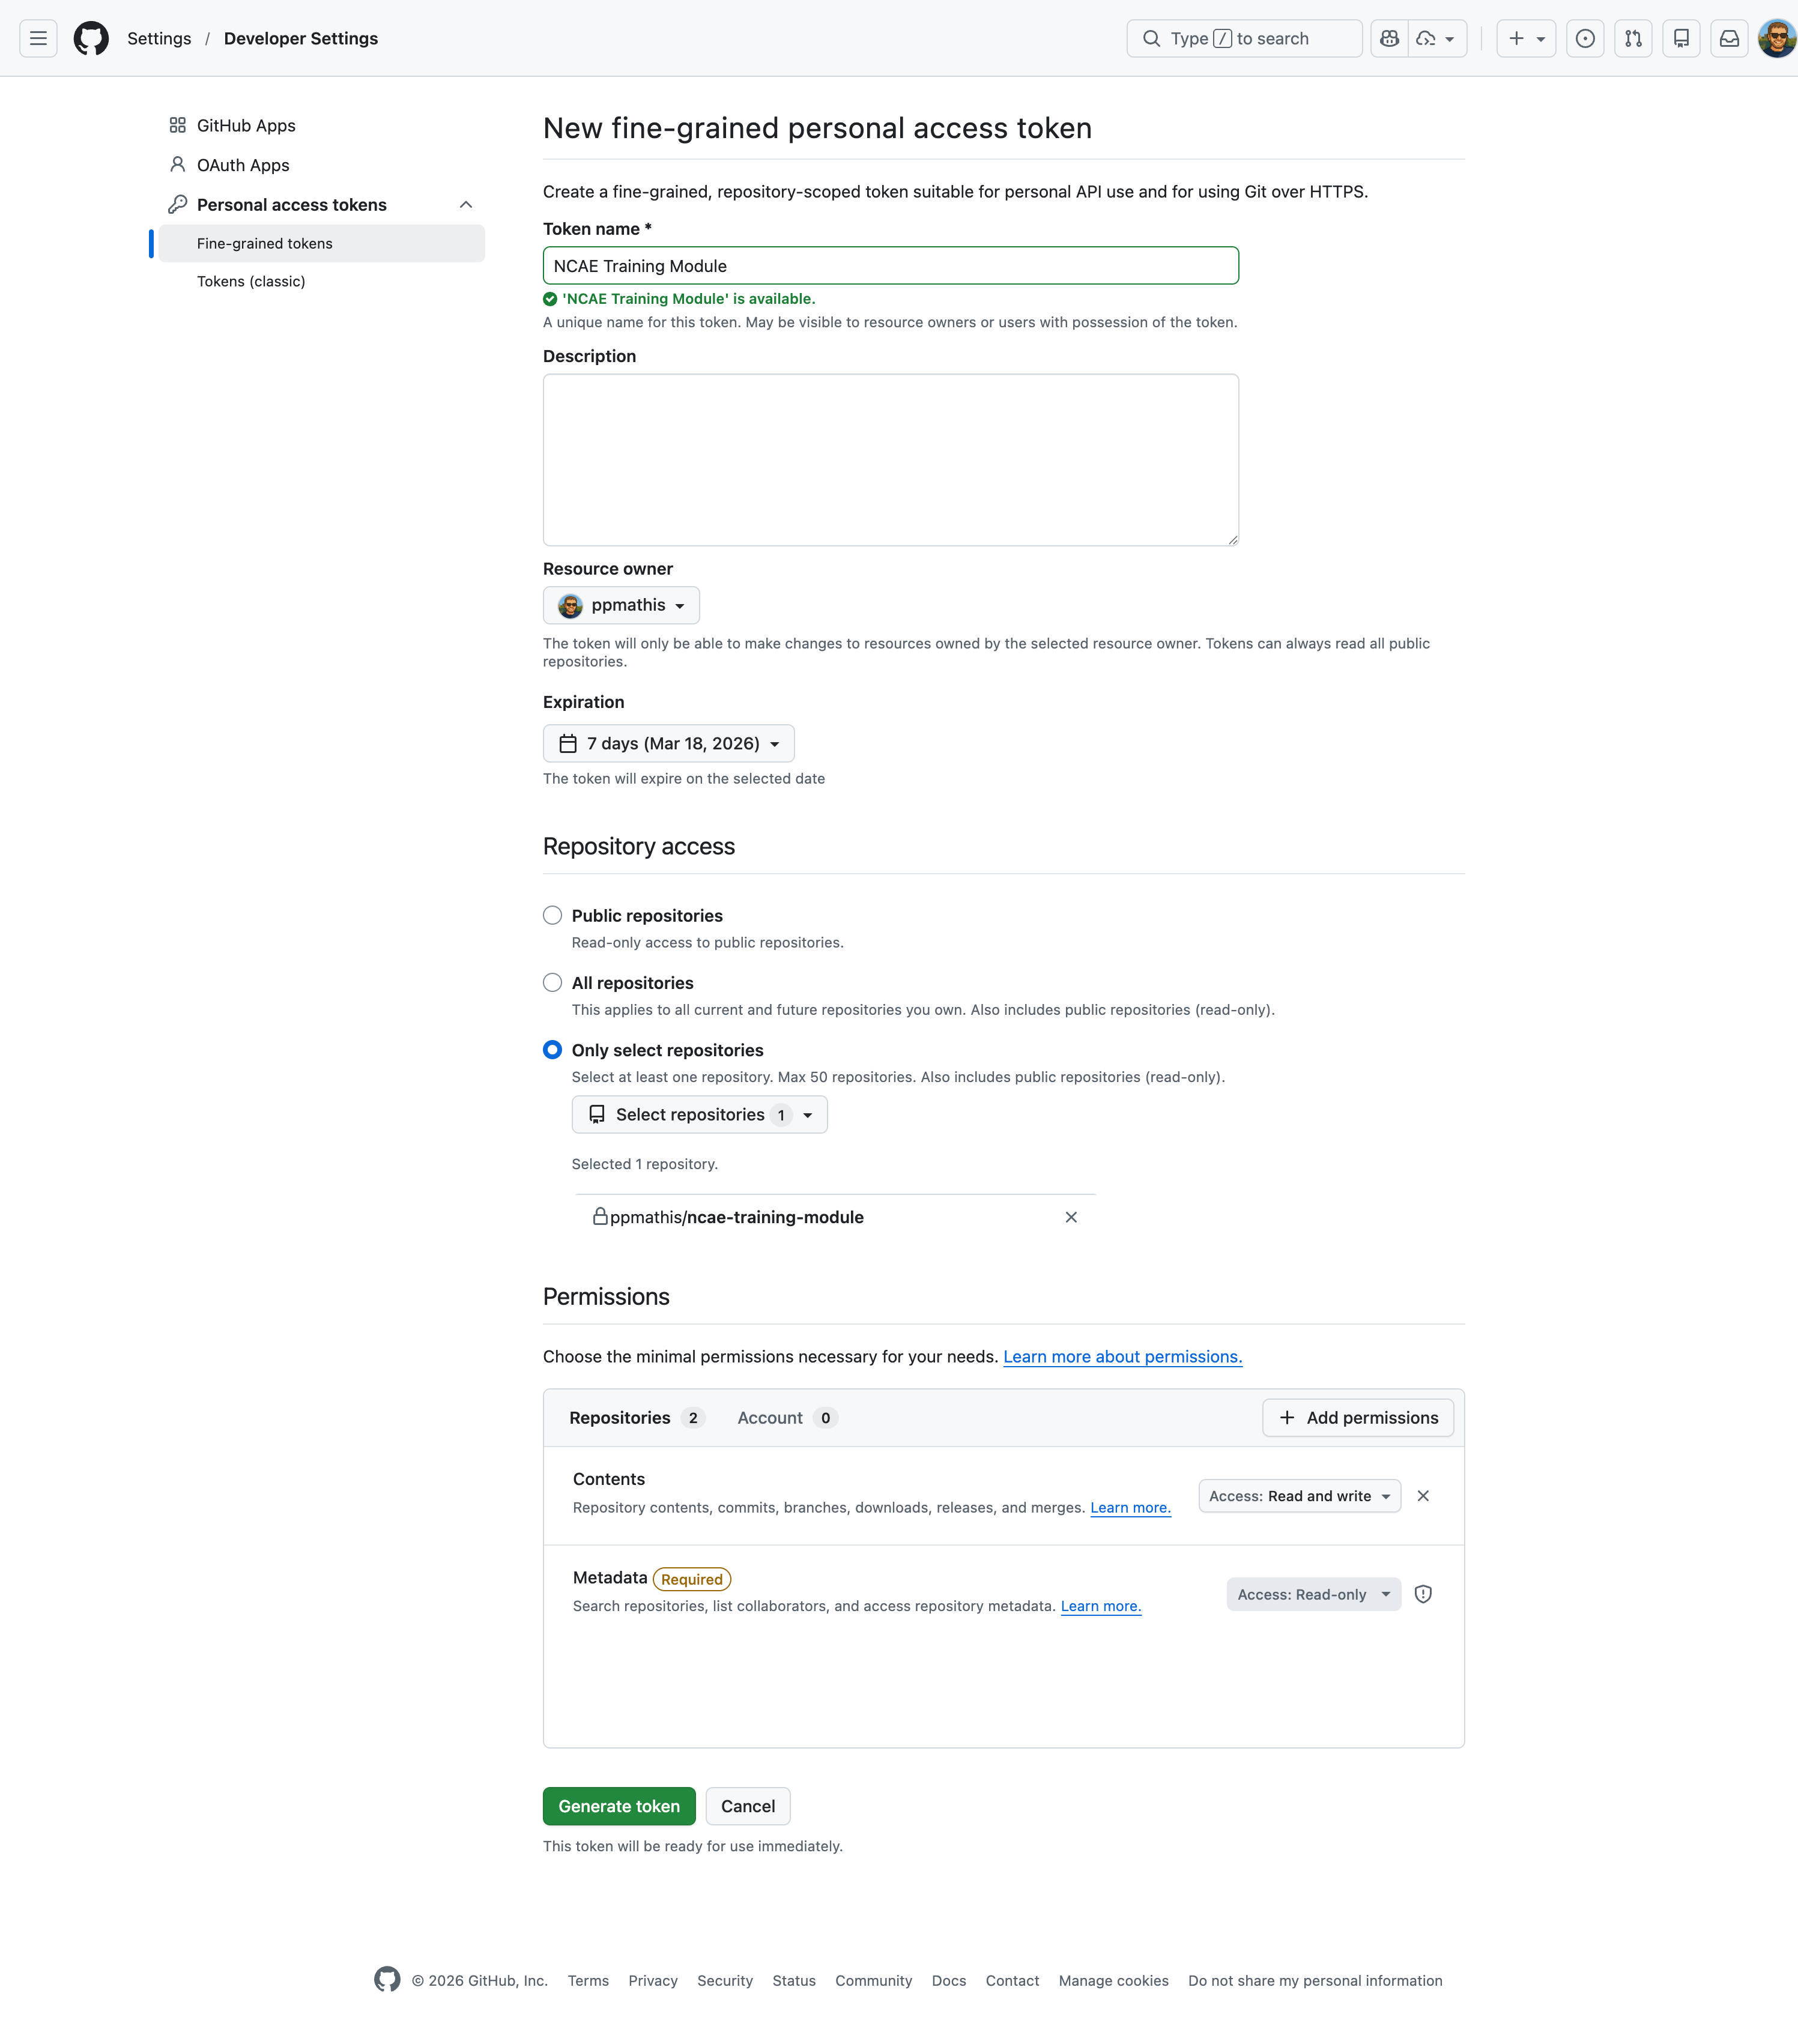
Click on “Generate token” to create your PAT, and confirm your choices if prompted by GitHub. You will then be shown your PAT, which you need to copy and save in a secure place. You will NOT be able to get it again, without regenerating the token.
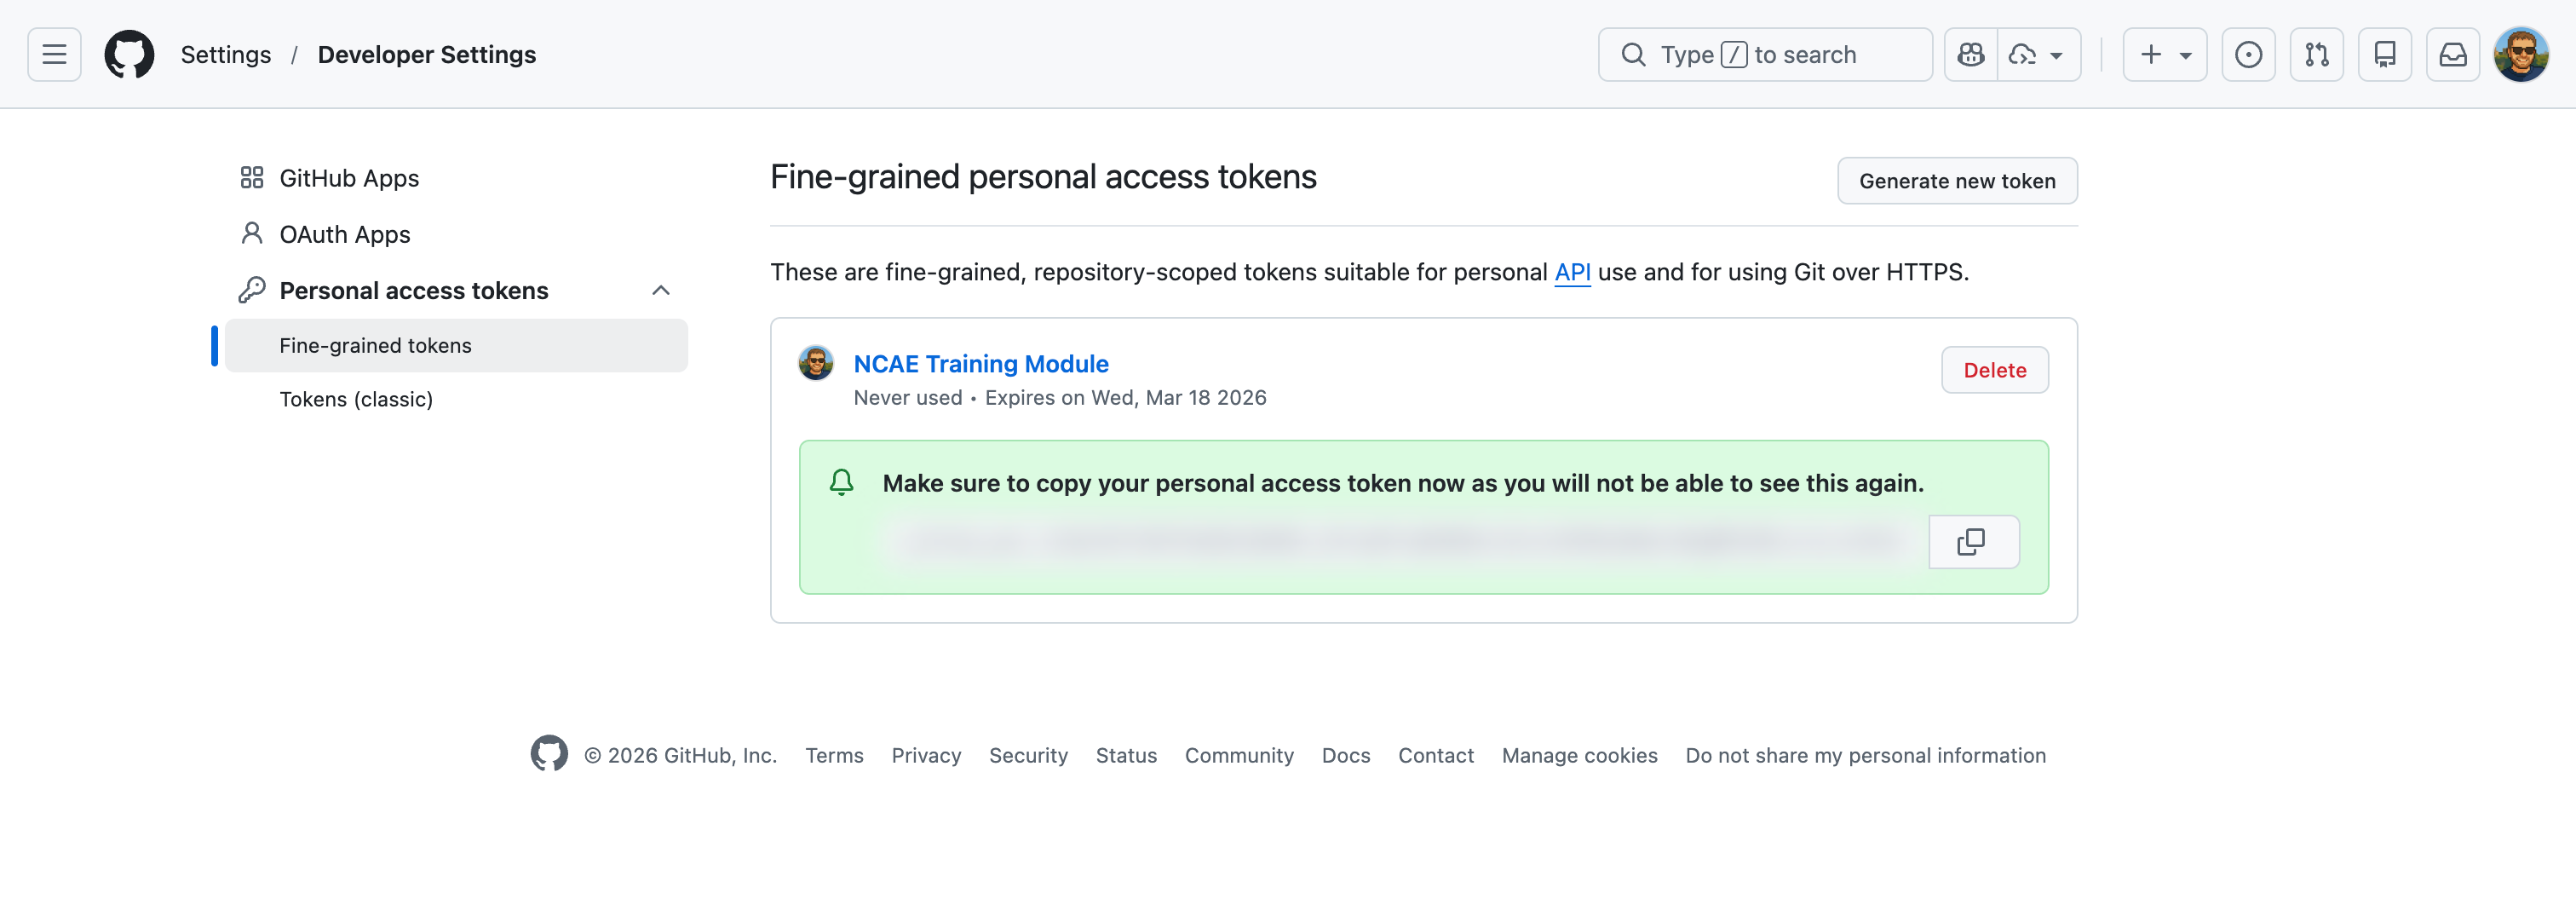
This concludes the preparation of your GitHub account. Once you’ve completed all these steps, you should have the following two pieces of information ready for the next step:
- The GitHub repo URL, which should look like
https://github.com/<username>/ncae-training-module.git - Your Personal Access Token (PAT), which should look like
ghp_XXXXXXXXXXXXXXXXXXXXXXXXXXXXXXXXXXXX
Create your NCAE module
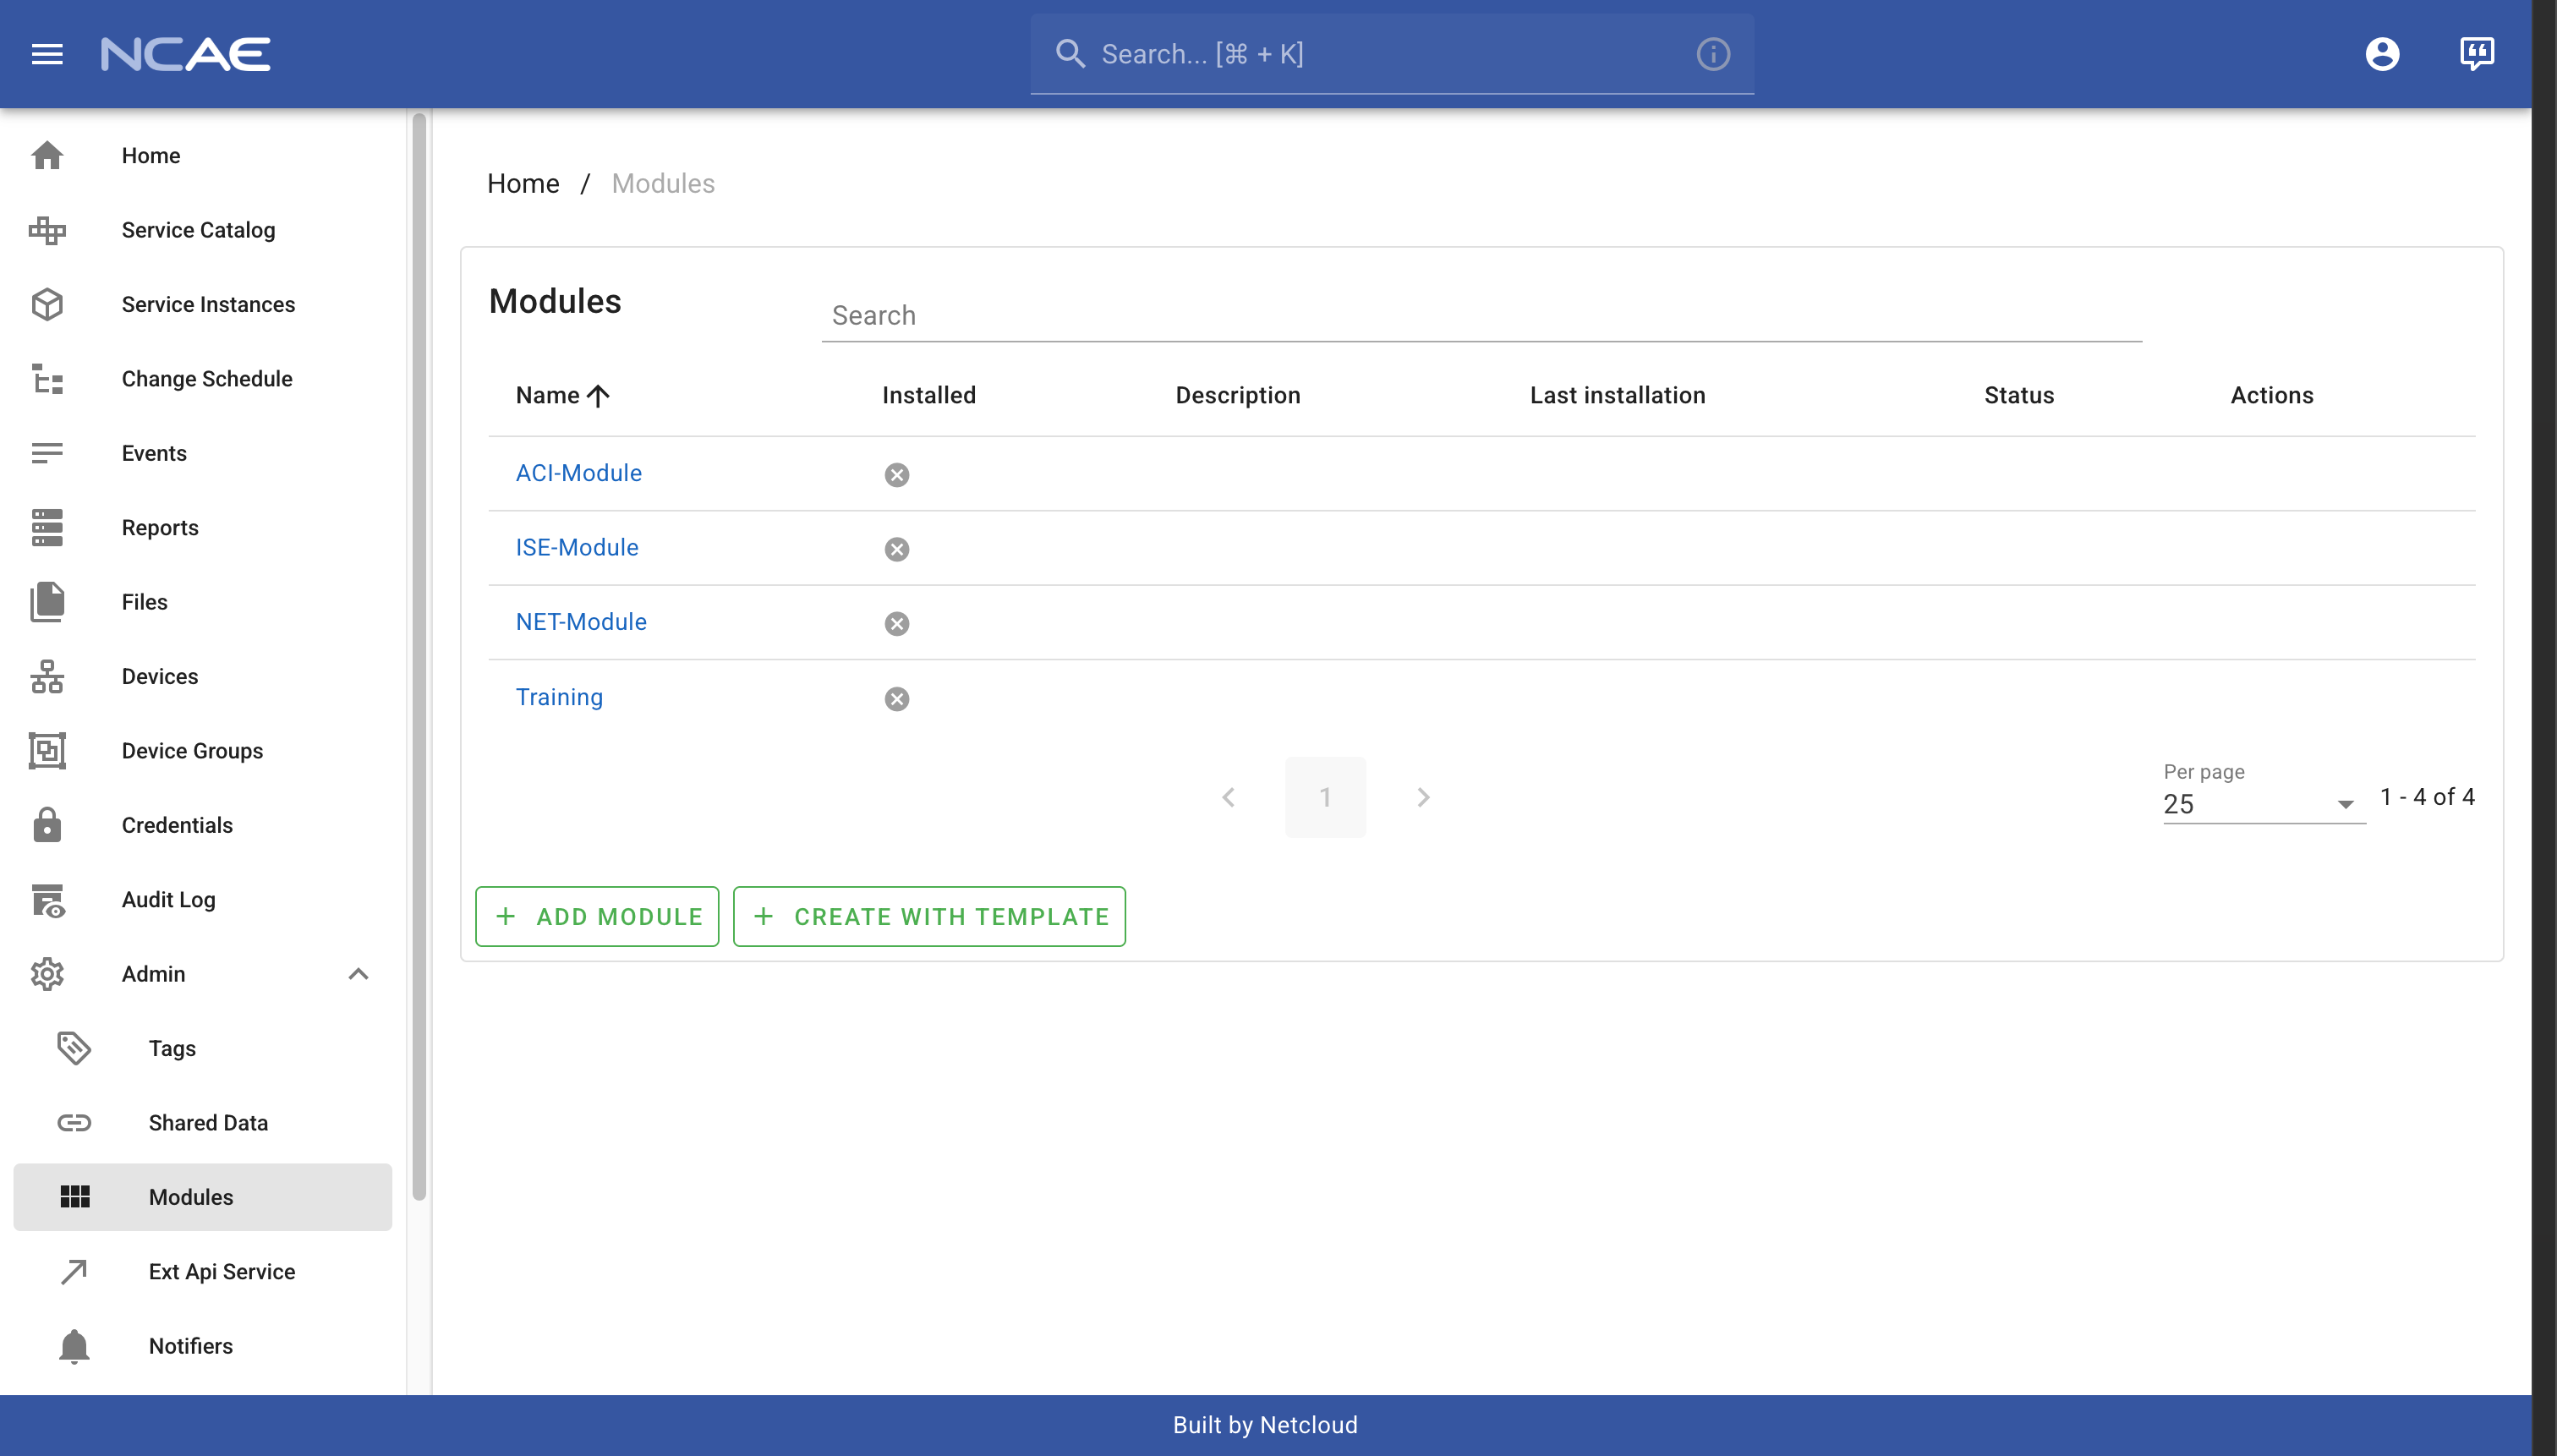
With your GitHub repository being ready, you can now start creating your own first NCAE module. Start by logging into your NCAE instance, then navigate to “Admin -> Modules” in the left sidebar. This will bring you to the module management page, where you can see that currently no modules are installed:

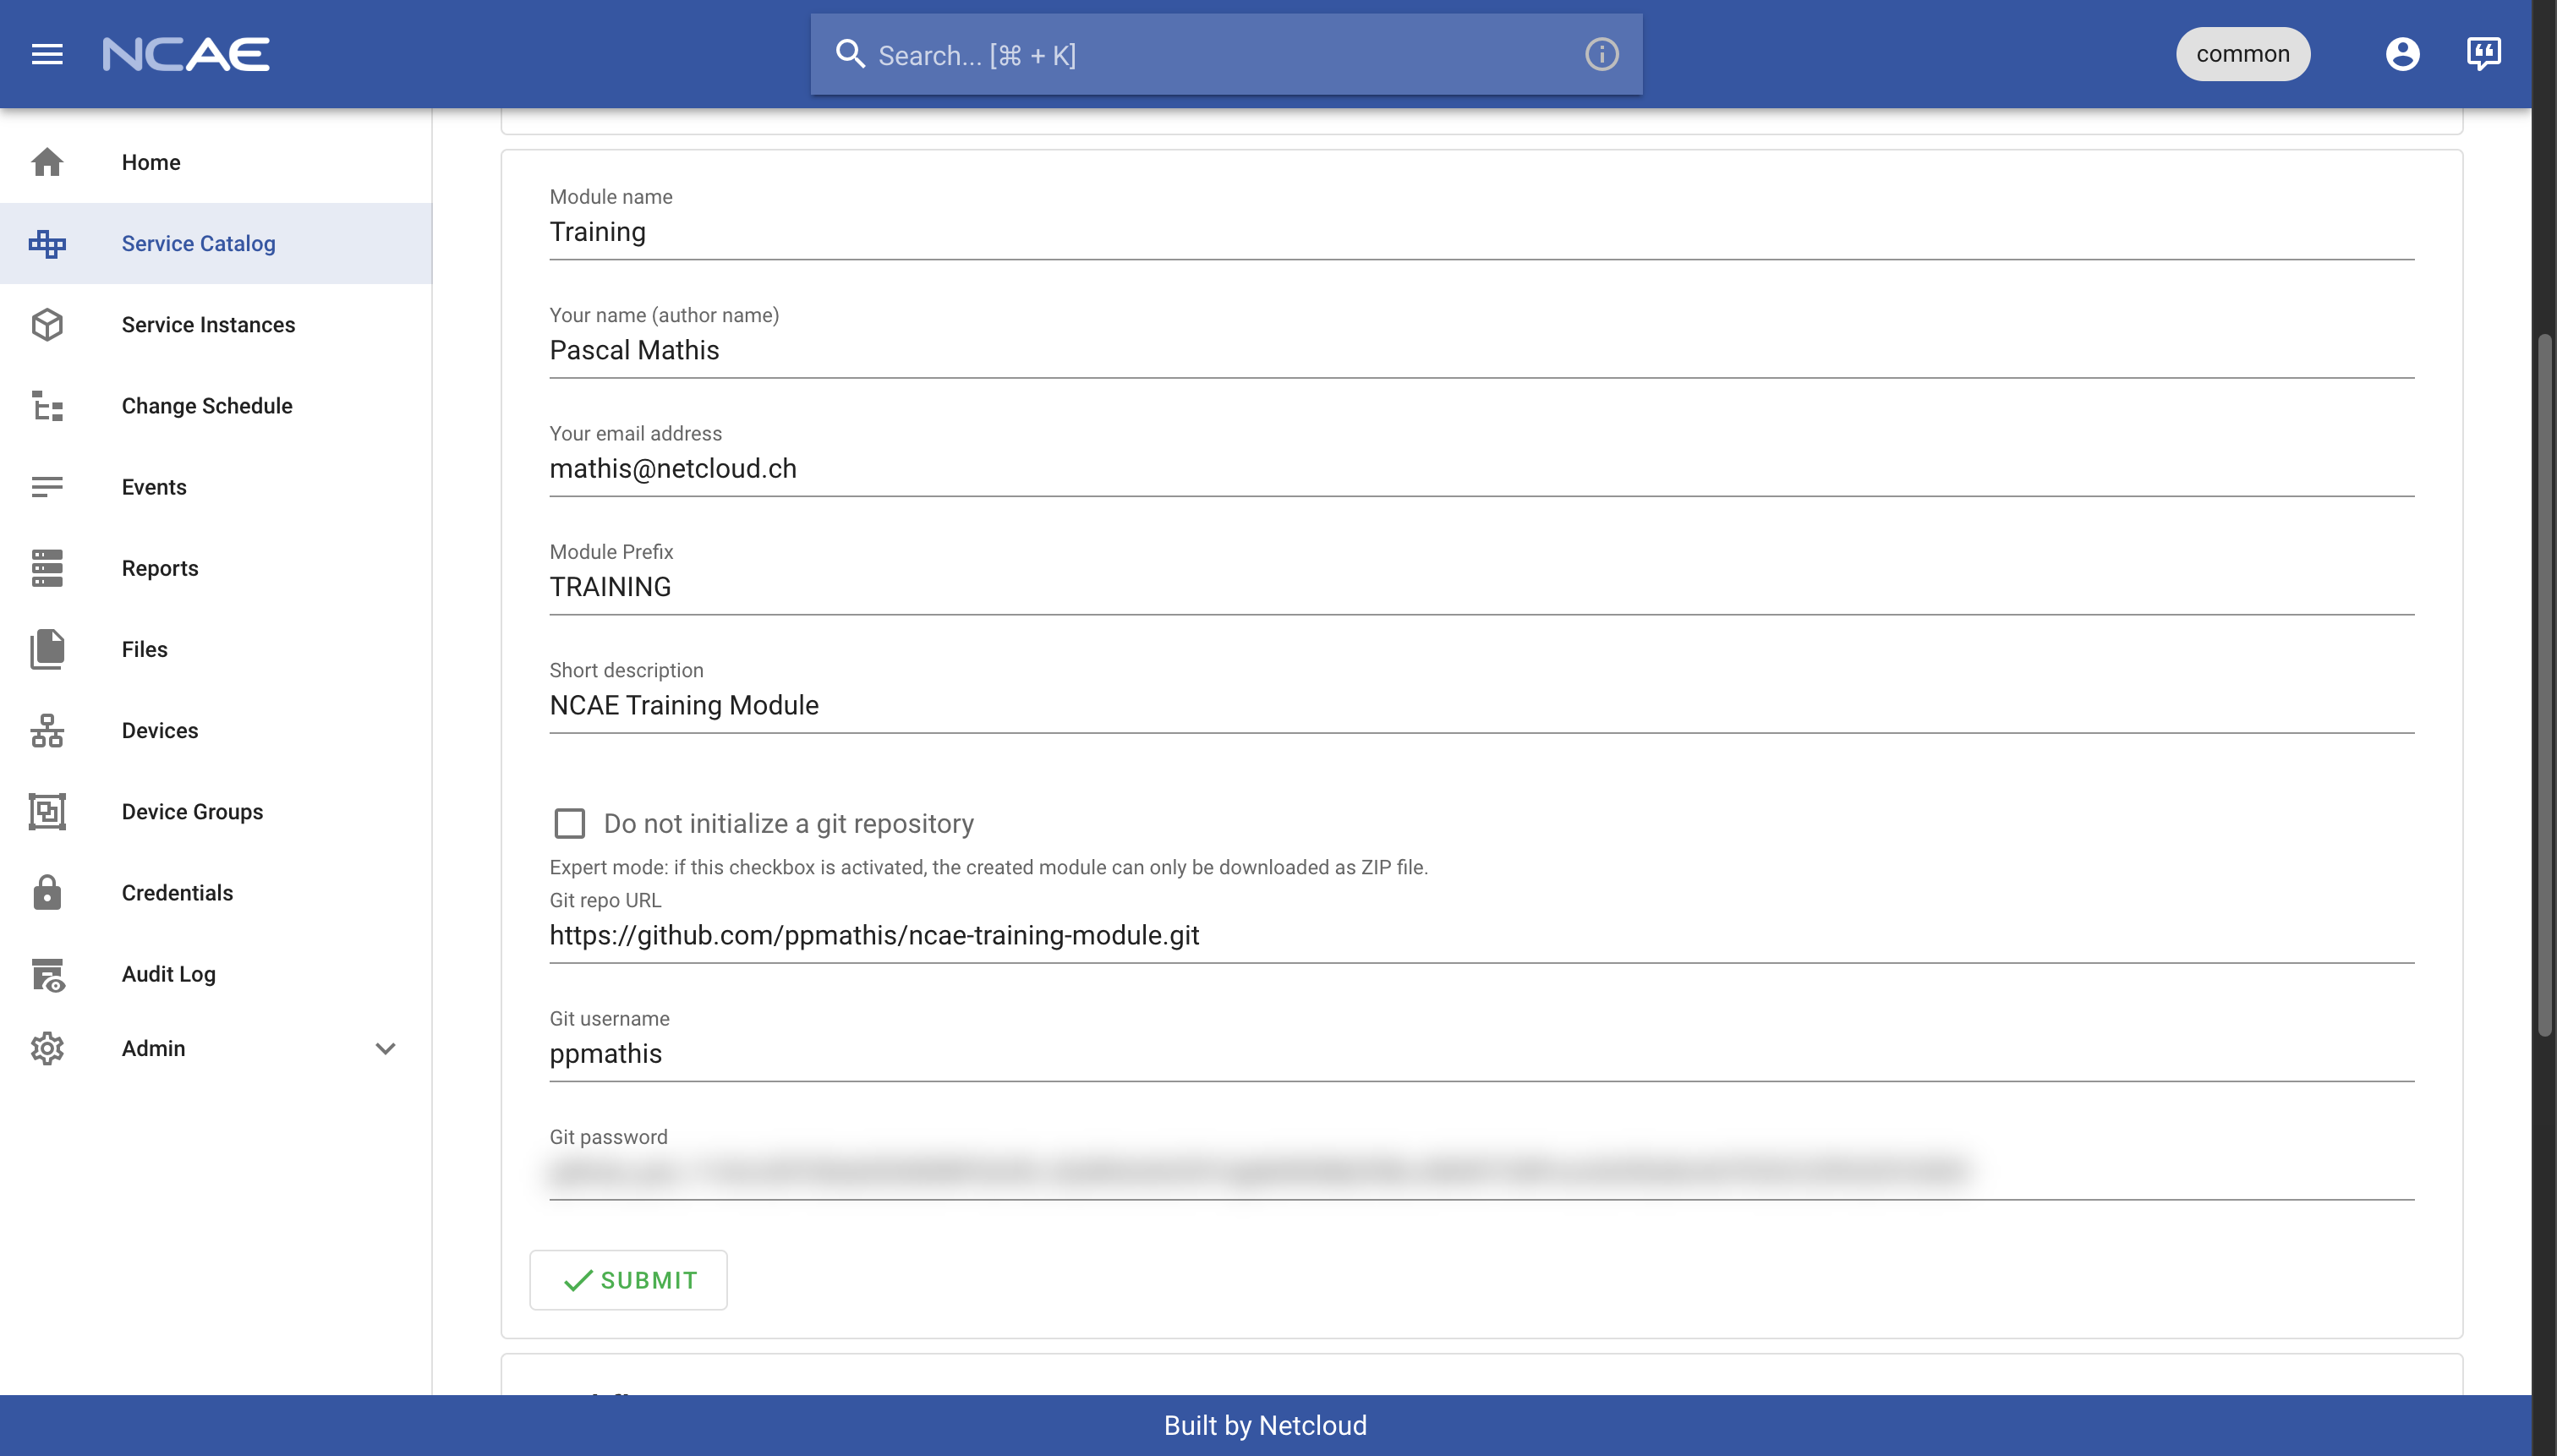
To proceed, click on the “Create with Template” button underneath the module table. You will be redirected to the “MODULE-INSTALLER-V1” service, where you can create your module by filling out these values:
- Module name: should be
Training - Your name: should be your full name, e.g.
John Doe - Your email: should be your email address, e.g.
john.doe@example.com- this will be used for Git commits, so you should use the same email as registered in your GitHub account for this training - Module prefix: should be
TRAINING - Short description: should be
NCAE Training Module - Git repo URL: use the GitHub repo URL you copied in the previous step
- Git username: should be your GitHub username
- Git password: should be the Personal Access Token (PAT) you created in the previous step
With all values entered, your form should look like in the screenshot below:
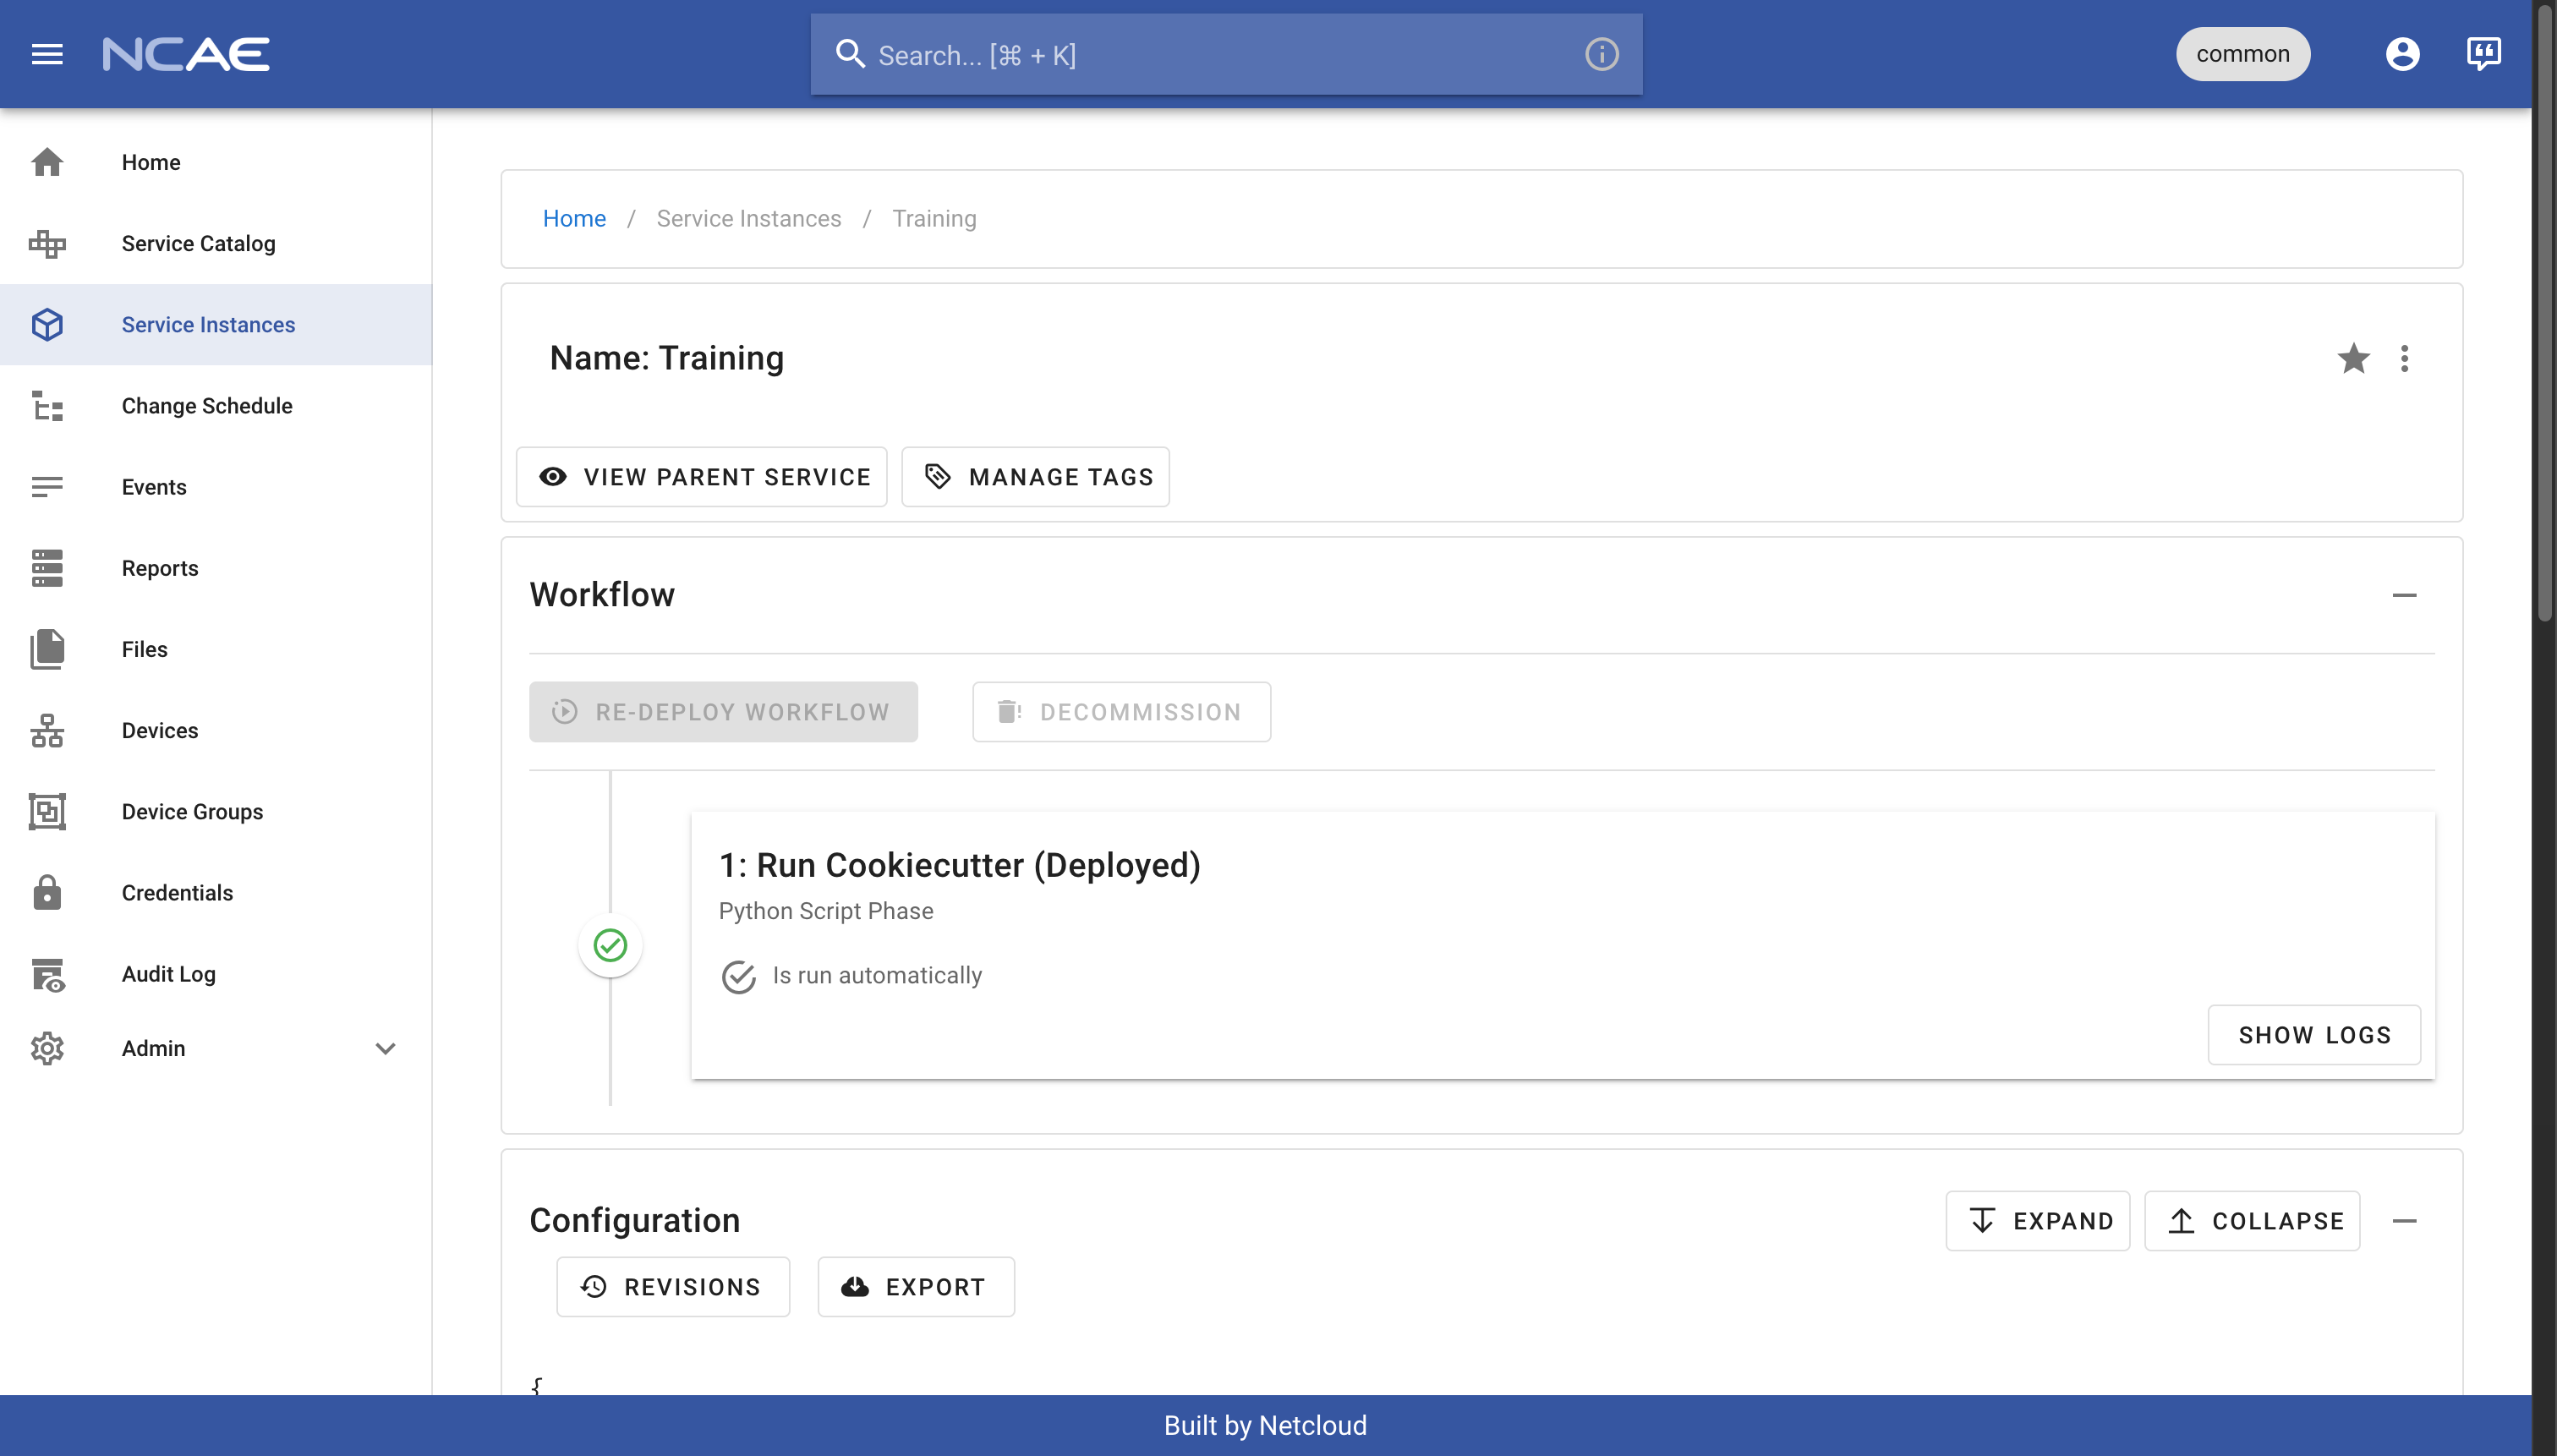
Click on the “Submit” button to start the module creation. The service will now generate a new module template based on your input, and push it to your GitHub repository. This process can take a few minutes, so be patient while the service is working. Once the process is completed, you should see that the service instance finished successfully:
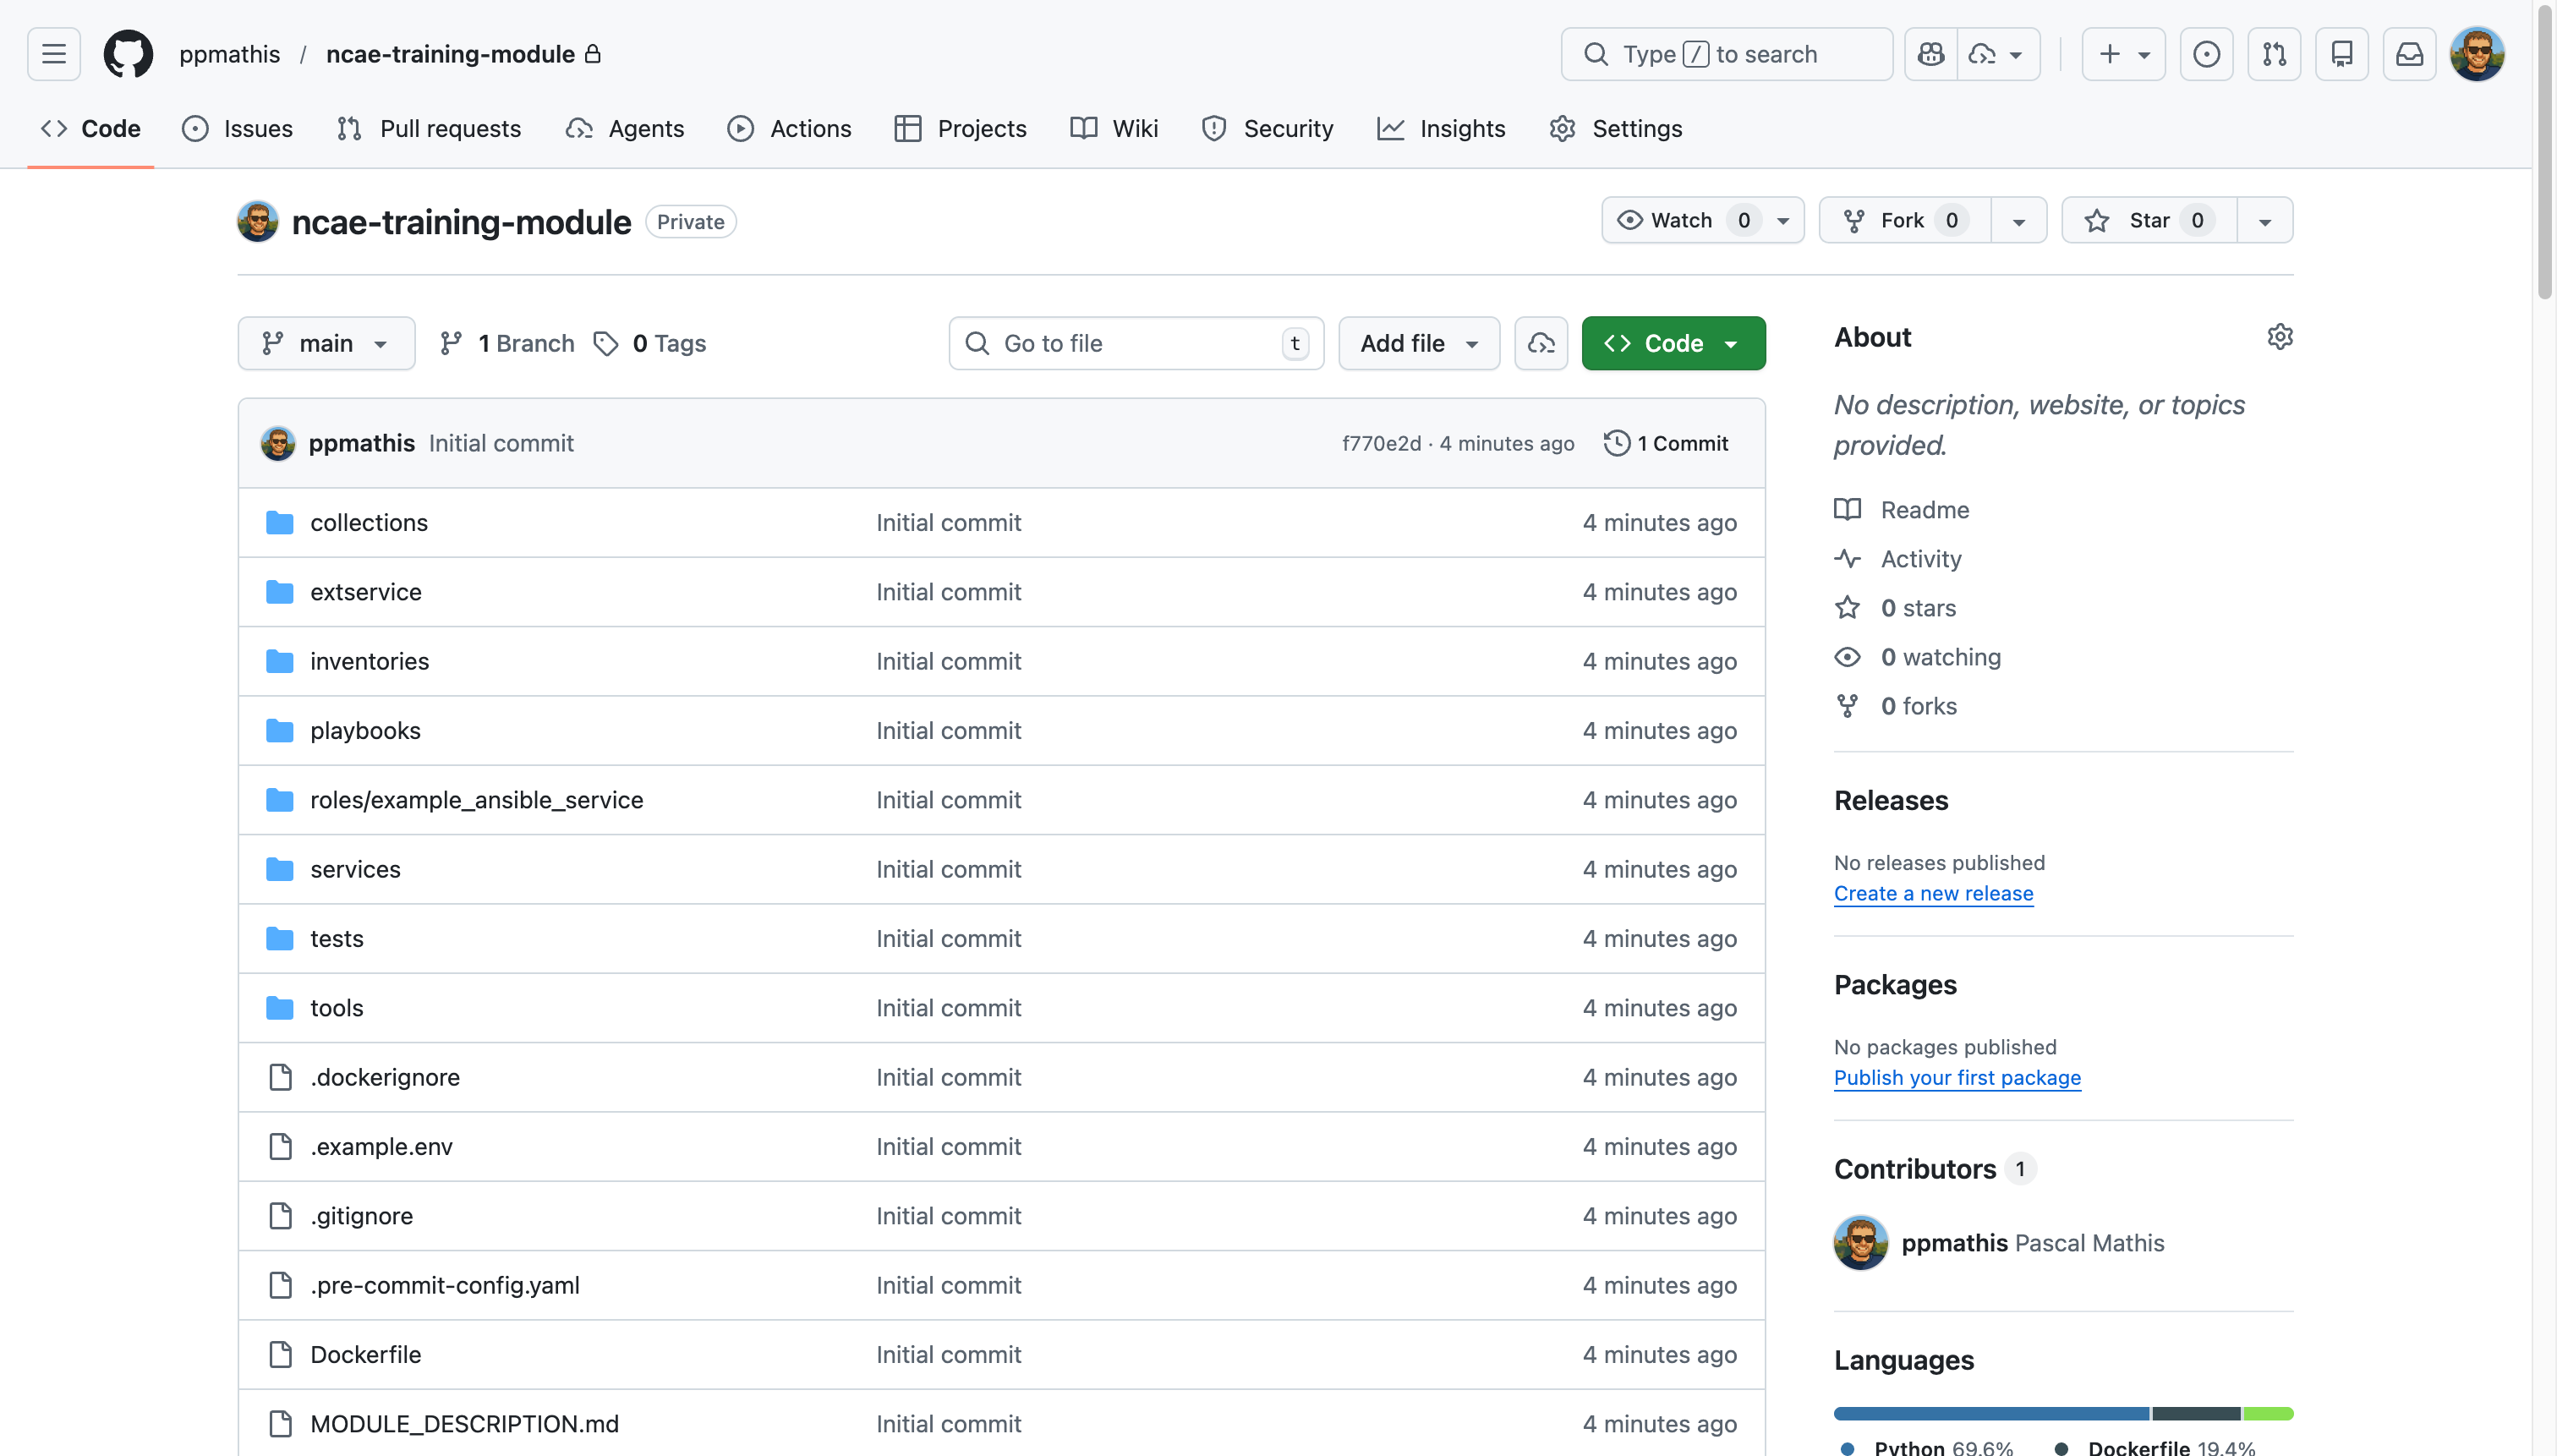
Additionally, when you head back to your GitHub repository, you should now see that it is no longer empty, but contains the generated module template with all the necessary files:
Configure automated container builds on GitHub
While you could already install your NCAE module at this point, you would only be able to run the Ansible-based example service at this point. The Python-based example service requires to run a container image, which needs to be built from your module source code.
We will use GitHub Actions in this training to automatically build and push the container whenever you push any changes. The resulting image will be stored on the GitHub Container Registry, which is a container registry integrated into GitHub and linked to your repository. This specific procedure can vary; you could also build and push locally with Docker Desktop, or use whatever your in-house CI/CD system is.
To create the required configuration, click the “Add file” button on the GitHub repository view (it is left to the green “Code” button), then select “Create new file”. You must fill out the form as follows:
- Name your file: should be
.github/workflows/main.yml - File content: copy the following code snippet as-is without changes
name: CI
on:
push:
branches:
- main
pull_request:
branches:
- main
workflow_dispatch:
permissions:
contents: read
packages: write
jobs:
build:
name: Build and push Docker image
runs-on: ubuntu-latest
permissions:
contents: read
packages: write
steps:
- name: Check out repository
uses: actions/checkout@v6
- name: Log in to GHCR
uses: docker/login-action@v4
with:
registry: ghcr.io
username: ${{ github.actor }}
password: ${{ secrets.GITHUB_TOKEN }}
- name: Set up uv
uses: astral-sh/setup-uv@v7
- name: Set up QEMU
uses: docker/setup-qemu-action@v4
- name: Set up Docker Buildx
uses: docker/setup-buildx-action@v4
- name: Run pre-commit checks
run: |
uv sync --locked --group dev
uv run pre-commit run --all-files
- name: Determine image metadata
id: metadata
uses: docker/metadata-action@v6
with:
images: ghcr.io/${{ github.repository }}
tags: |
type=ref,event=branch
type=ref,event=tag
type=sha
- name: Build and push Docker image
uses: docker/build-push-action@v7
with:
context: .
platforms: linux/amd64,linux/arm64
push: ${{ github.event_name != 'pull_request' }}
tags: ${{ steps.metadata.outputs.tags }}
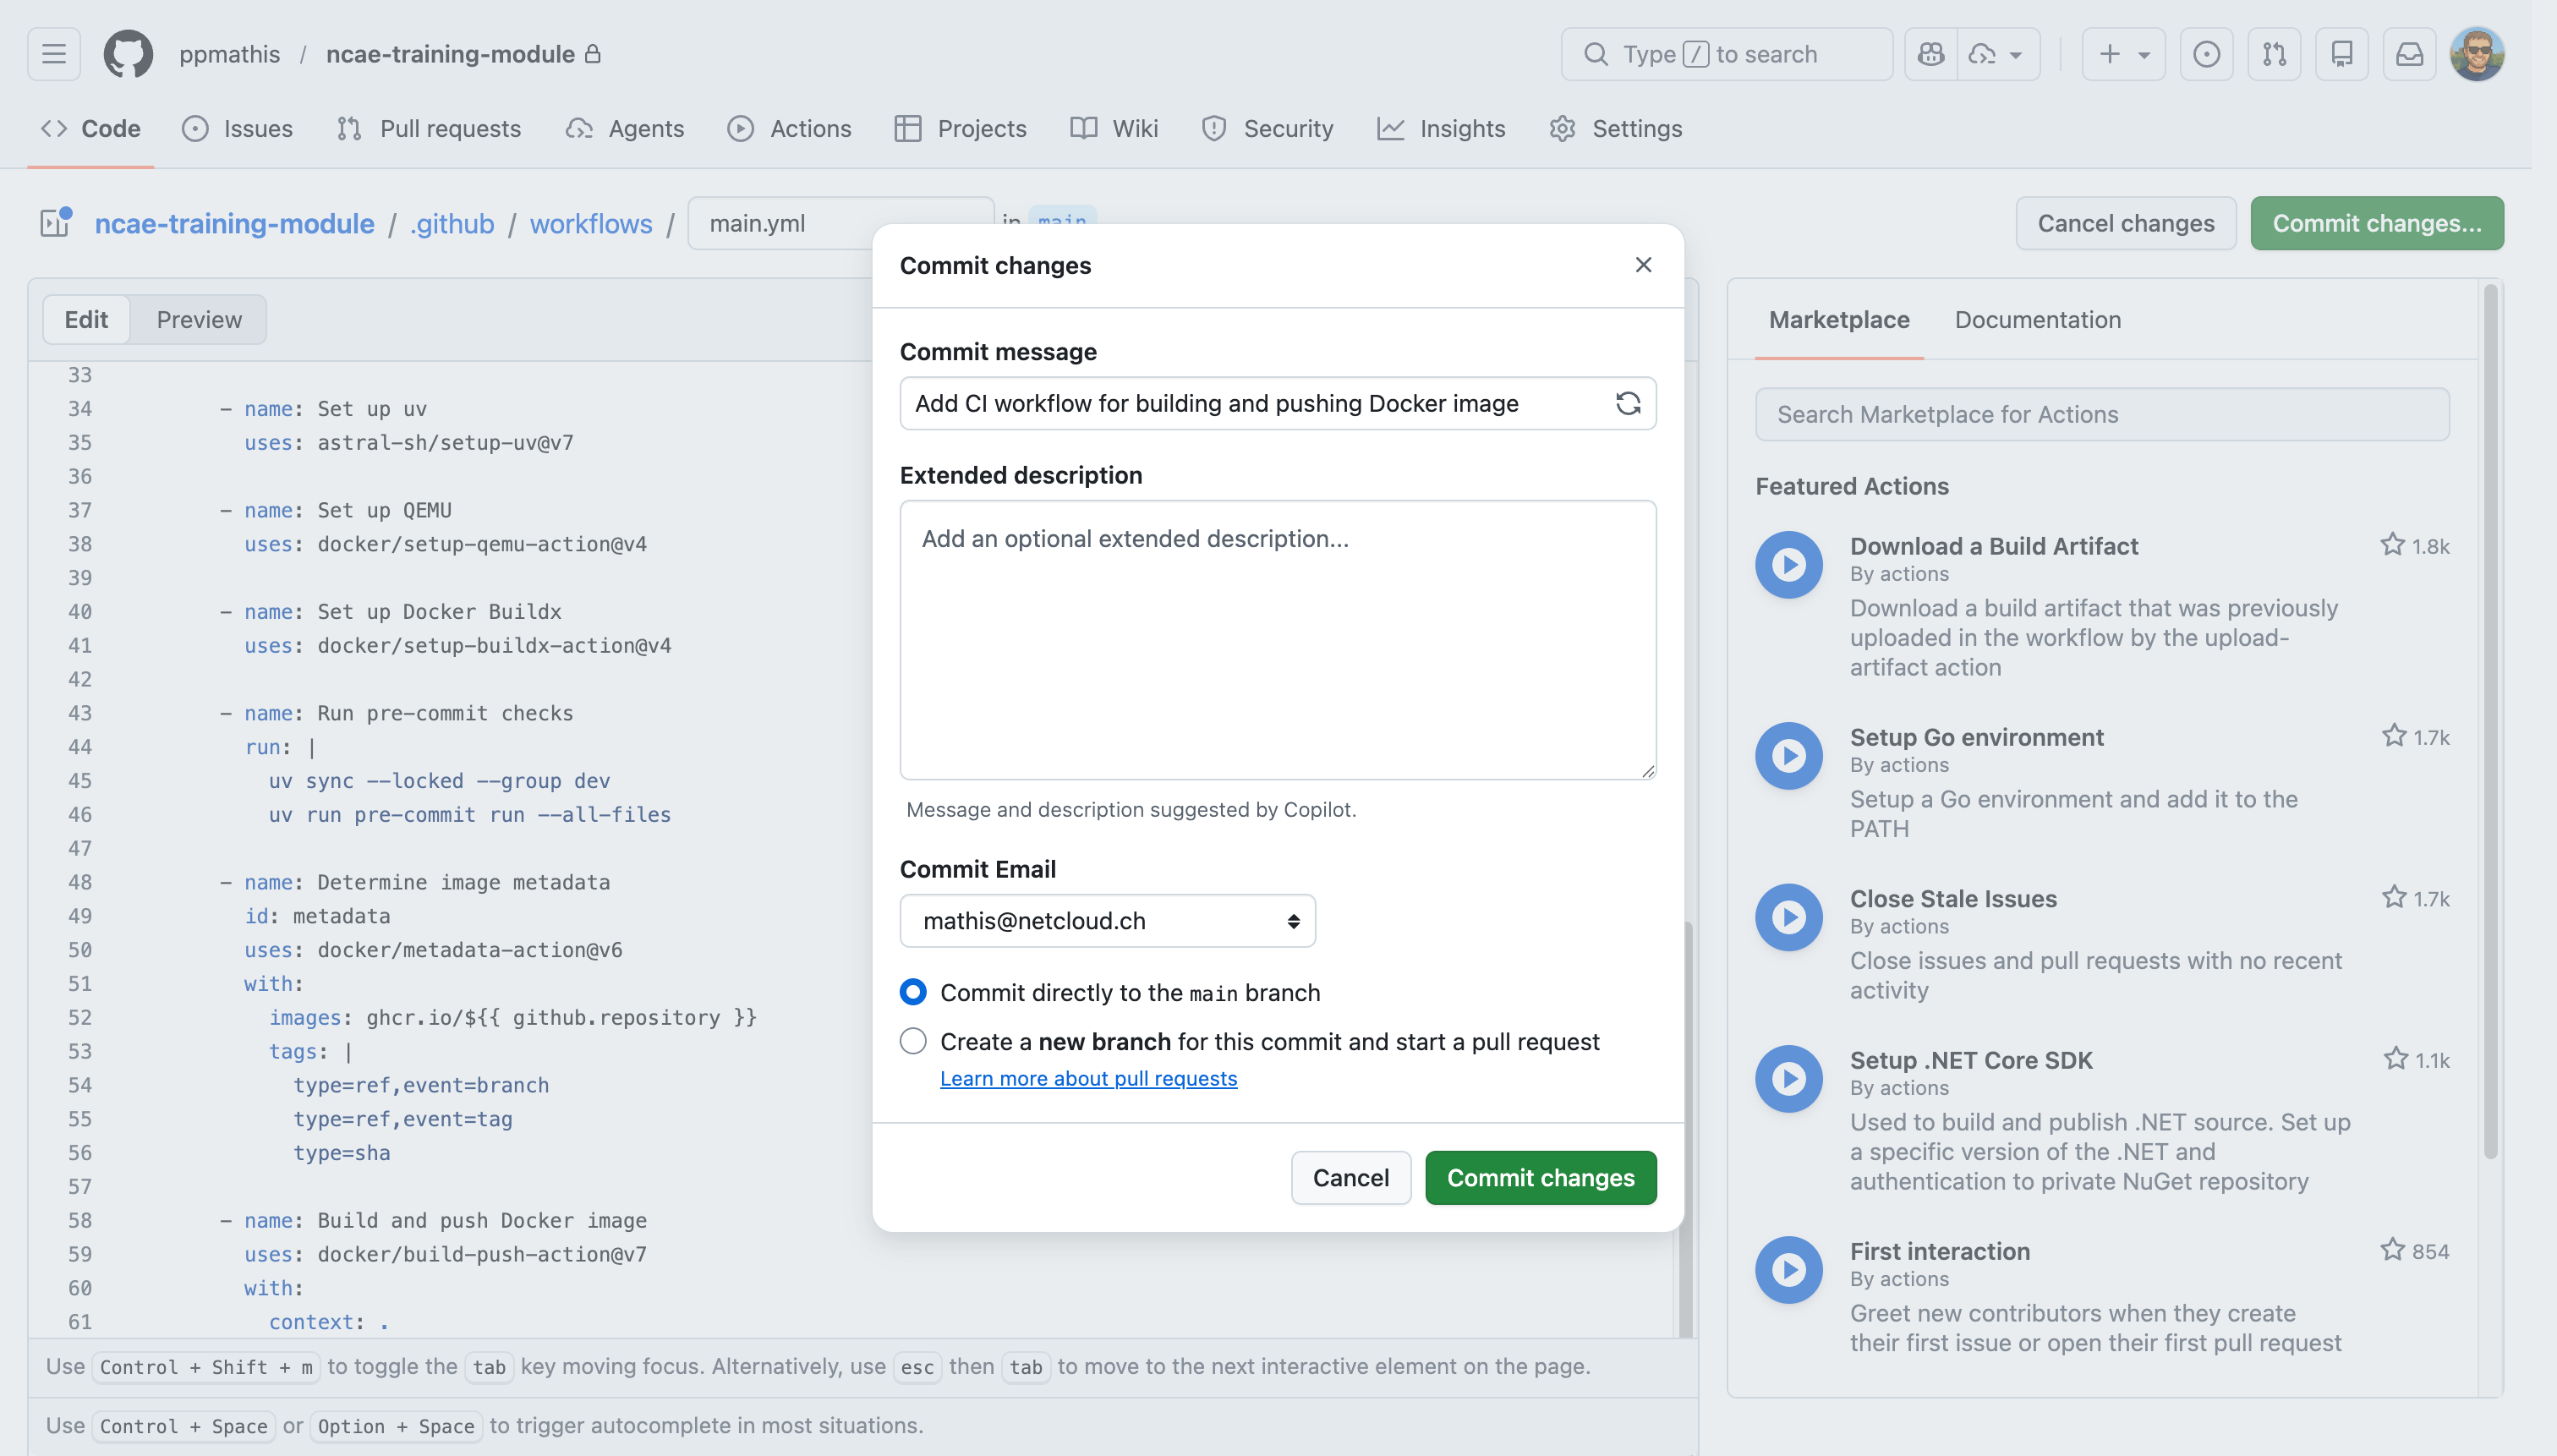
labels: ${{ steps.metadata.outputs.labels }}After filling out the filename and content, your form should look like in the screenshot below. Click on the “Commit changes…” button to save the file to your repository:
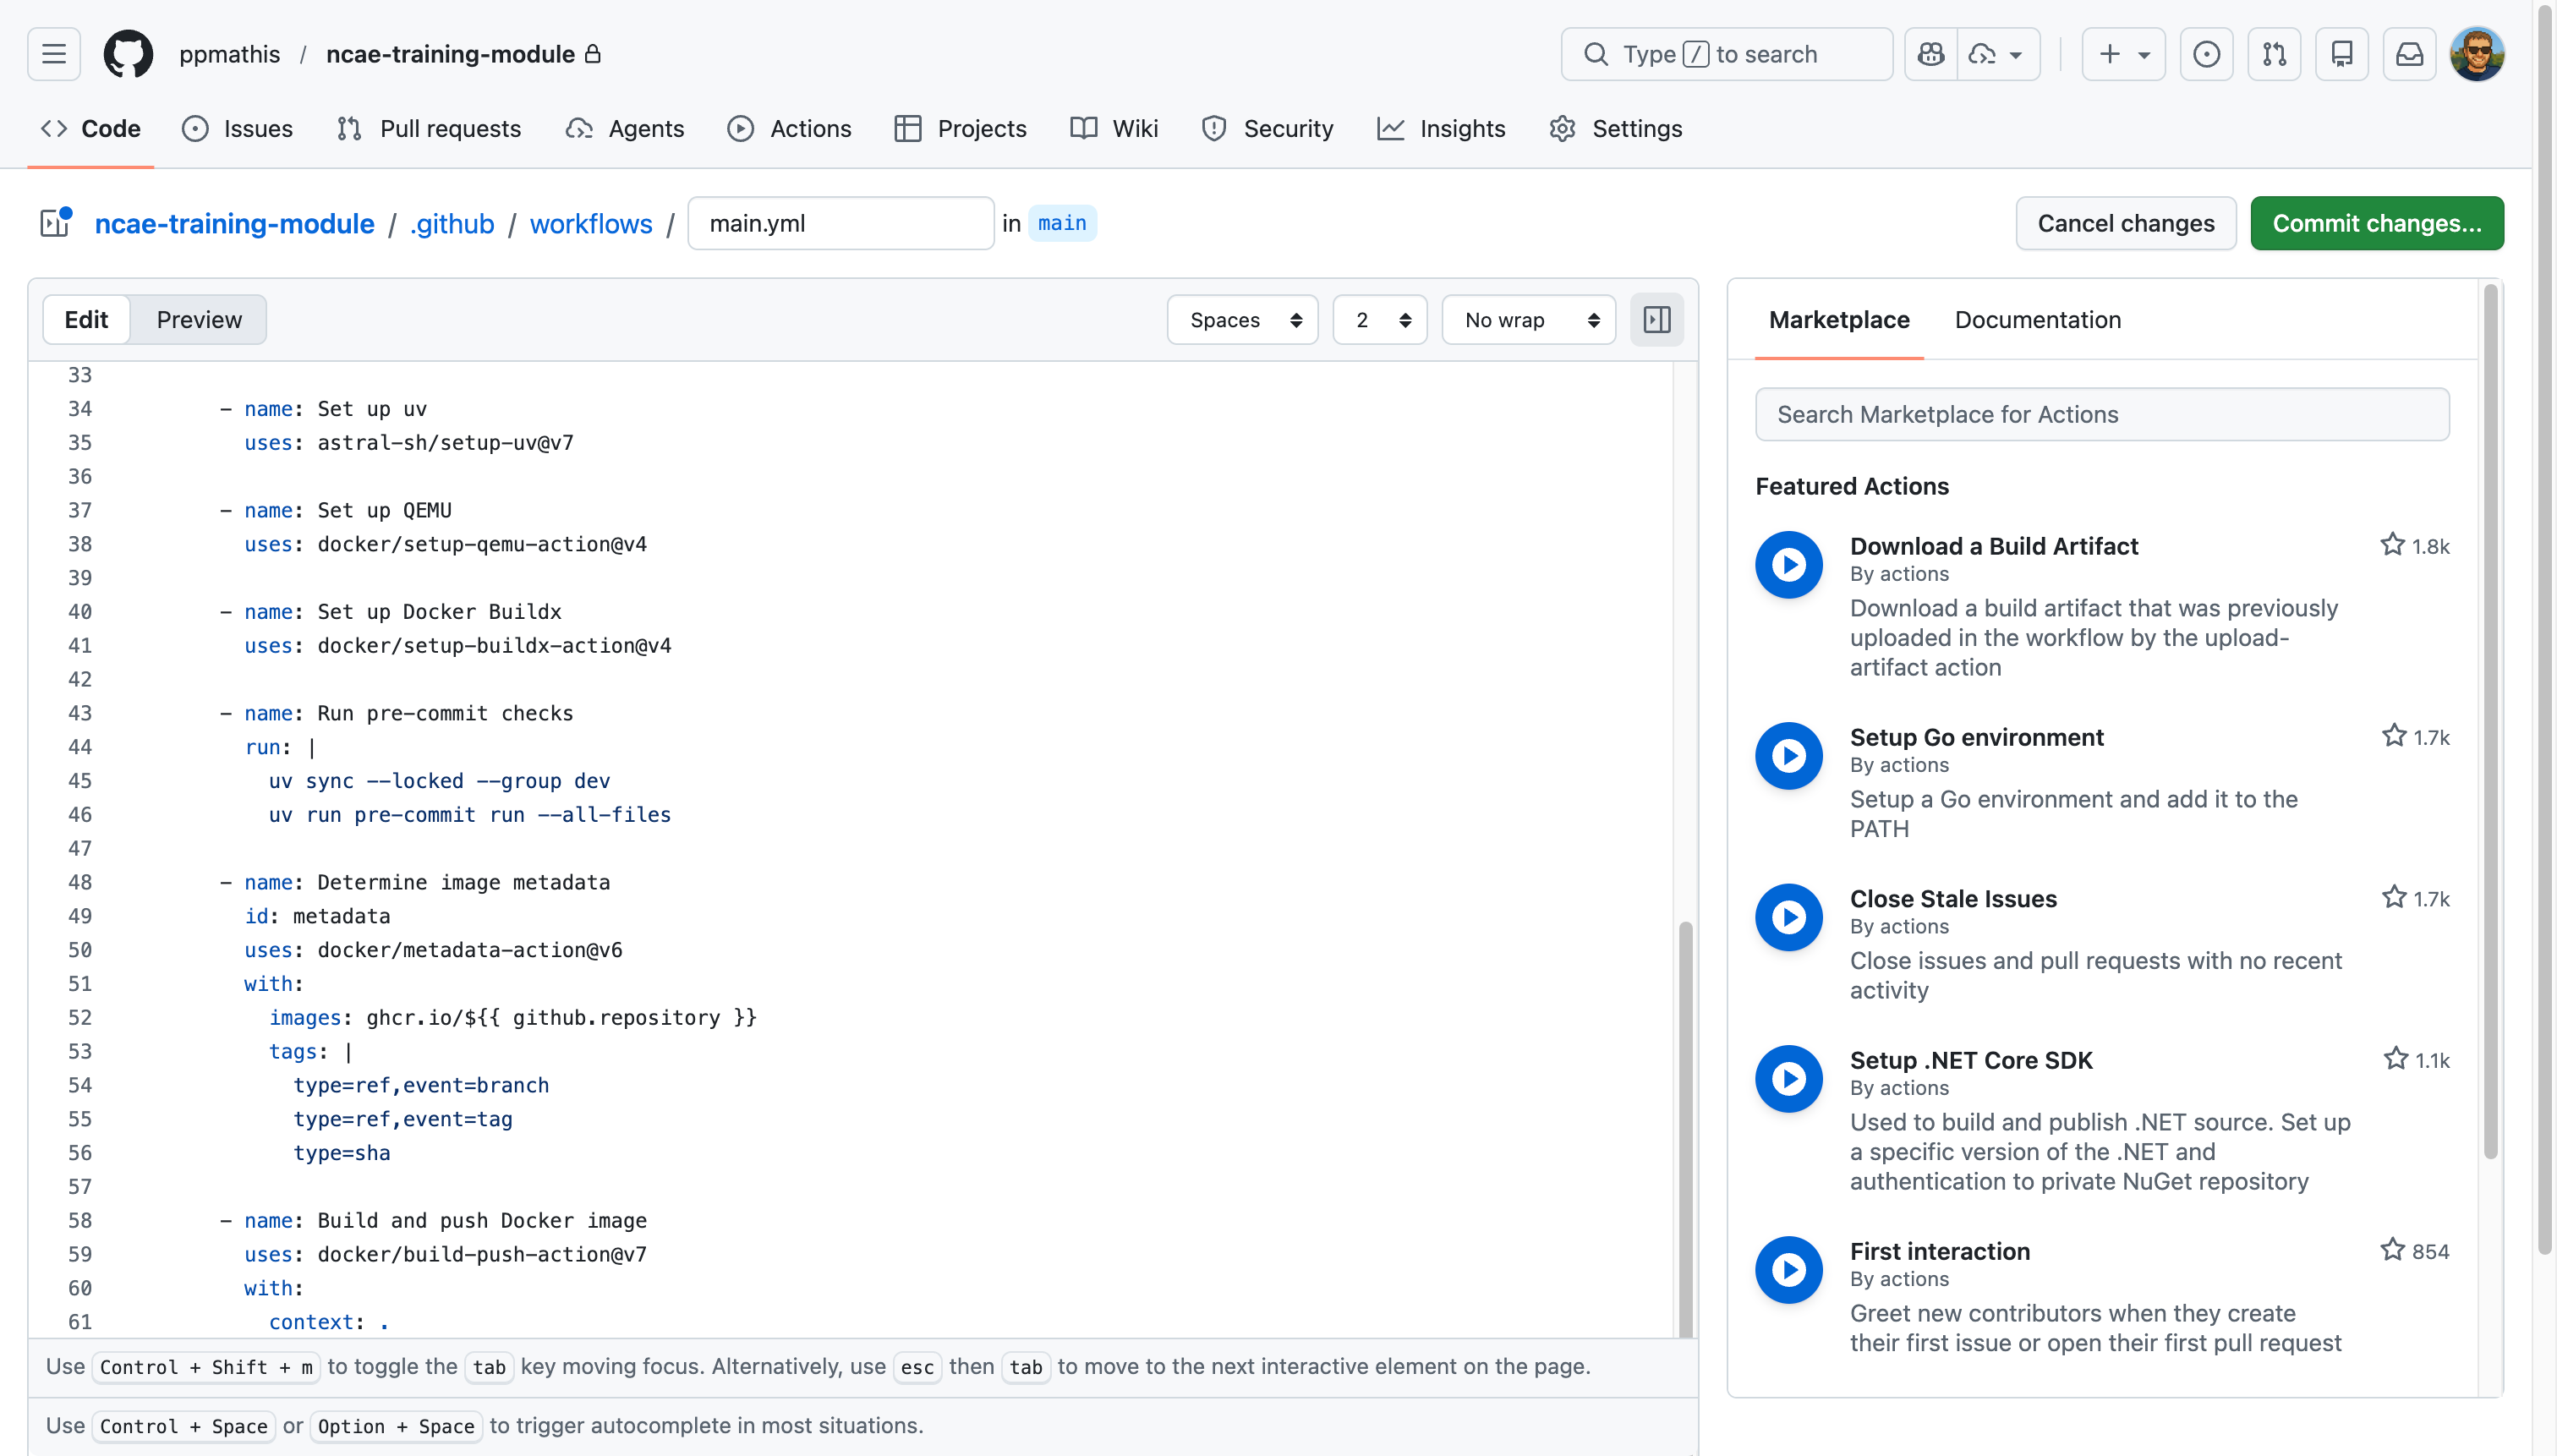
Enter a commit message, if GitHub should not auto-generate one or you prefer a different message. Ensure that “Commit
directly to the main branch” is selected, then click on “Commit changes” to save the file to your repository:
If you now inspect your GitHub repository again, you should see the file .github/workflows/main.yml in the file list.
This file defines a GitHub Actions workflow, which will automatically run the defined steps whenever you push changes to
your repository.
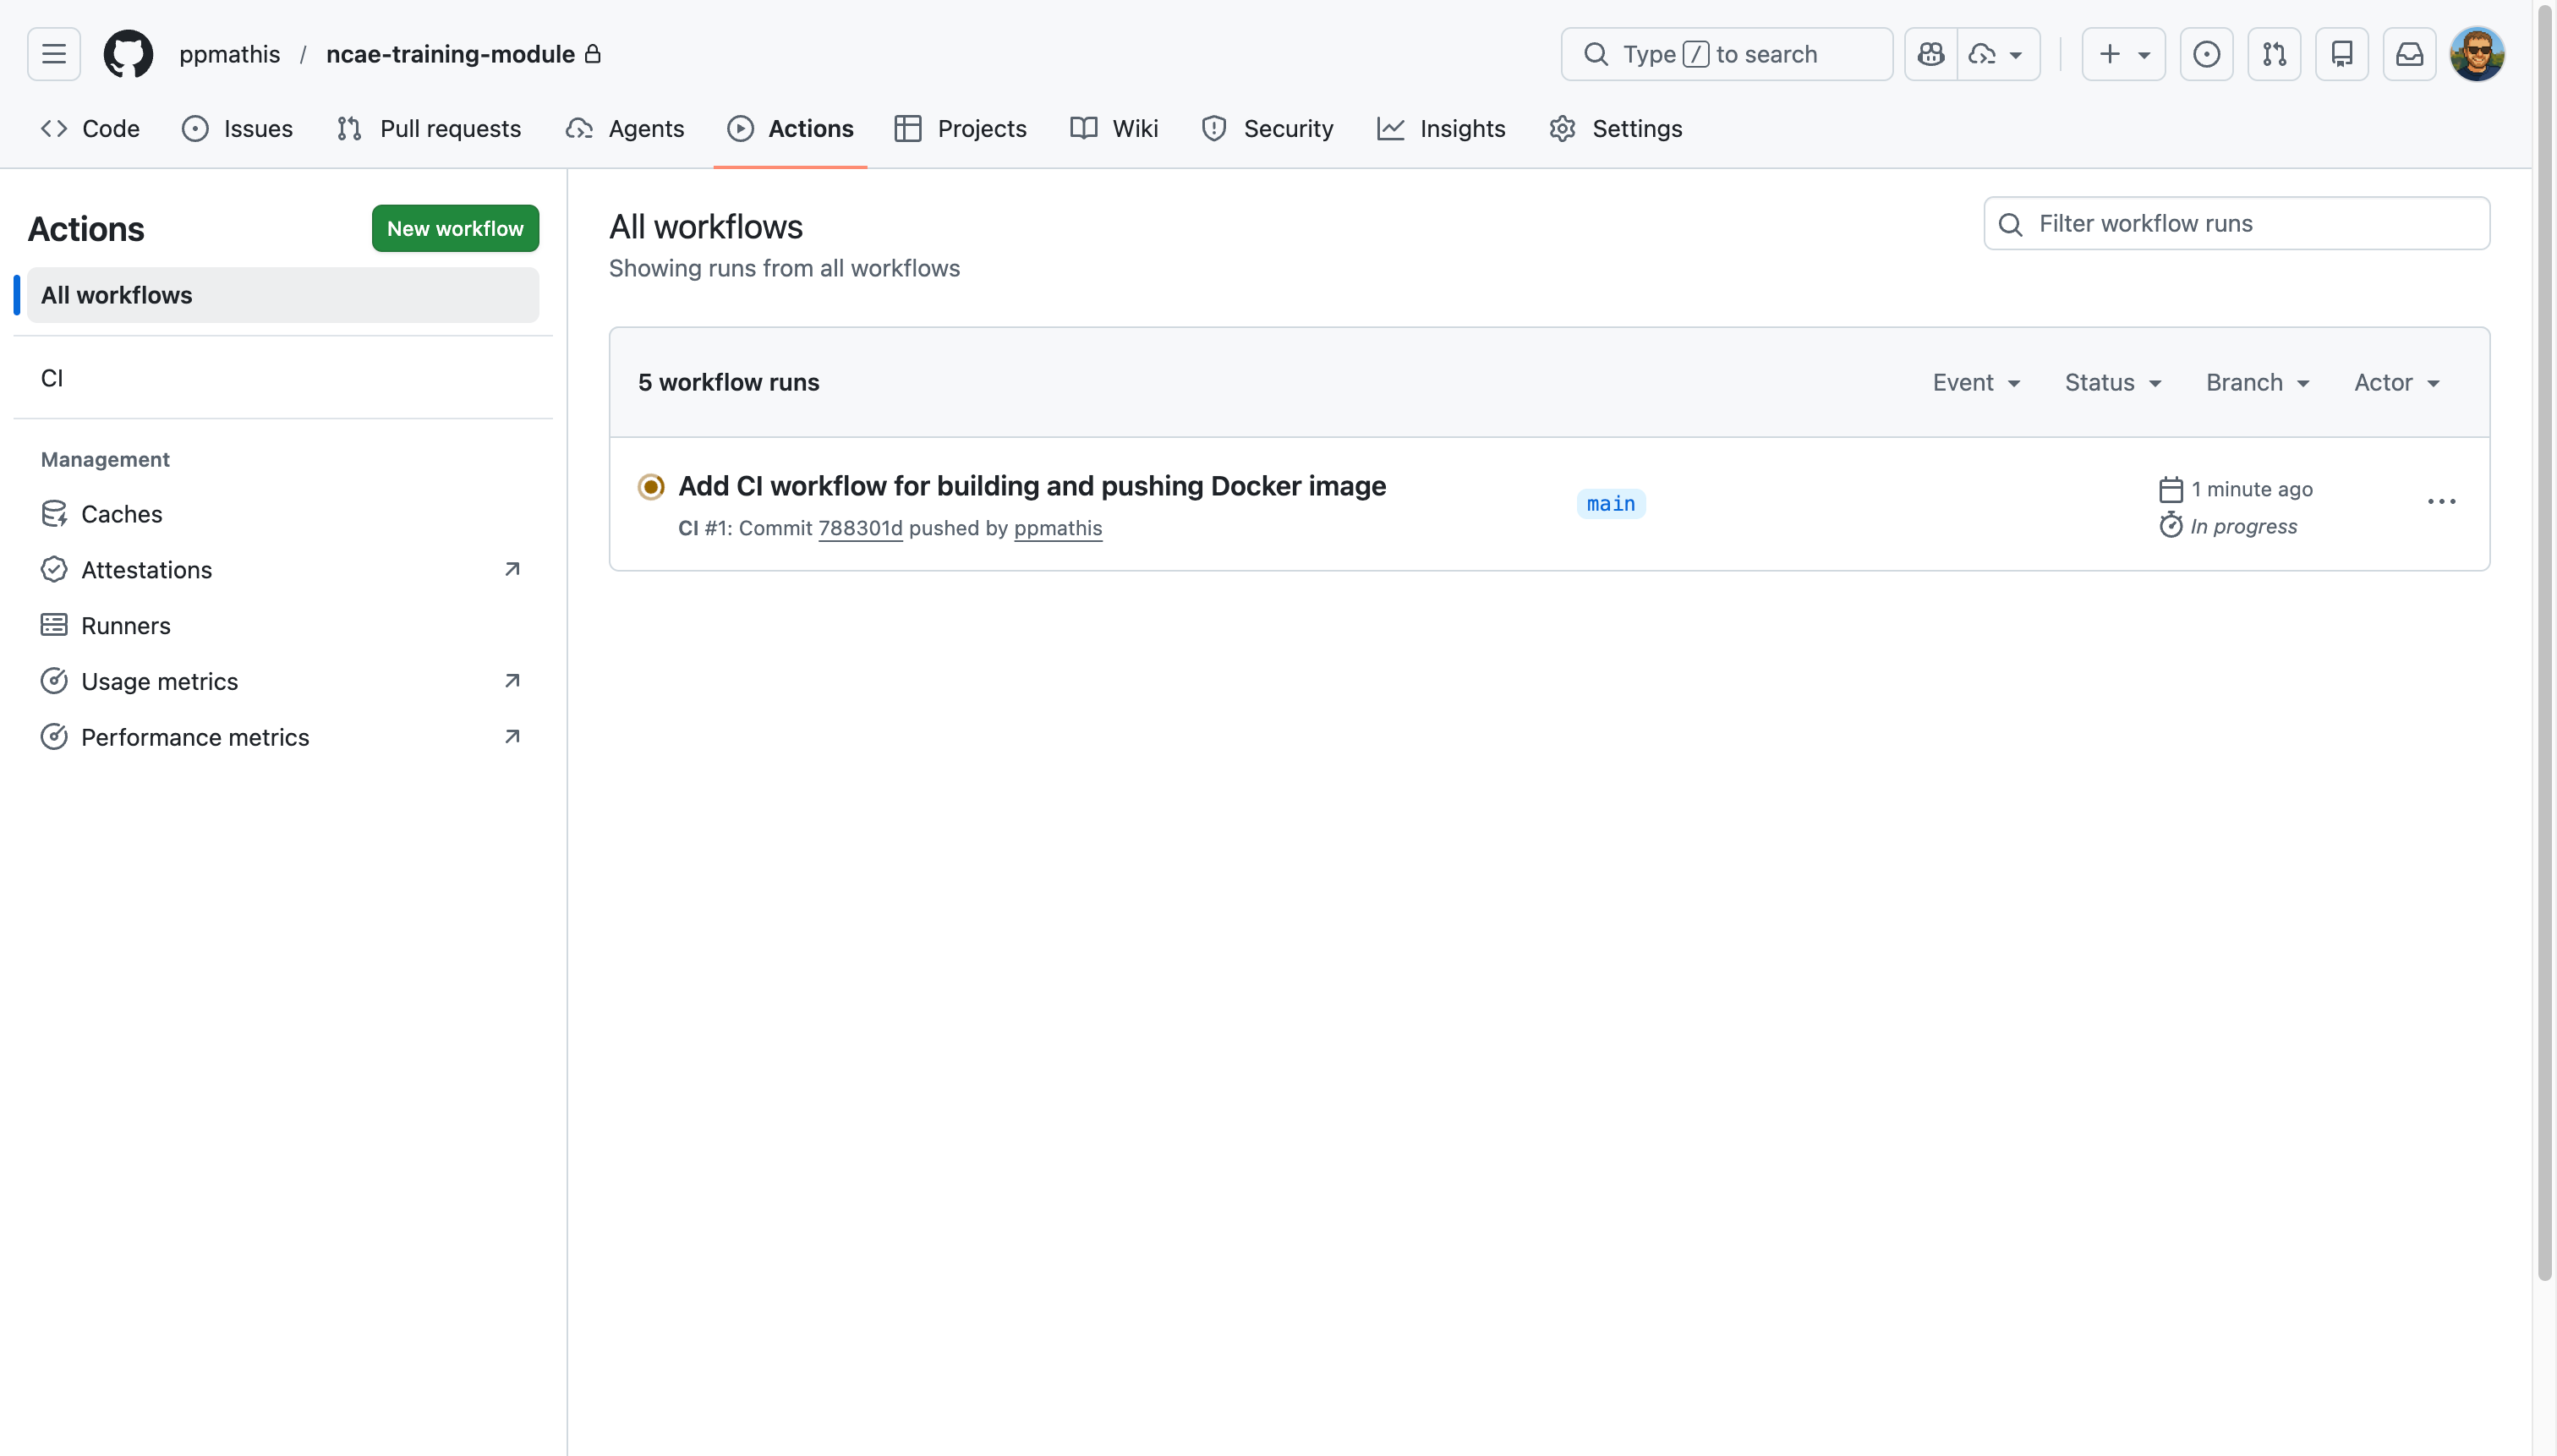
Additionally, if you click on the “Actions” tab in the GitHub repository menu, you should now see that a first automated workflow run has been triggered. Click on the title of your workflow run to inspect the individual steps:
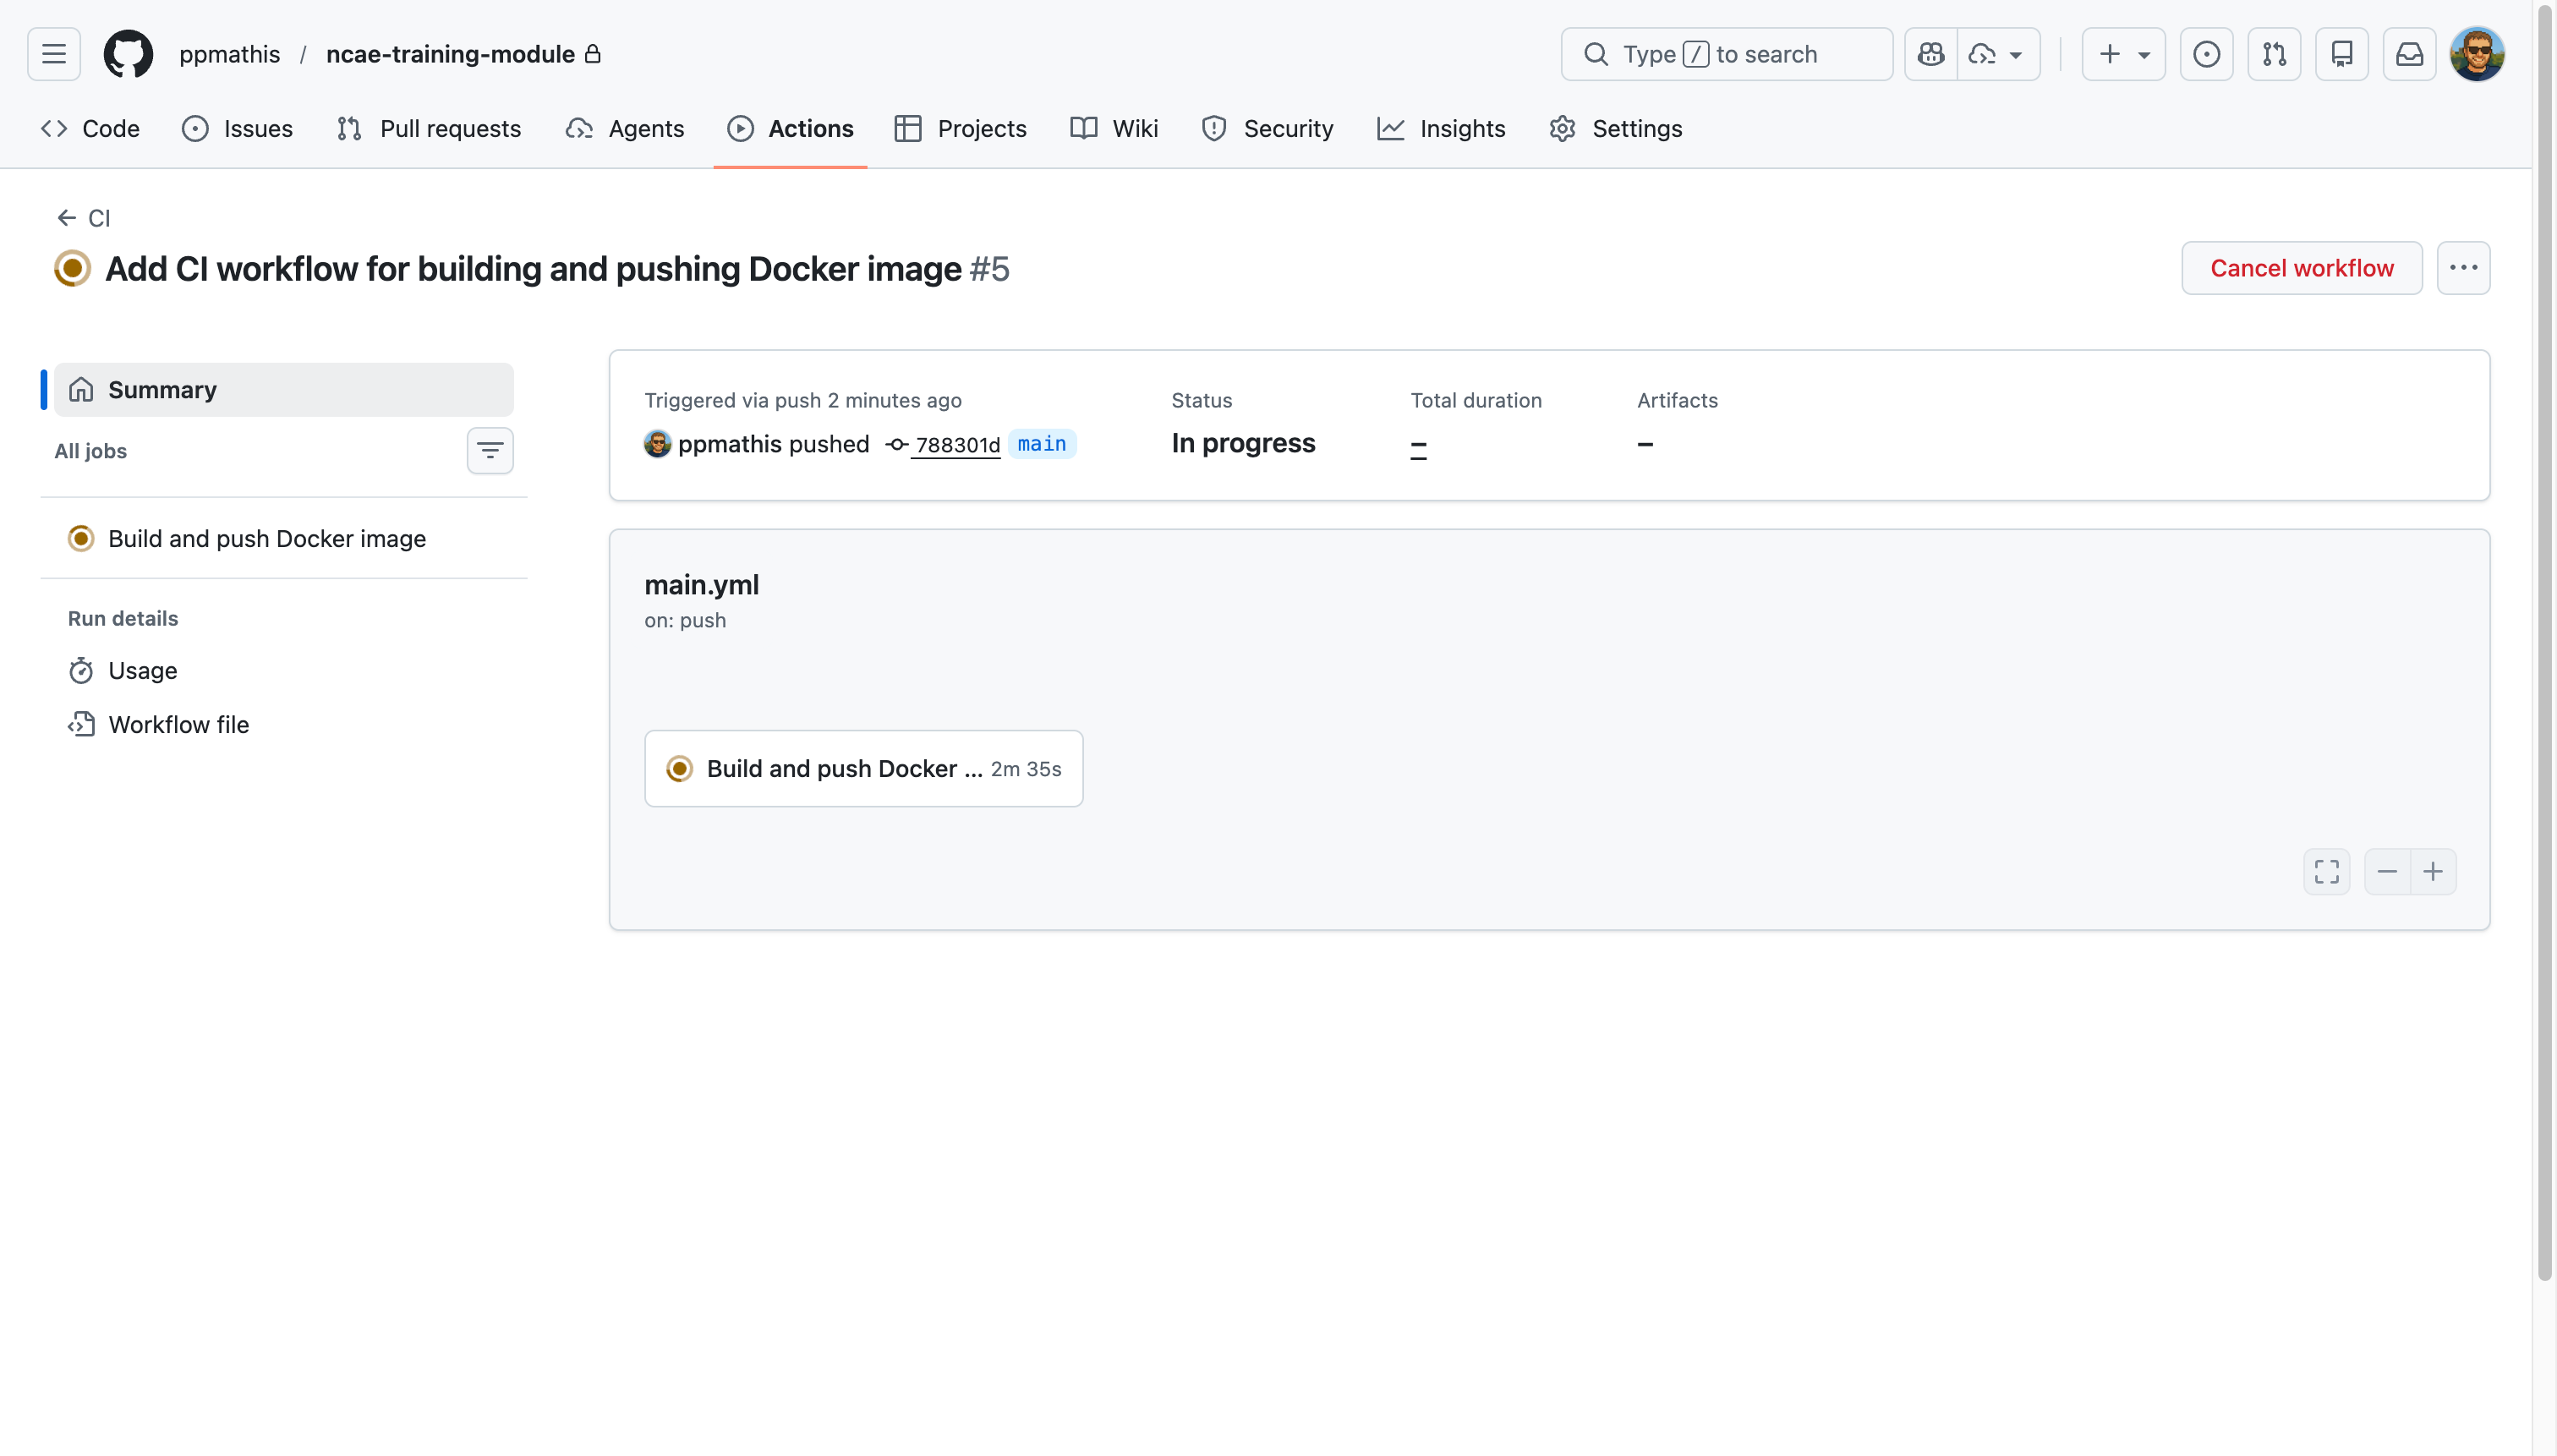
Your container image is now being built. If you wish, you can also click onto the individual job on the right side called “Build and push Docker image” to watch the build progress in real-time. Once the workflow run has finished, you should see the status “Success” along with a build summary:
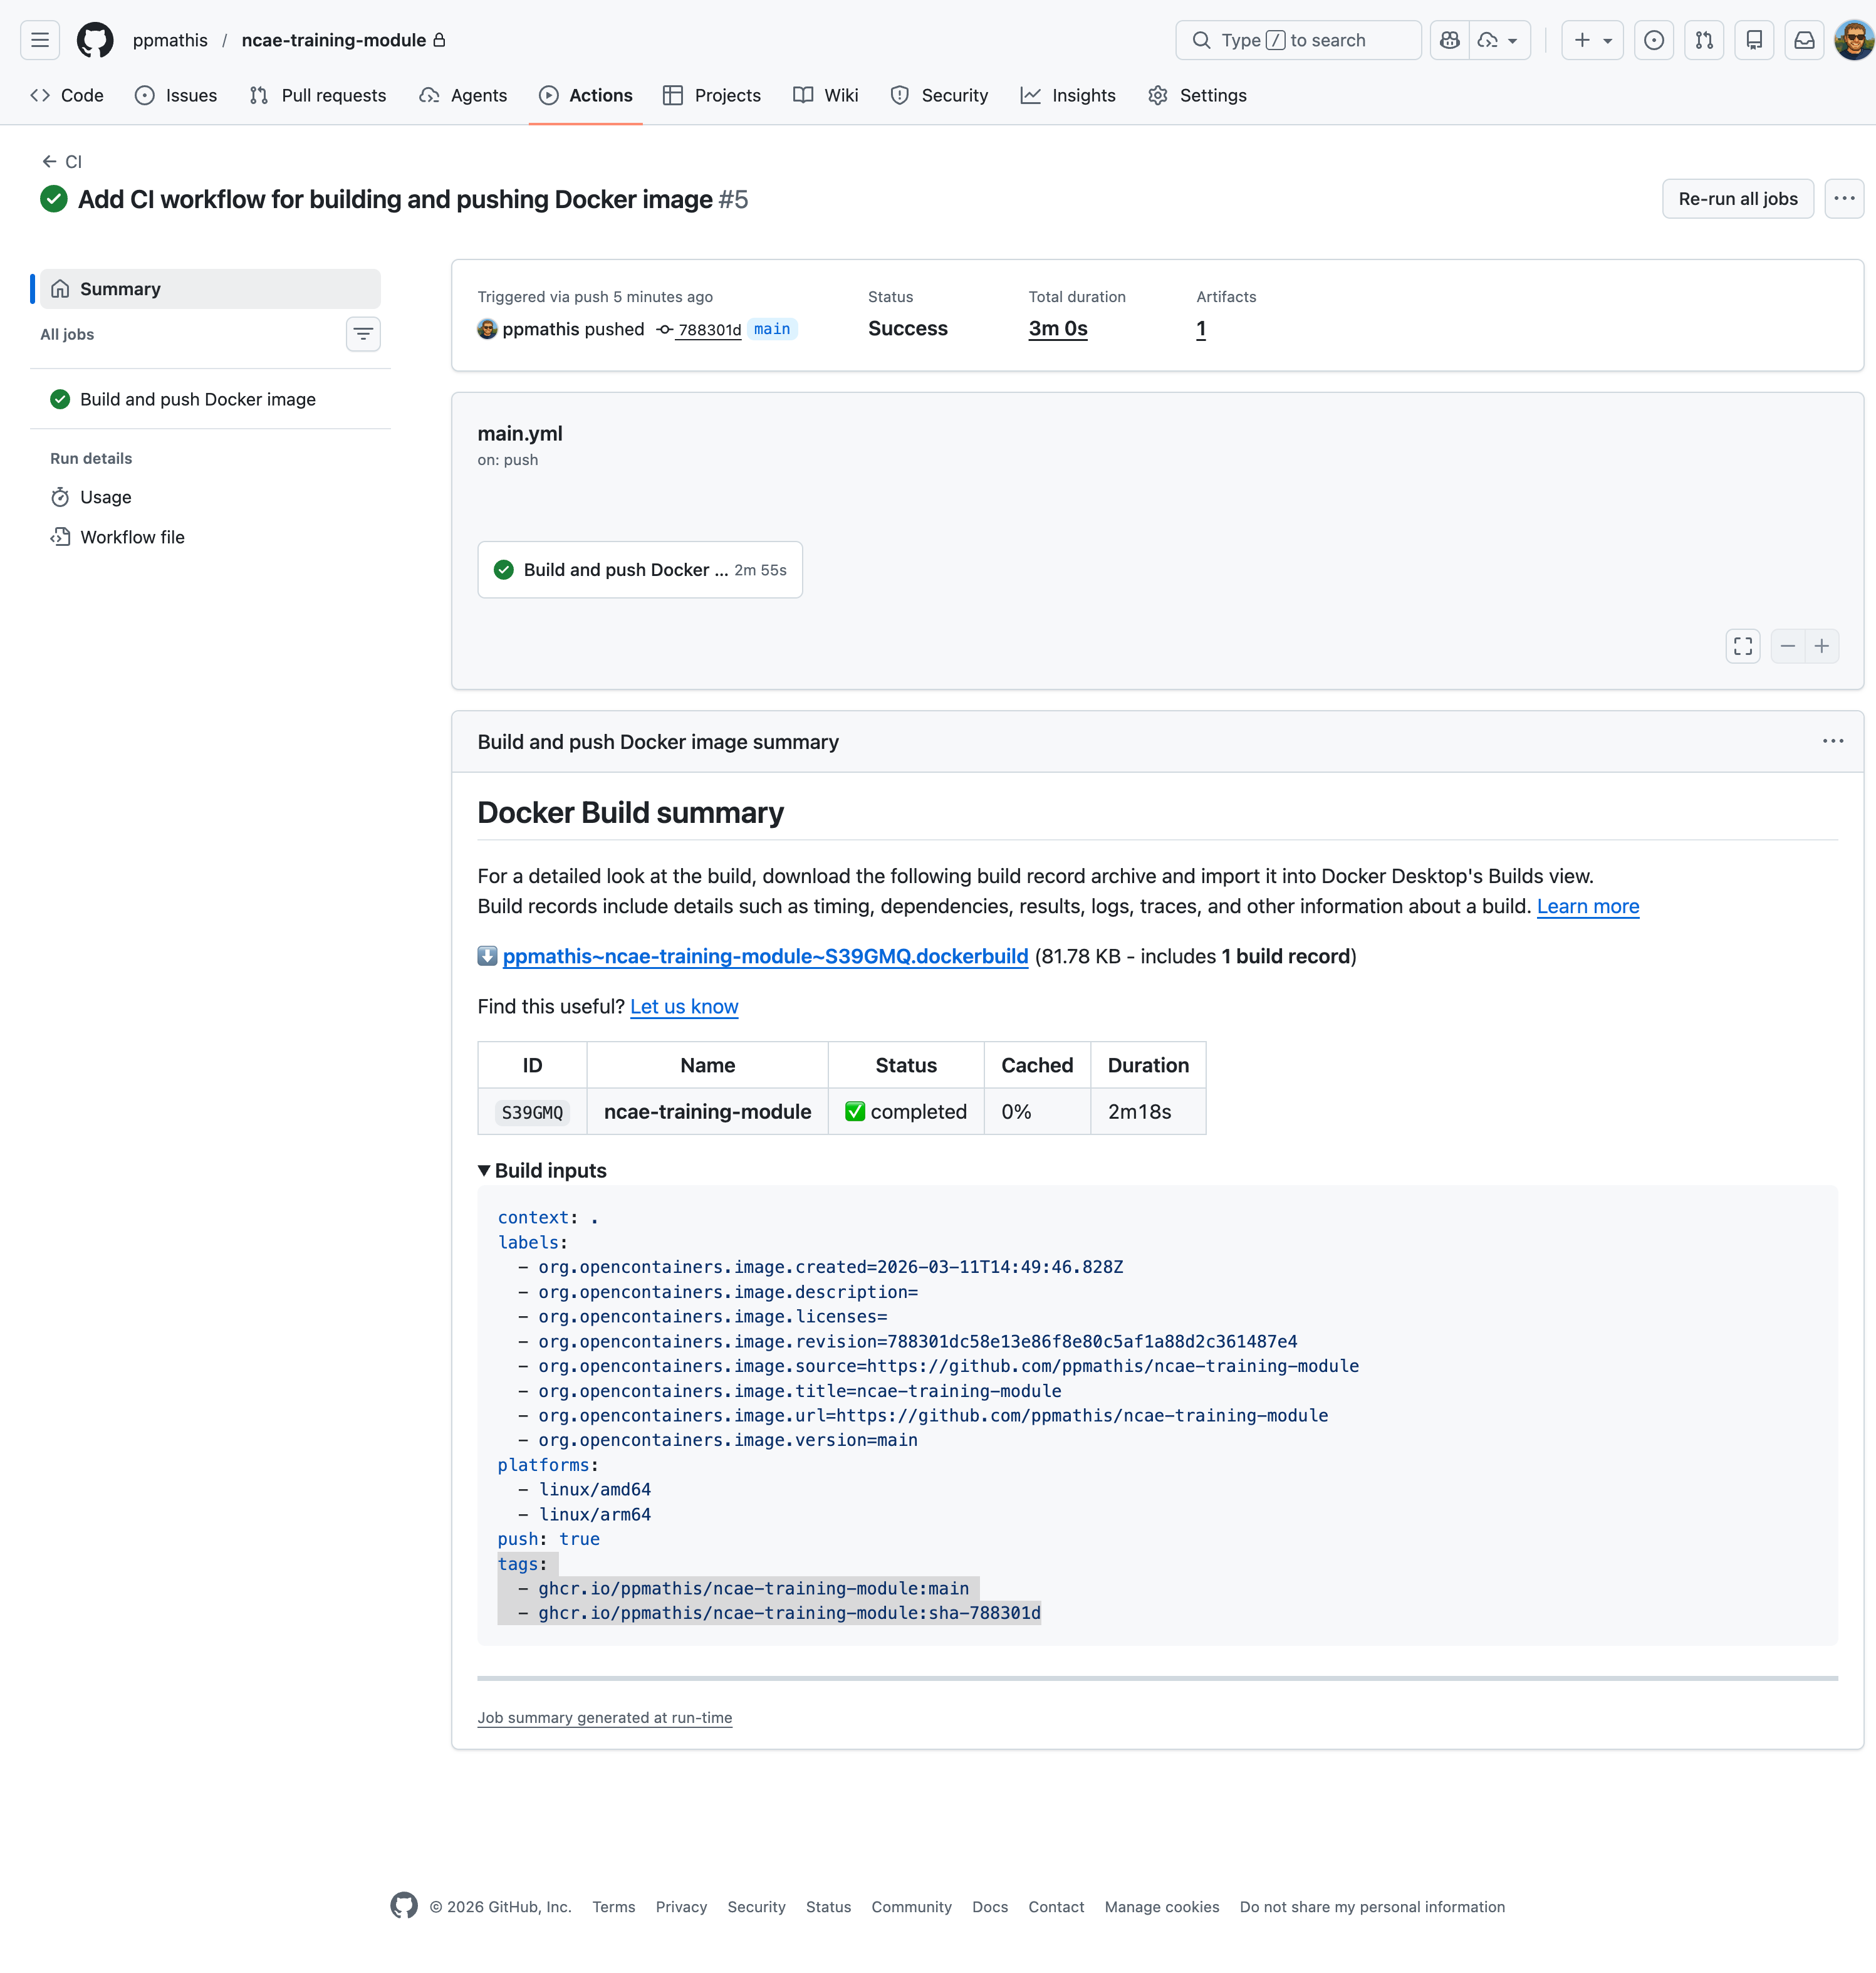
Pay special attention to the tags section in the Docker build output, as it specifies where your container image is
now being stored. Take a note of this output, as you will need it in the next step to install your module in NCAE.
Ensure NCAE can pull your container image
While your GitHub repository now contains a freshly built container image, your NCAE does not have access to your repository, since it is marked as private. You will need its own dedicated Personal Access Token (PAT) to authenticate with GitHub and pull the container image.
Unfortunately as of today, GitHub does not yet support a repository-scoped PAT for container registry access, meaning your earlier token will not work for this use case. We will instead create a dedicated classic PAT which can only download container images. Head over to https://github.com/settings/tokens/new and fill out the form as follows:
- Note: should be
NCAE Container Access - Expiration: should be set to
7 daysfor this training; in production, you would choose a longer expiration - Select scopes:
read:packagesshould be selected, to allow the token to download container images- Ensure that no other scopes are selected
Continue by pressing “Generate token”, then copy and note down the generated PAT:
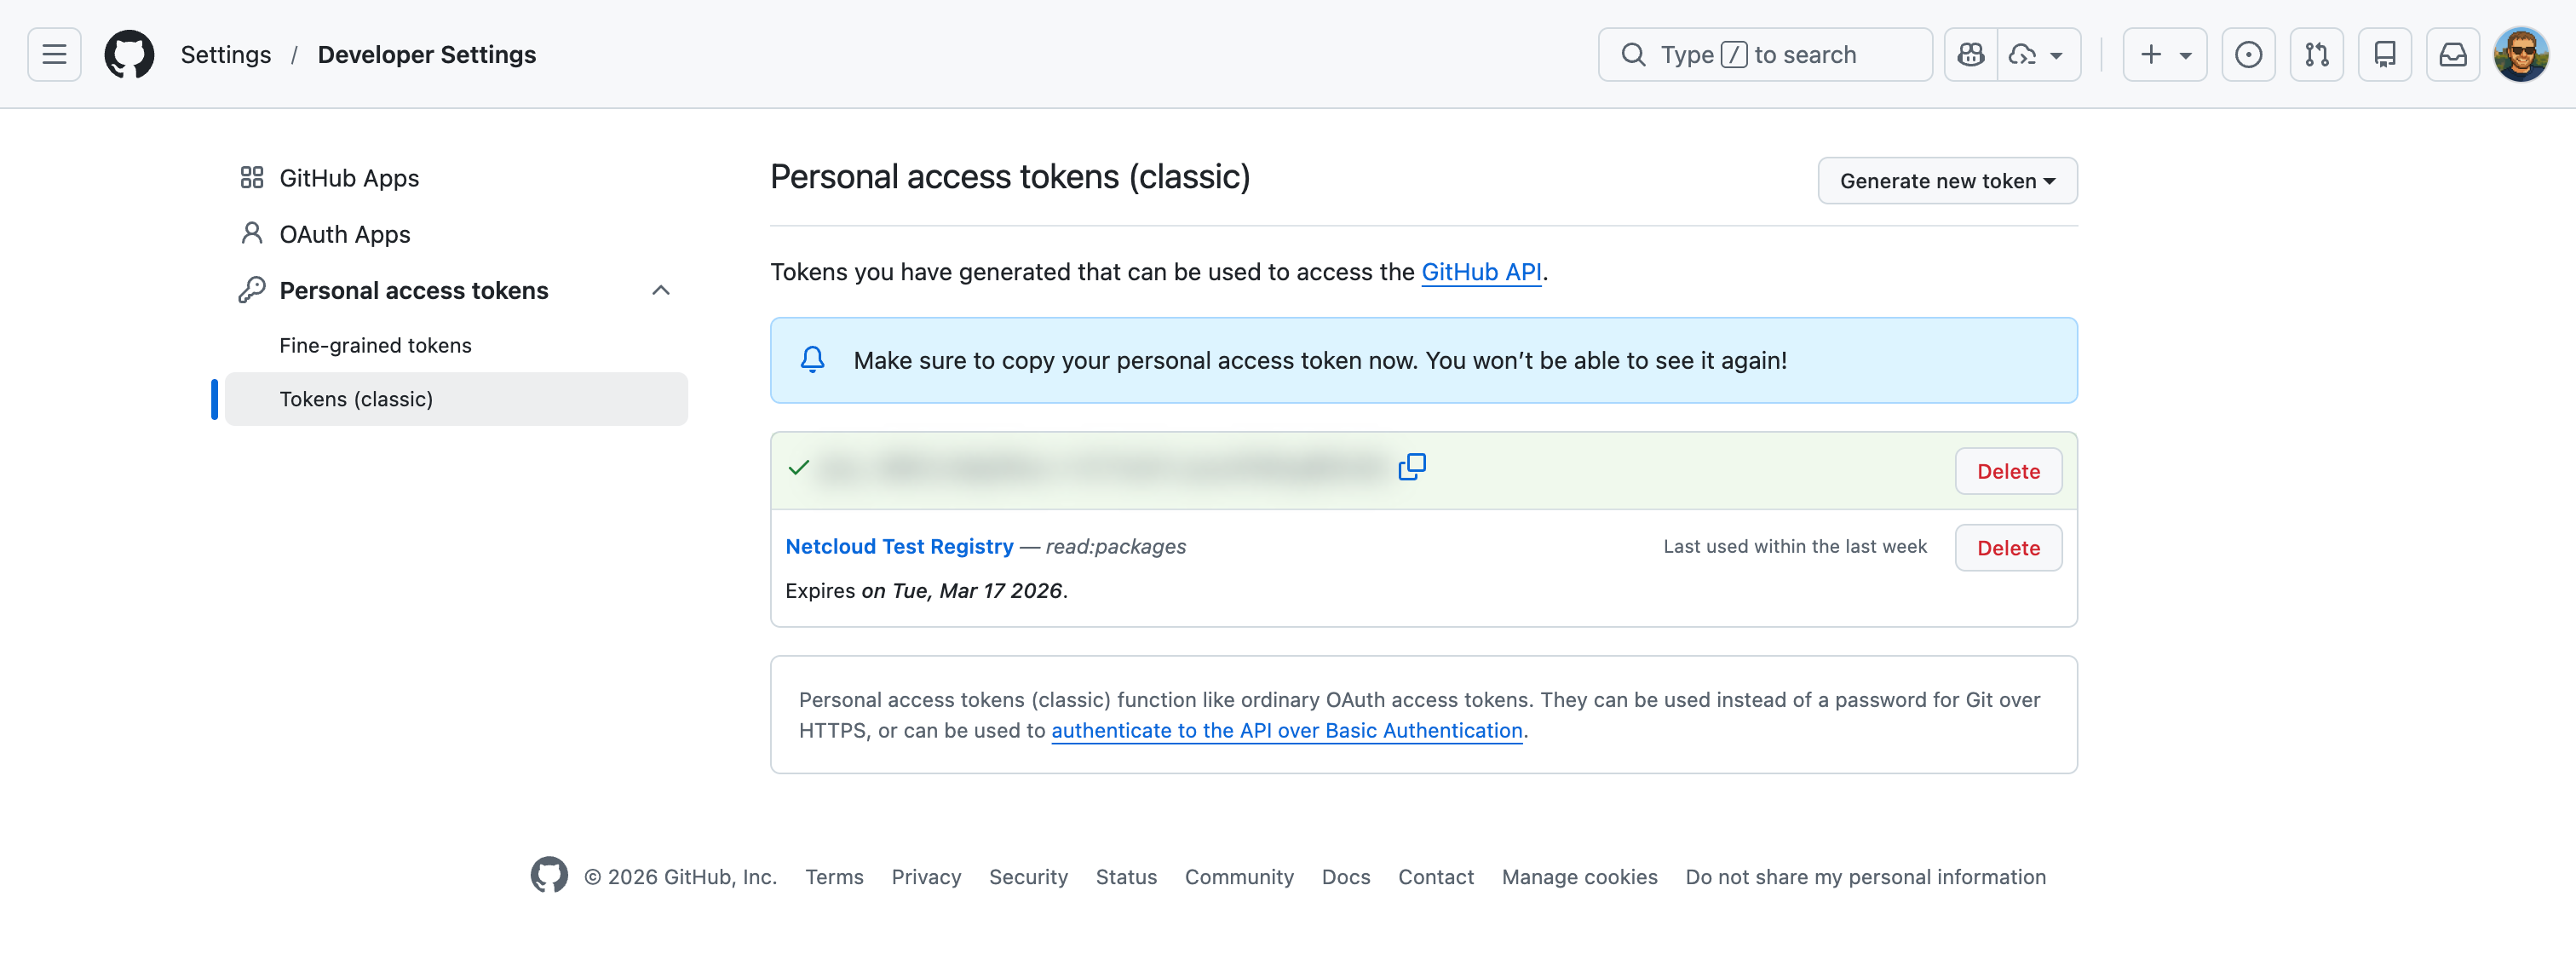
Just like previously, this value will only be shown once, and you will need it in the next step.
Deploy the container image on your NCAE
We’re almost there! Now that you have a container image which is also being continuously updated with every change you push to your repository, you actually have to deploy a container on your NCAE appliance. This will ensure that once you install your module, the Python-based example service will be able to run properly.
Connect to your NCAE with a SSH client of your choice using the following connection details:
- Host: Your NCAE FQDN
- Port: should be
22 - Username: should be
admin - Password: Your NCAE System admin Credential
After establishing a successful connection, you will be presented with the NCAE VM menu:
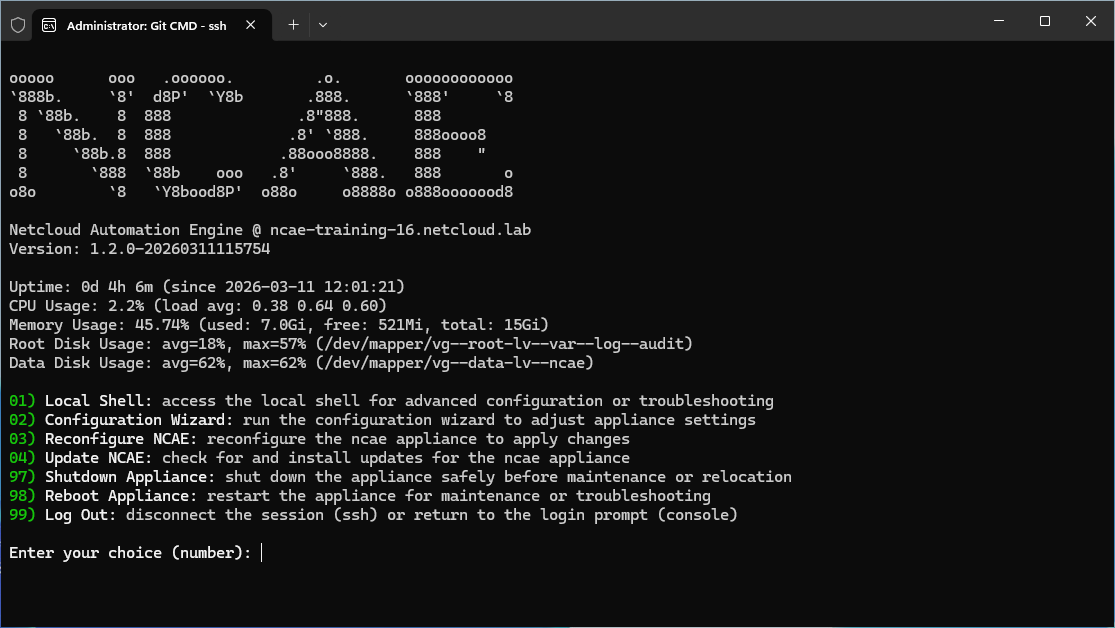
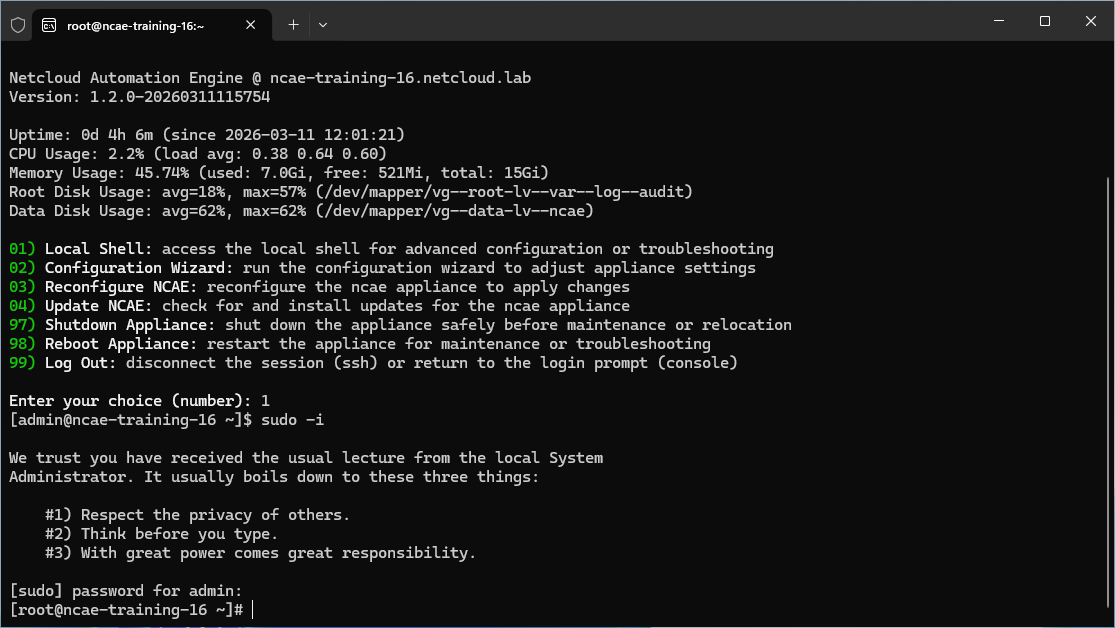
Deploying your container image will require shell access, so select the “Local Shell” option by entering 1 followed by
pressing Enter. Once you’ve entered the shell, escalate your privileges to root with the command sudo -i and enter
the same password again when prompted:
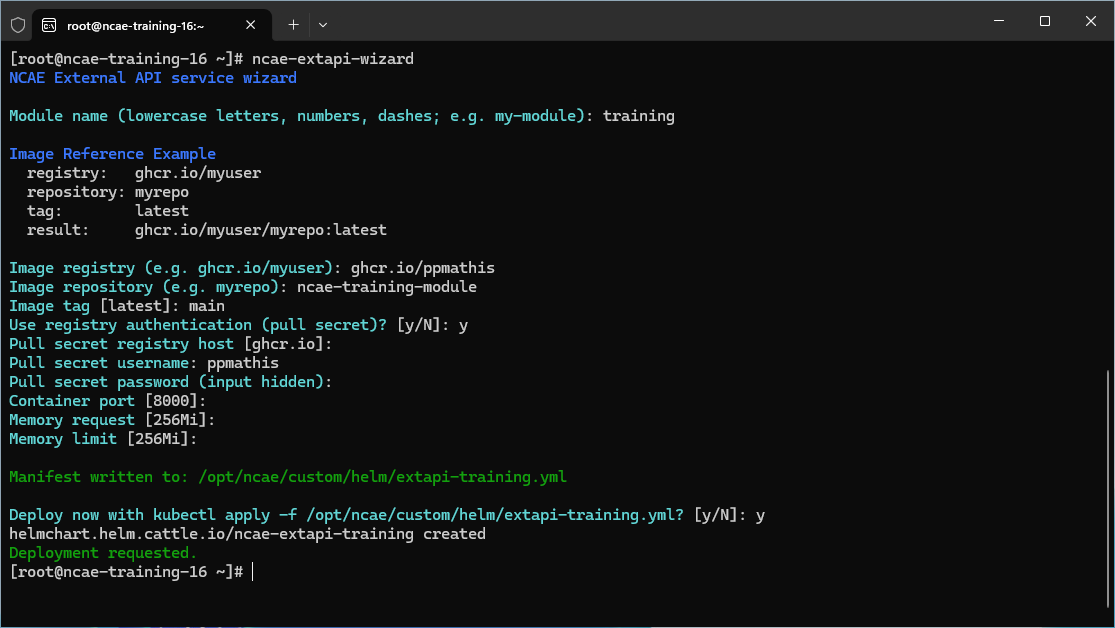
You may now run the command ncae-extapi-wizard to start an interactive wizard which will guide you through the process
of deploying your container image. The terminology extapi is used since NCAE Core considers your container an
“External API service”, as in an external service which is being interfaced with via an API.
Fill out the wizard form as follows:
- Module name: should be
training - Image registry: should be
ghcr.io/<your-github-username>- this is essentially part of your previously copied image tag up to the last slash, but without the image name and version after the slash - Image name: should be
ncae-training-module- this is the name of your image, which is the part after the last slash and before the colon in your previously copied image tag - Image tag: should be
main- this is the part after the colon in your previously copied image tag (you could also use the one calledsha-XXXXXXX, but we will usemainfor now) - Use registry authentication: should be replied with
yfor Yes; you have a private repository, so it will require authentication to pull the image - Pull secret registry host: should be
ghcr.io; you can ENTER without any value to use the default value, which is the same in this case - Pull secret registry username: should be your GitHub username
- Pull secret registry password: should be token for container access you created in the previous step - do NOT use the token from earlier when you pushed your code!
- Container port: accept the default by pressing ENTER without any input
- Memory request: same as above, just accept the default with ENTER
- Memory limit: same as above, just accept the default with ENTER
- Deploy now with kubectl apply -f [path]: should be replied with
yfor Yes, to directly deploy the container after the configuration
When you’ve completed all steps, the output should look something like this:
Wait for your container to be fully deployed and running. The easiest way of doing so is to run the command
kubectl -n ncae-module get pod in a loop, until you see a pod named ncae-extapi-training-server-xxxxxxxxxx-xxxxx
with the status Running:
[root@ncae-training-16 ~]# kubectl -n ncae-module get pod
NAME                                           READY   STATUS    RESTARTS   AGE
ncae-extapi-nc-aci-server-65577f7d5c-759hw     1/1     Running   0          19h
ncae-extapi-nc-ise-server-847bd8f8bb-m4bkm     1/1     Running   0          19h
ncae-extapi-nc-net-server-759df94d5d-wlthr     1/1     Running   0          19h
ncae-extapi-training-server-84558c945c-xsc2v   1/1     Running   0          16h # <-- your container!
Install your module on your NCAE
Now that your container image is built and deployed, you can finally install your module on your NCAE instance. Ensure you are logged in to your NCAE, and head over to “Admin -> Modules” once more. You should see your “Training” module, but it is not yet installed:
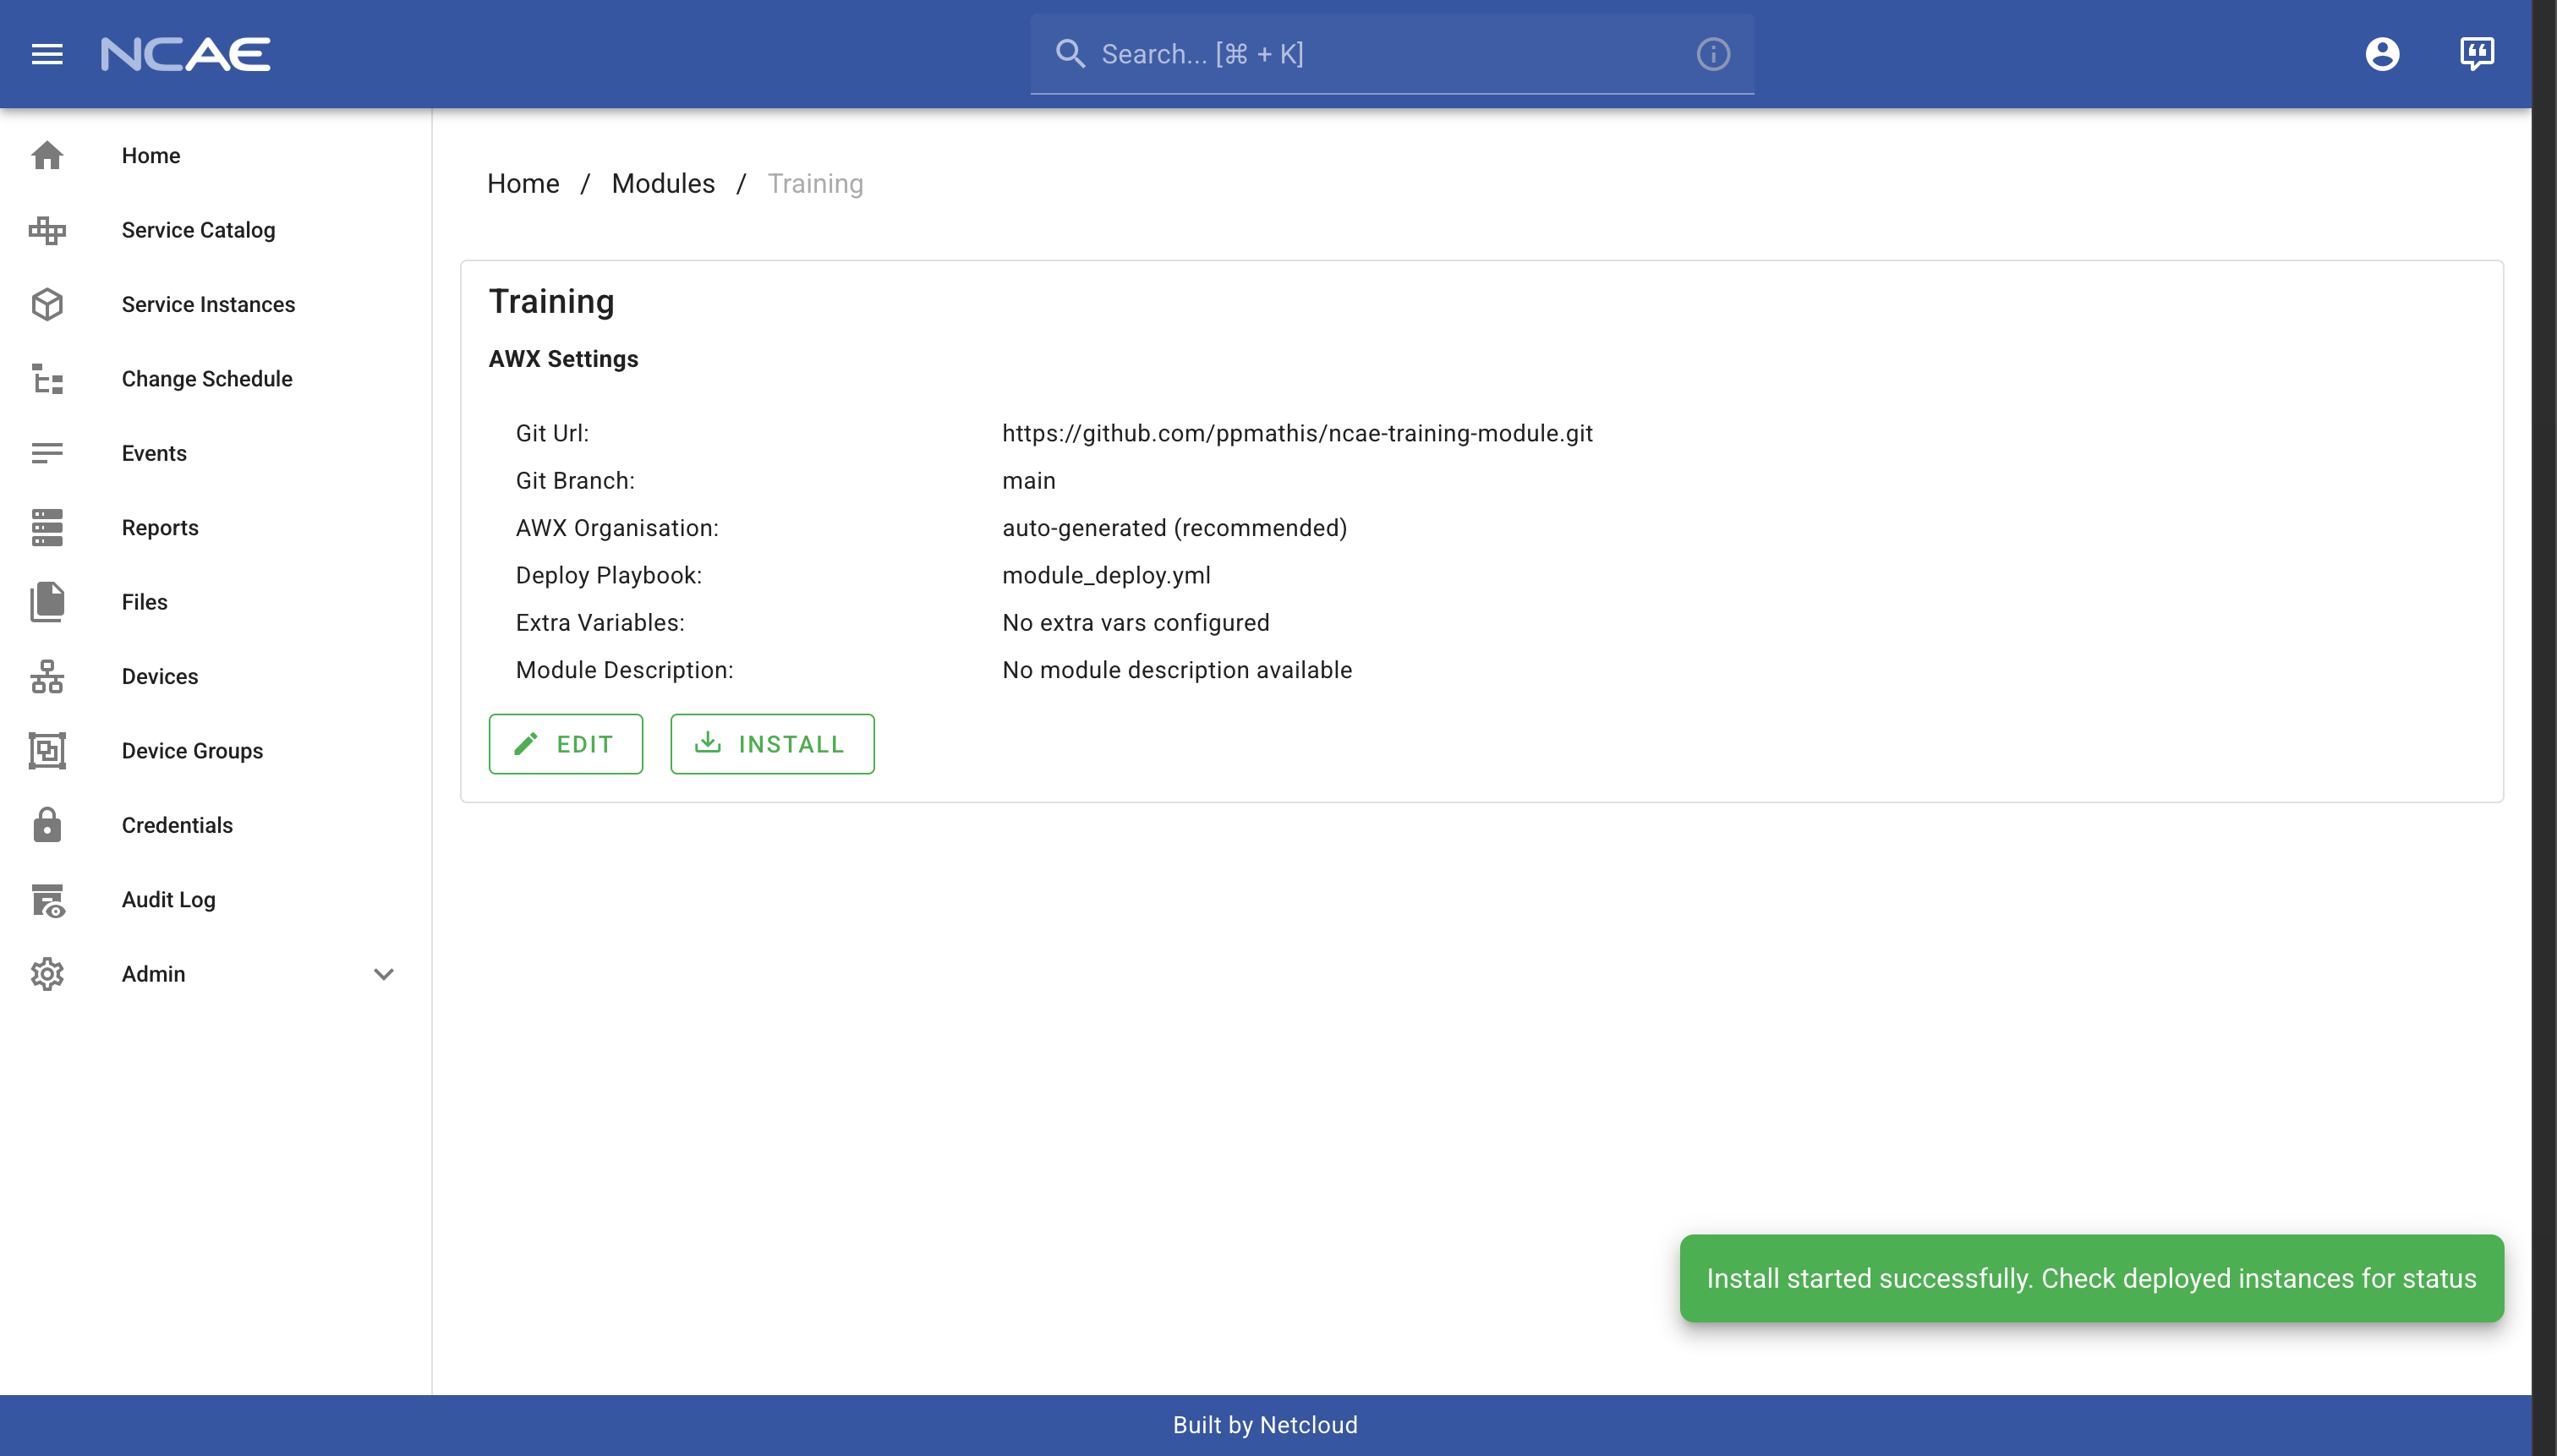
To install your module, first click on the module name “Training” to open the module details page. You will see that the module indeed uses your GitHub repository as its source, and can now click “Install” to begin installation:

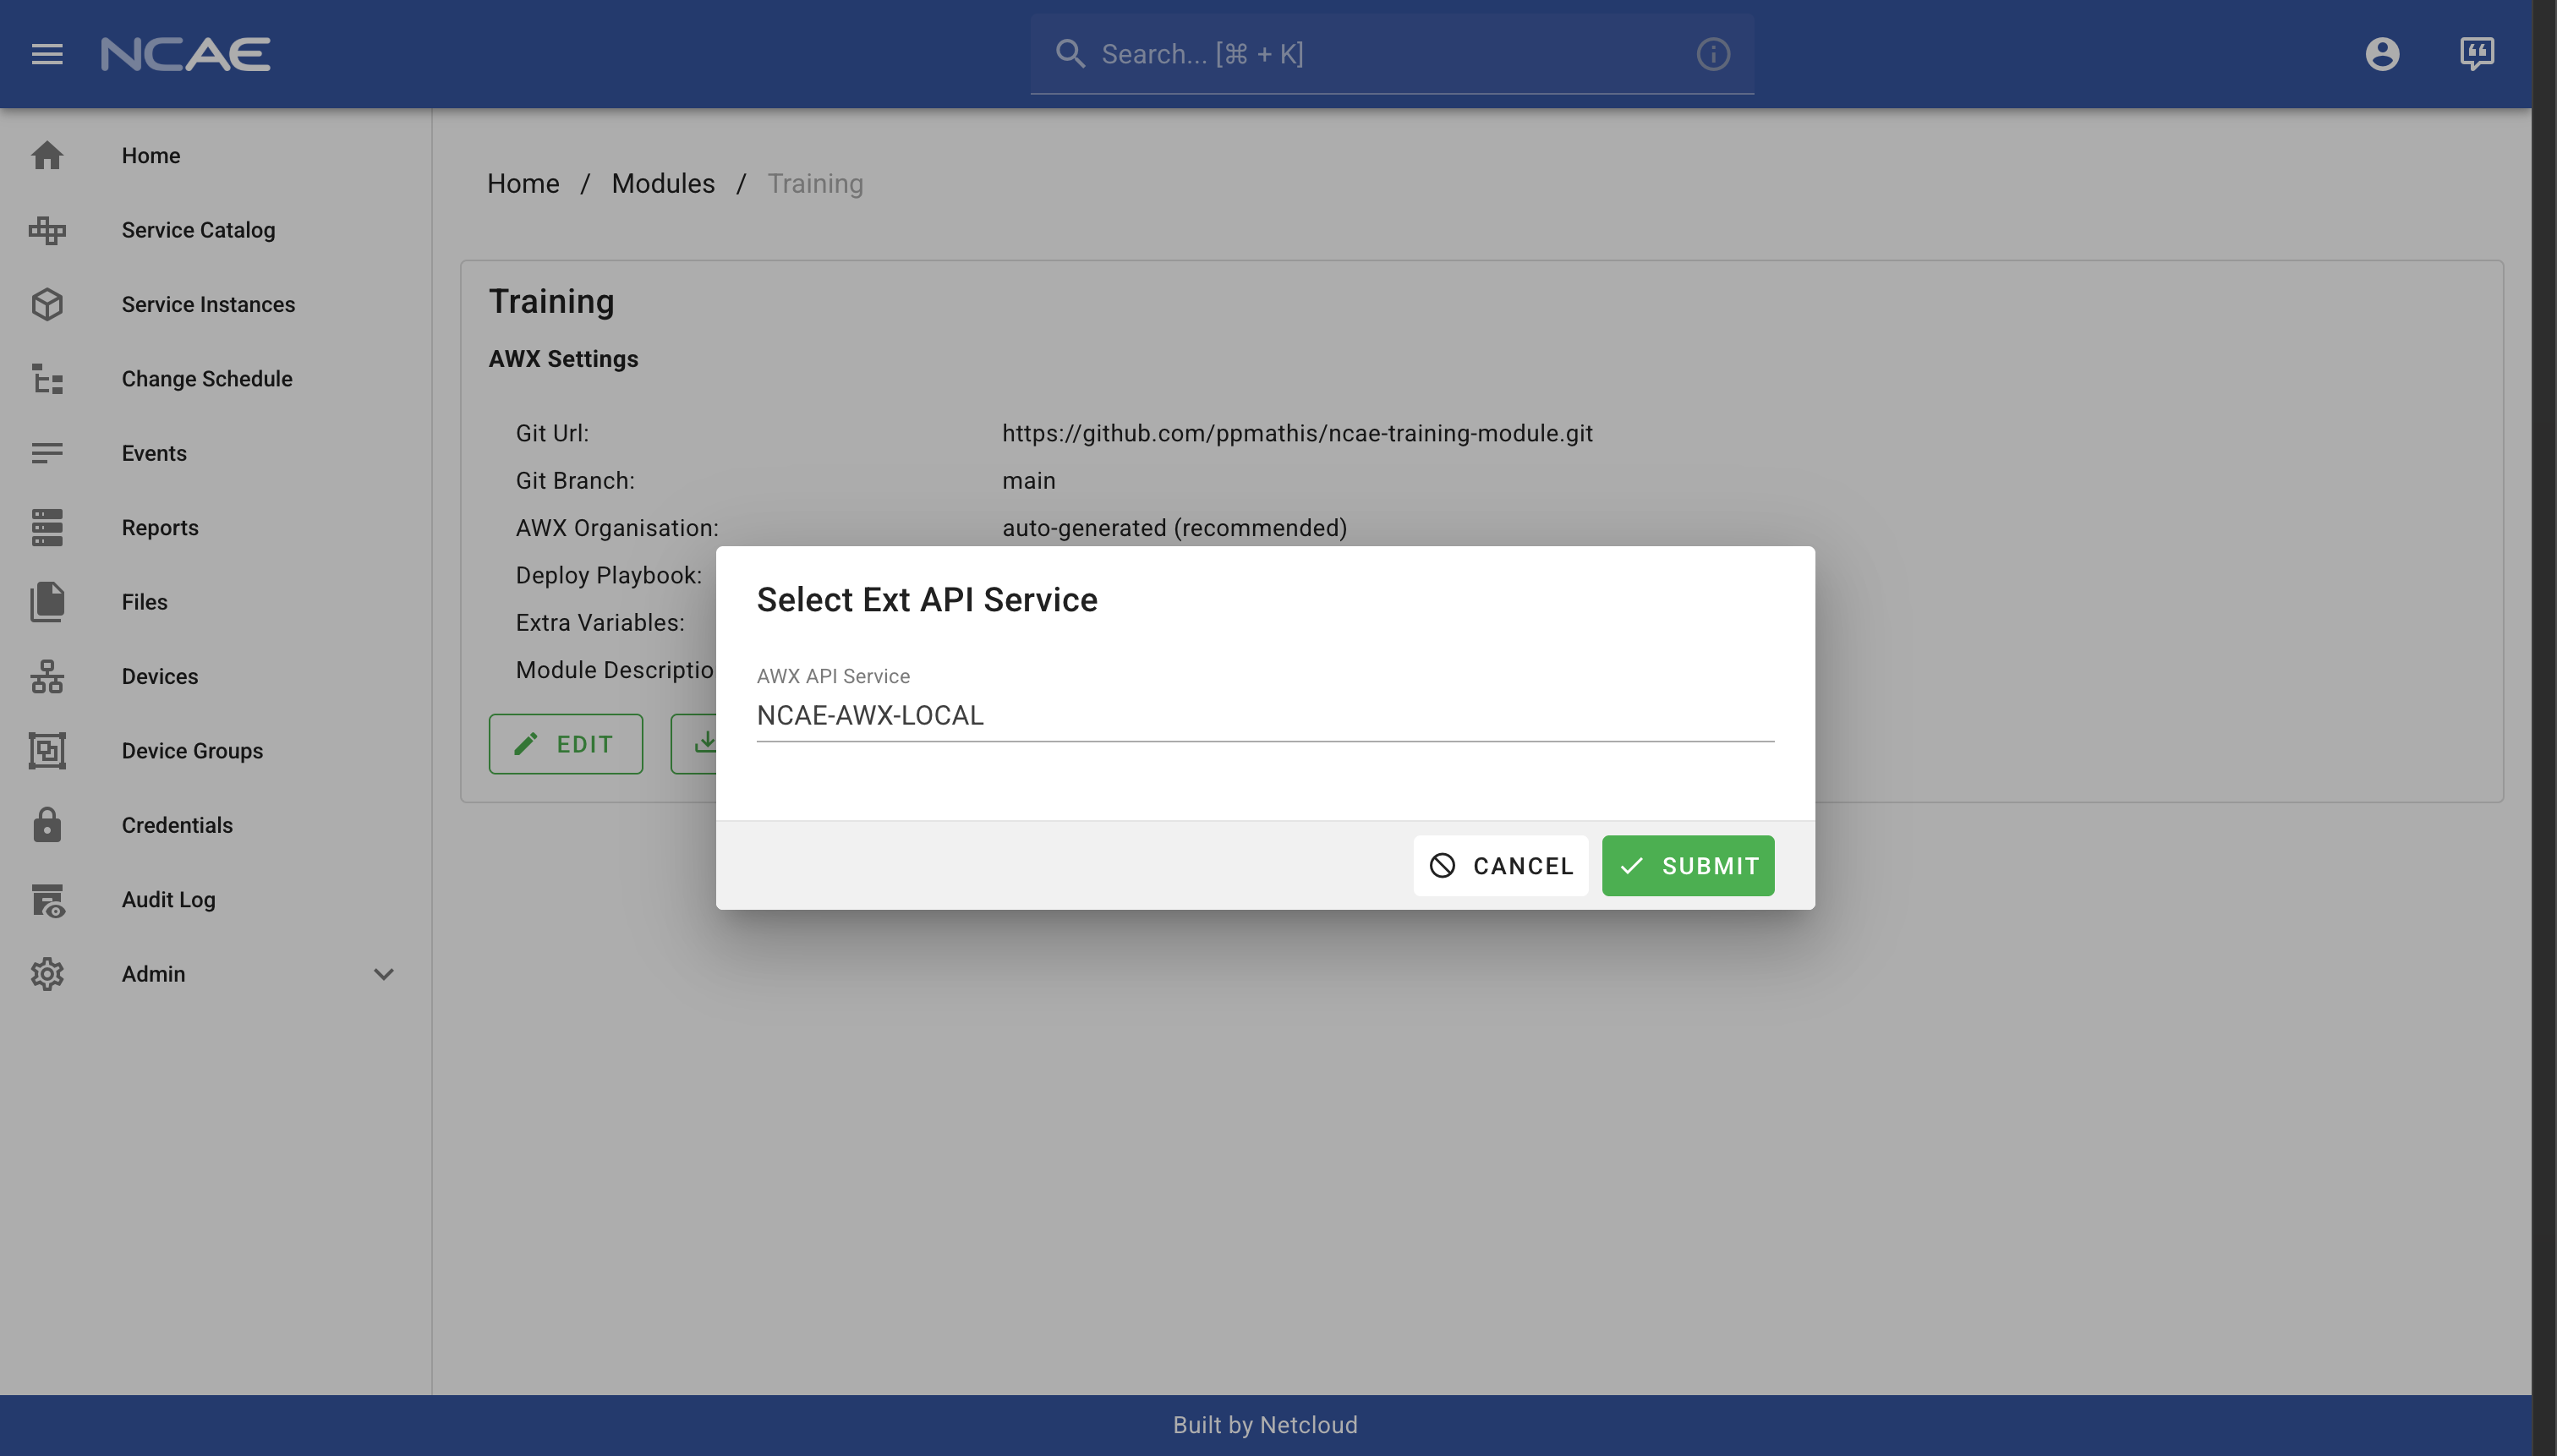
Before the installation starts, you will be asked to select the external API service which will handle the module installation. Select the existing “NCAE-AWX-LOCAL” and continue by clicking on the “Submit” button:
After a few seconds, a notification will temporarily pop up in the bottom right corner of your screen, indicating that the module installation has been successfully started:
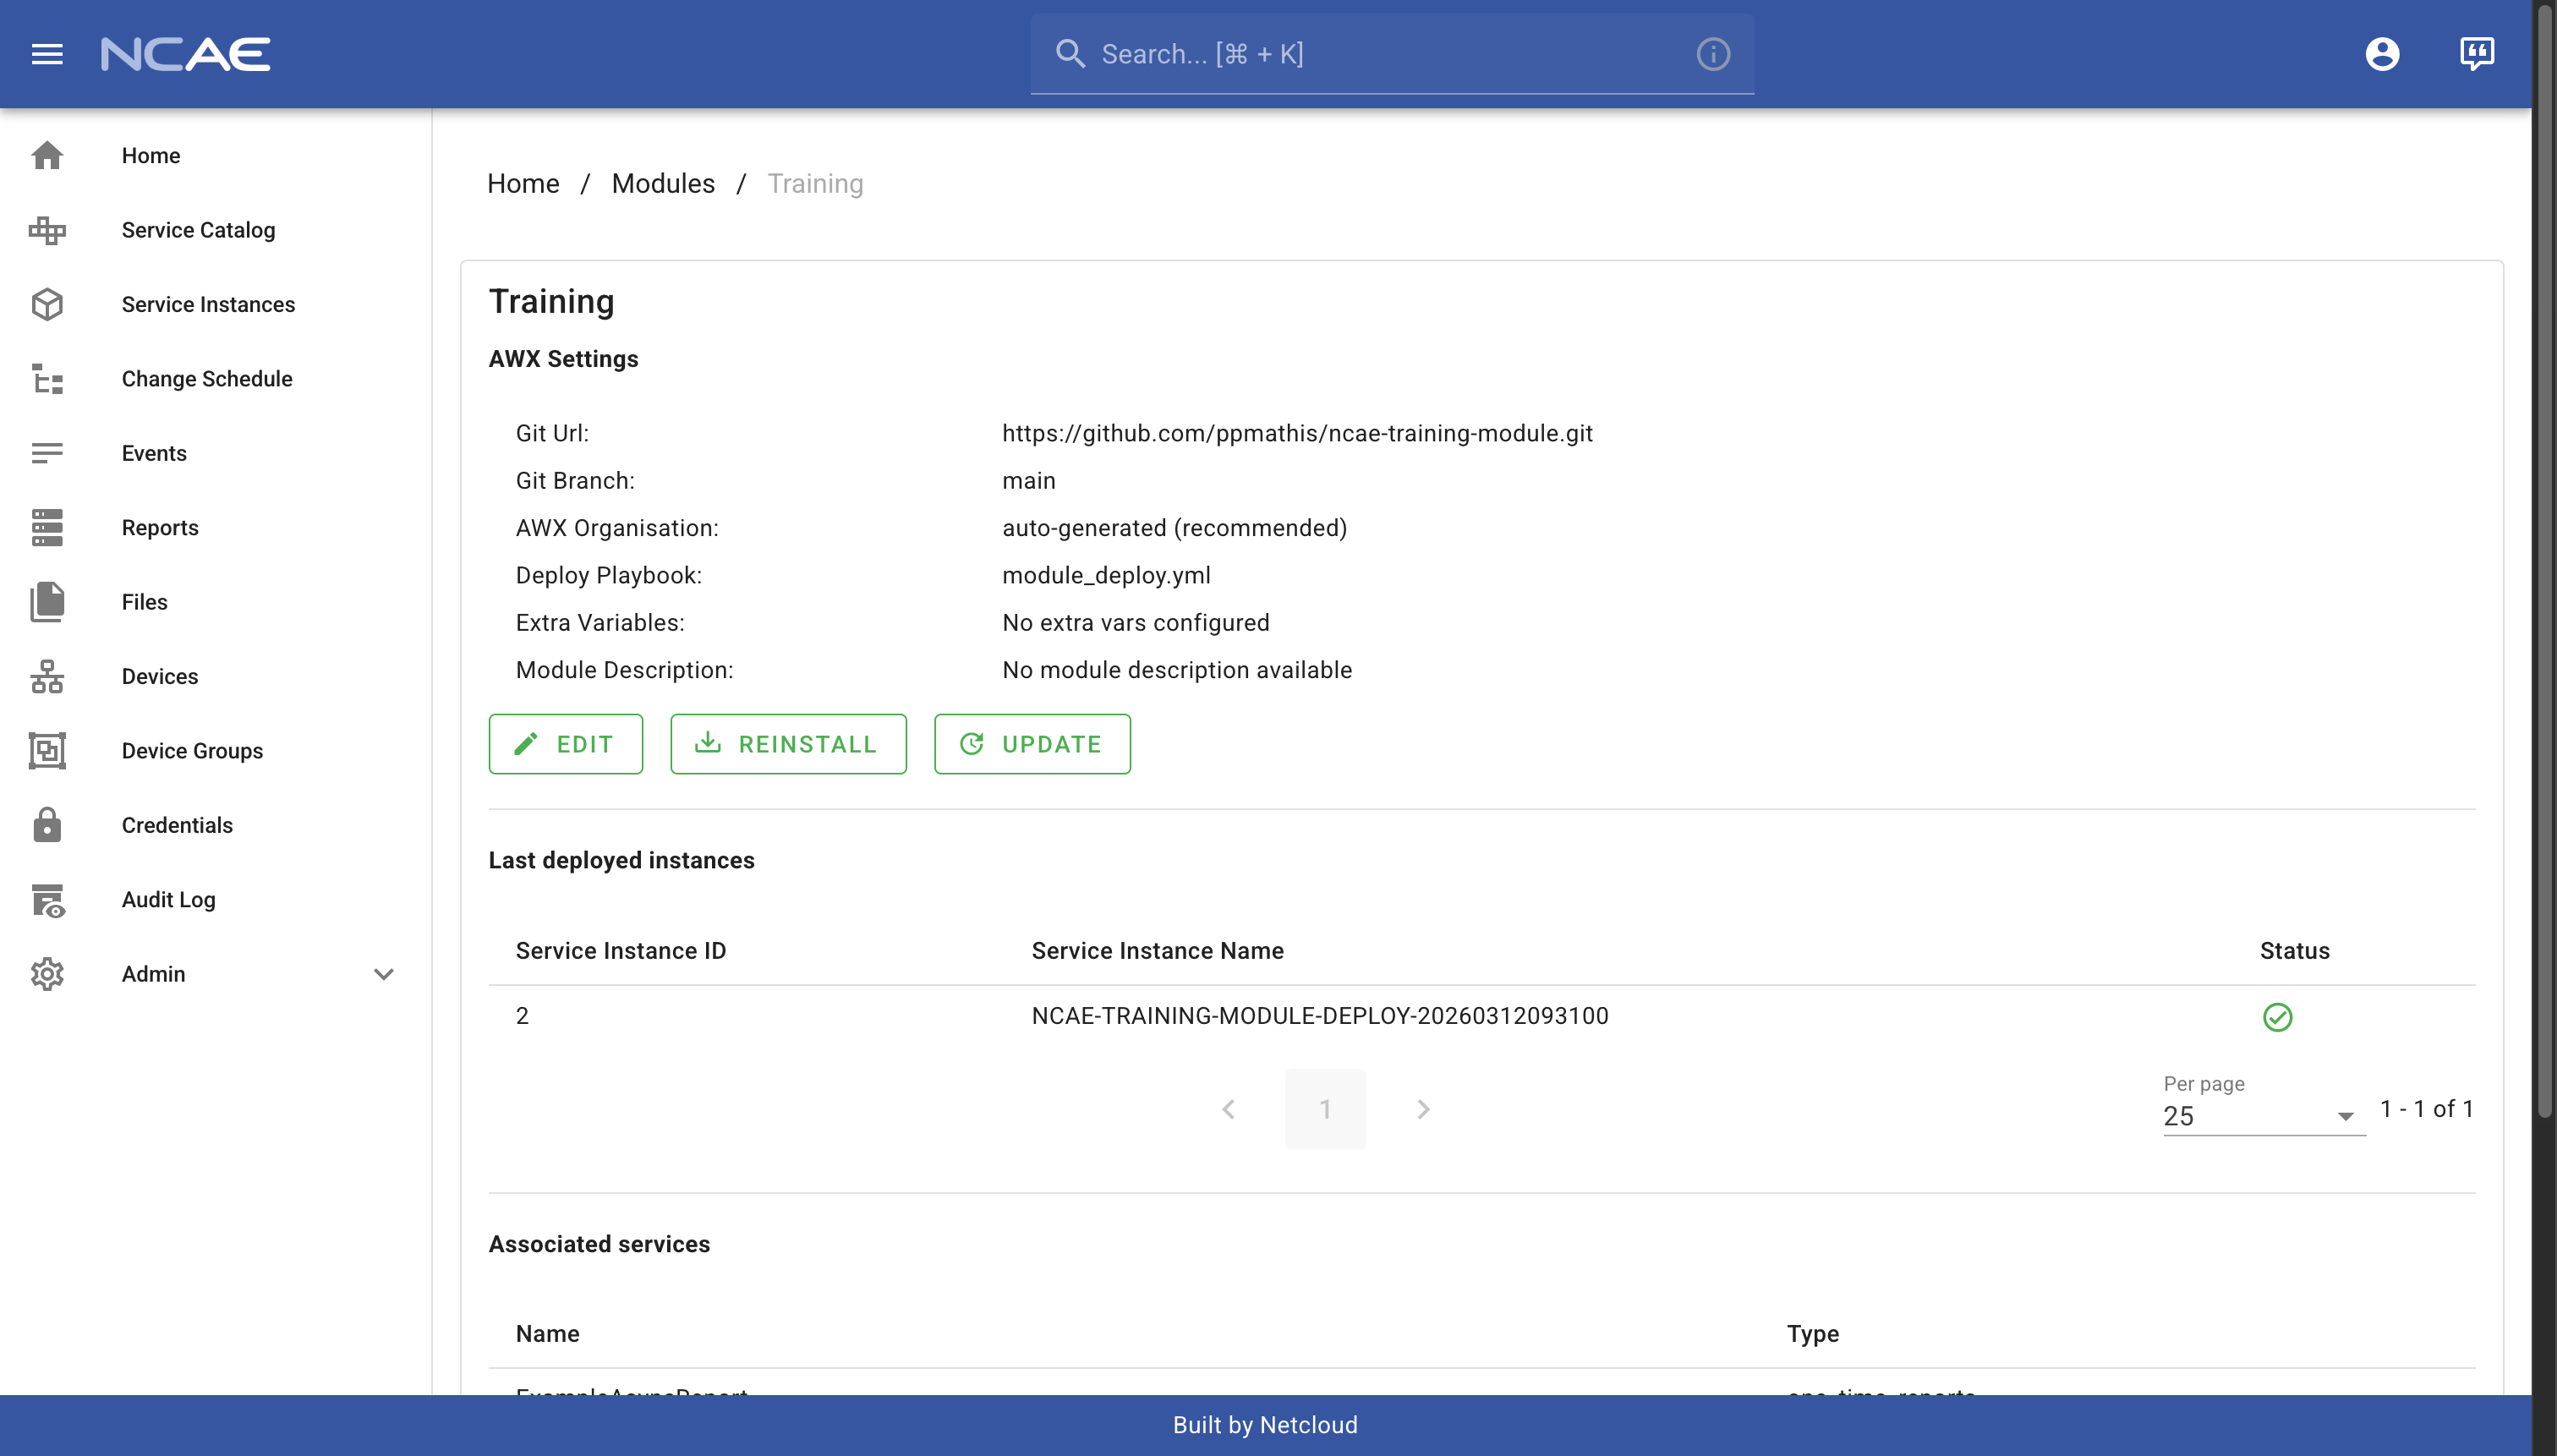
As soon as this notification appear, refresh / reload the page and you should see a new entry in the “Last deployed instances” table. A module installation in NCAE is also just a service, so what you are seeing here is the service instance which has been created to install your module just now! Click on the table row in the “Last deployed instances” table to open the service instance details page:
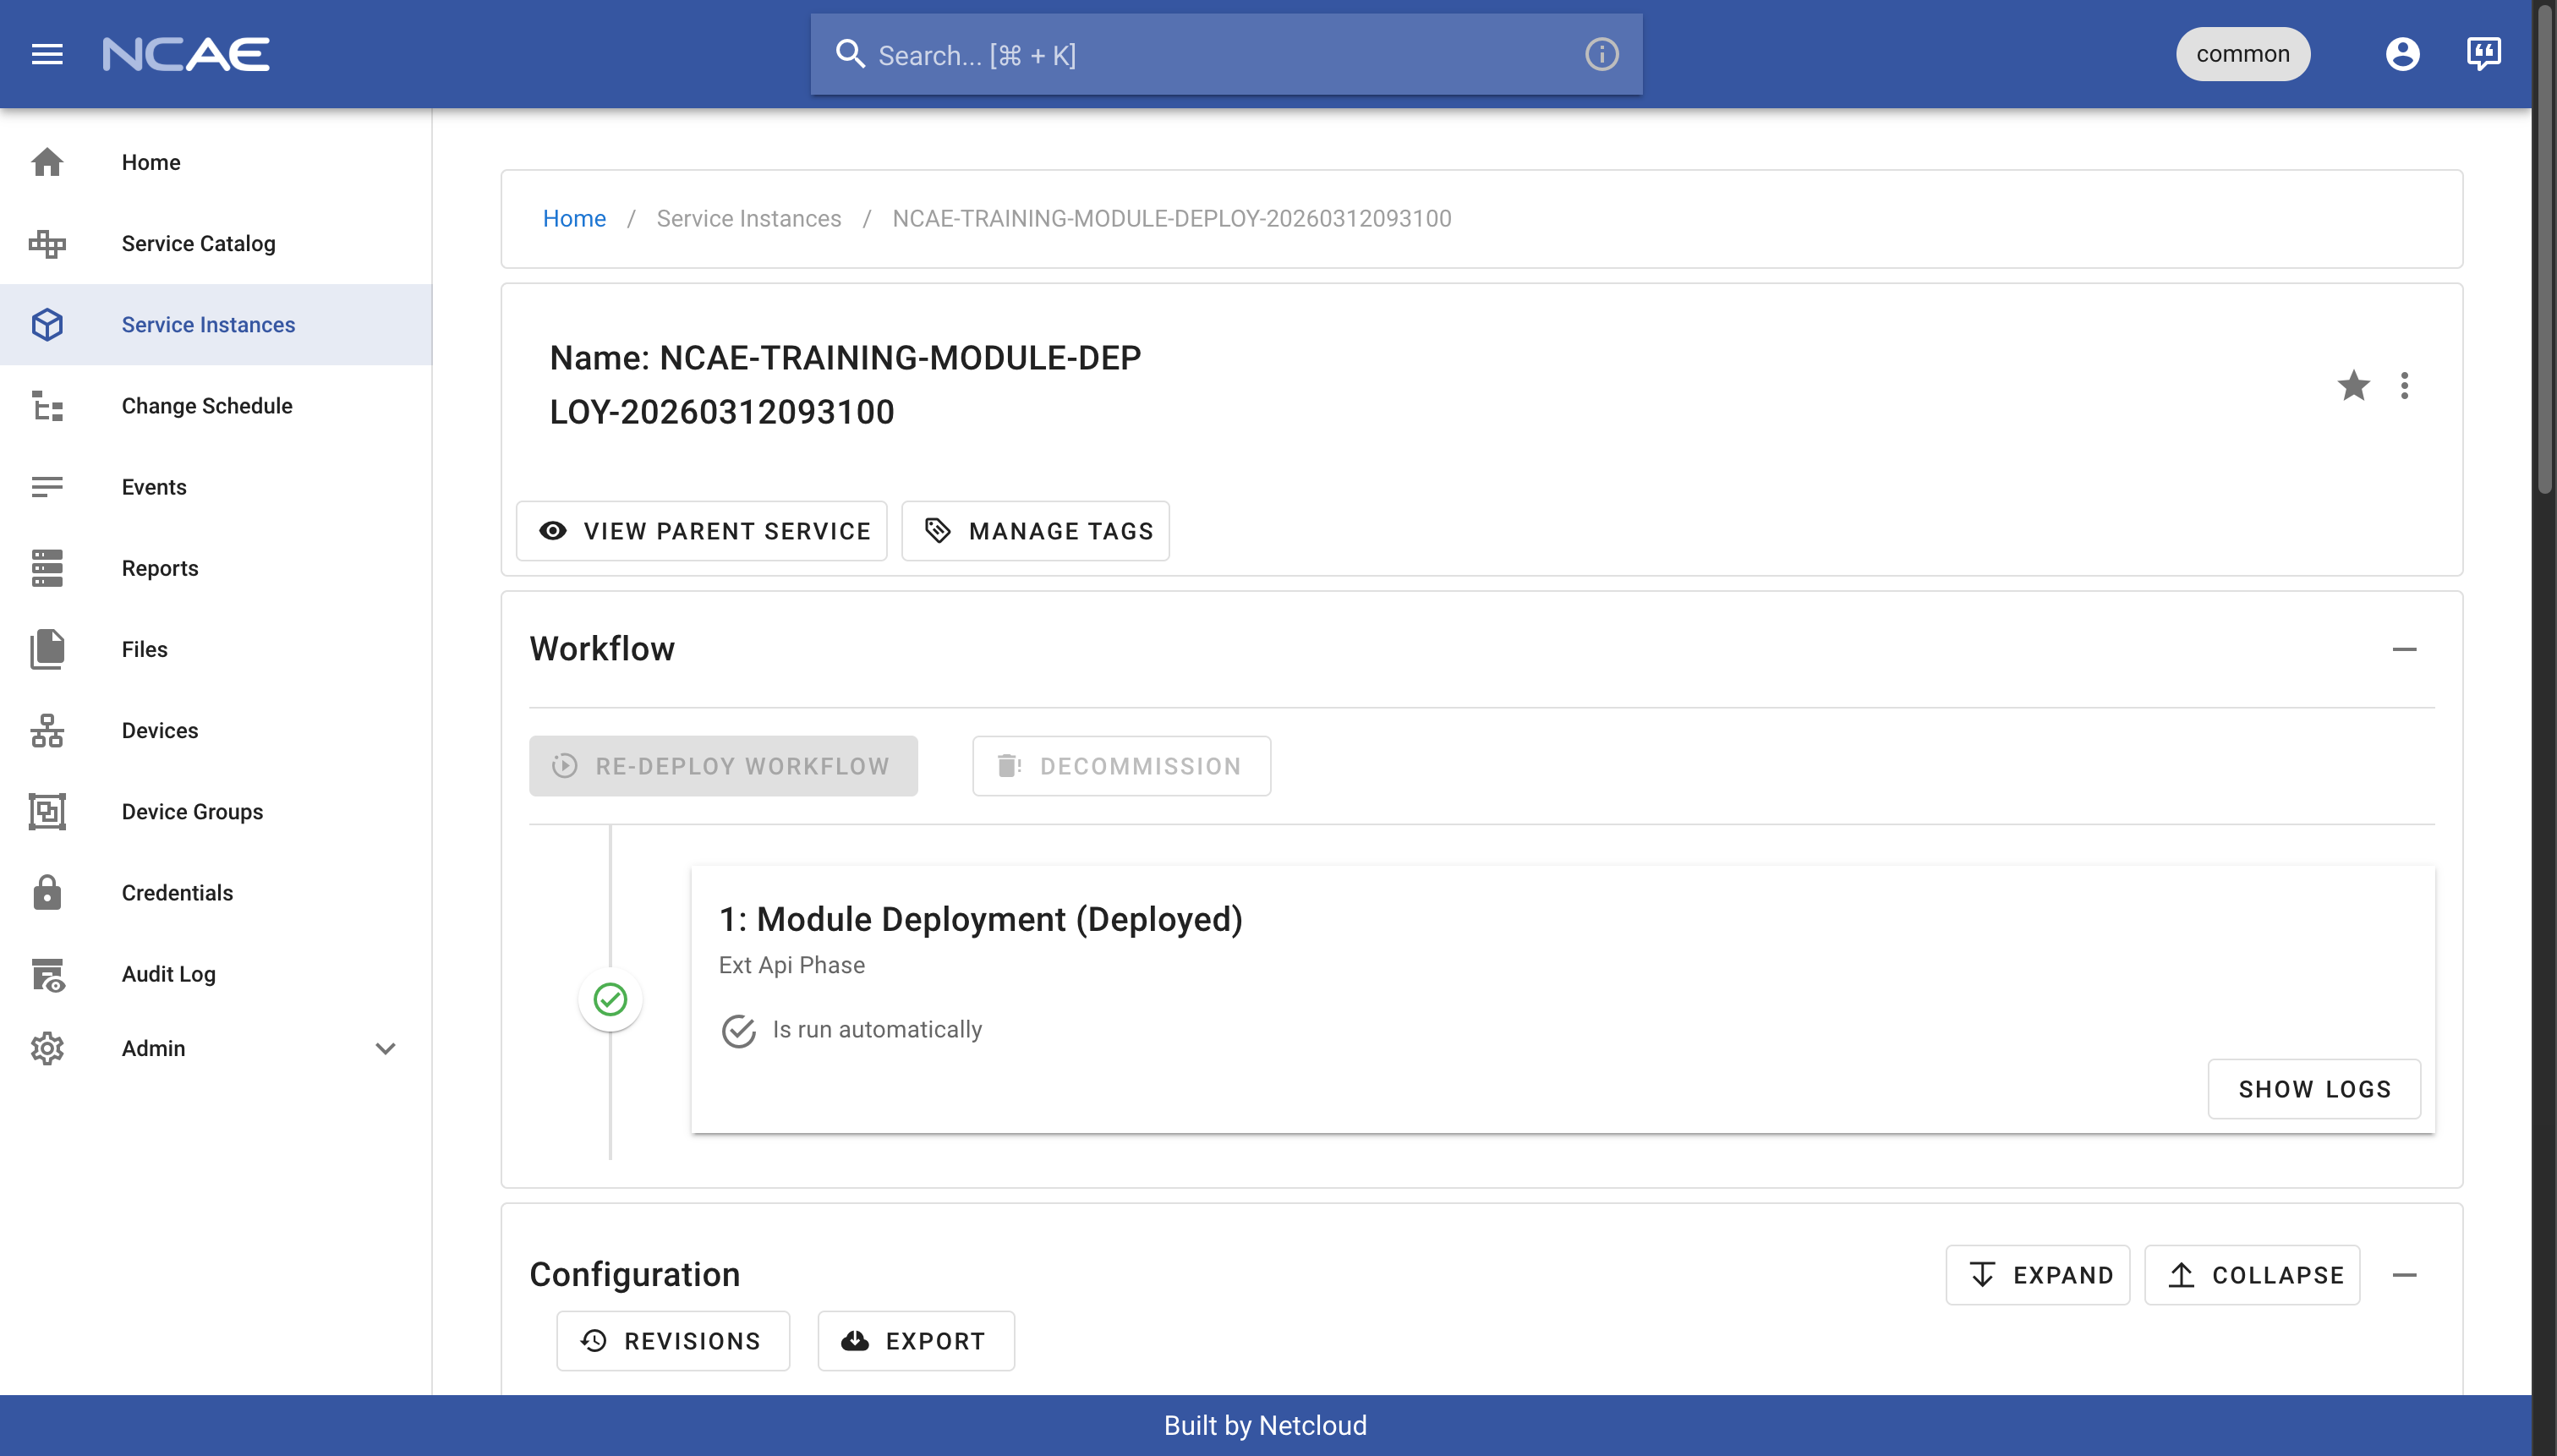
Wait for this service instance to reach the state “Deployed”, which indicates that the module installation has been completed. This can take a minute or two, so be patient. Once this process completes, you’ve successfully installed your own NCAE module!
Explore your installed module
With the module installation finished, you should now see the following resources inside your NCAE:
- Service Catalog will show
EXAMPLE-ANSIBLE-SERVICE-V1andEXAMPLE-PYTHON-SERVICE-V1 - Reports will show
ExampleAsyncReportandExampleSyncReport
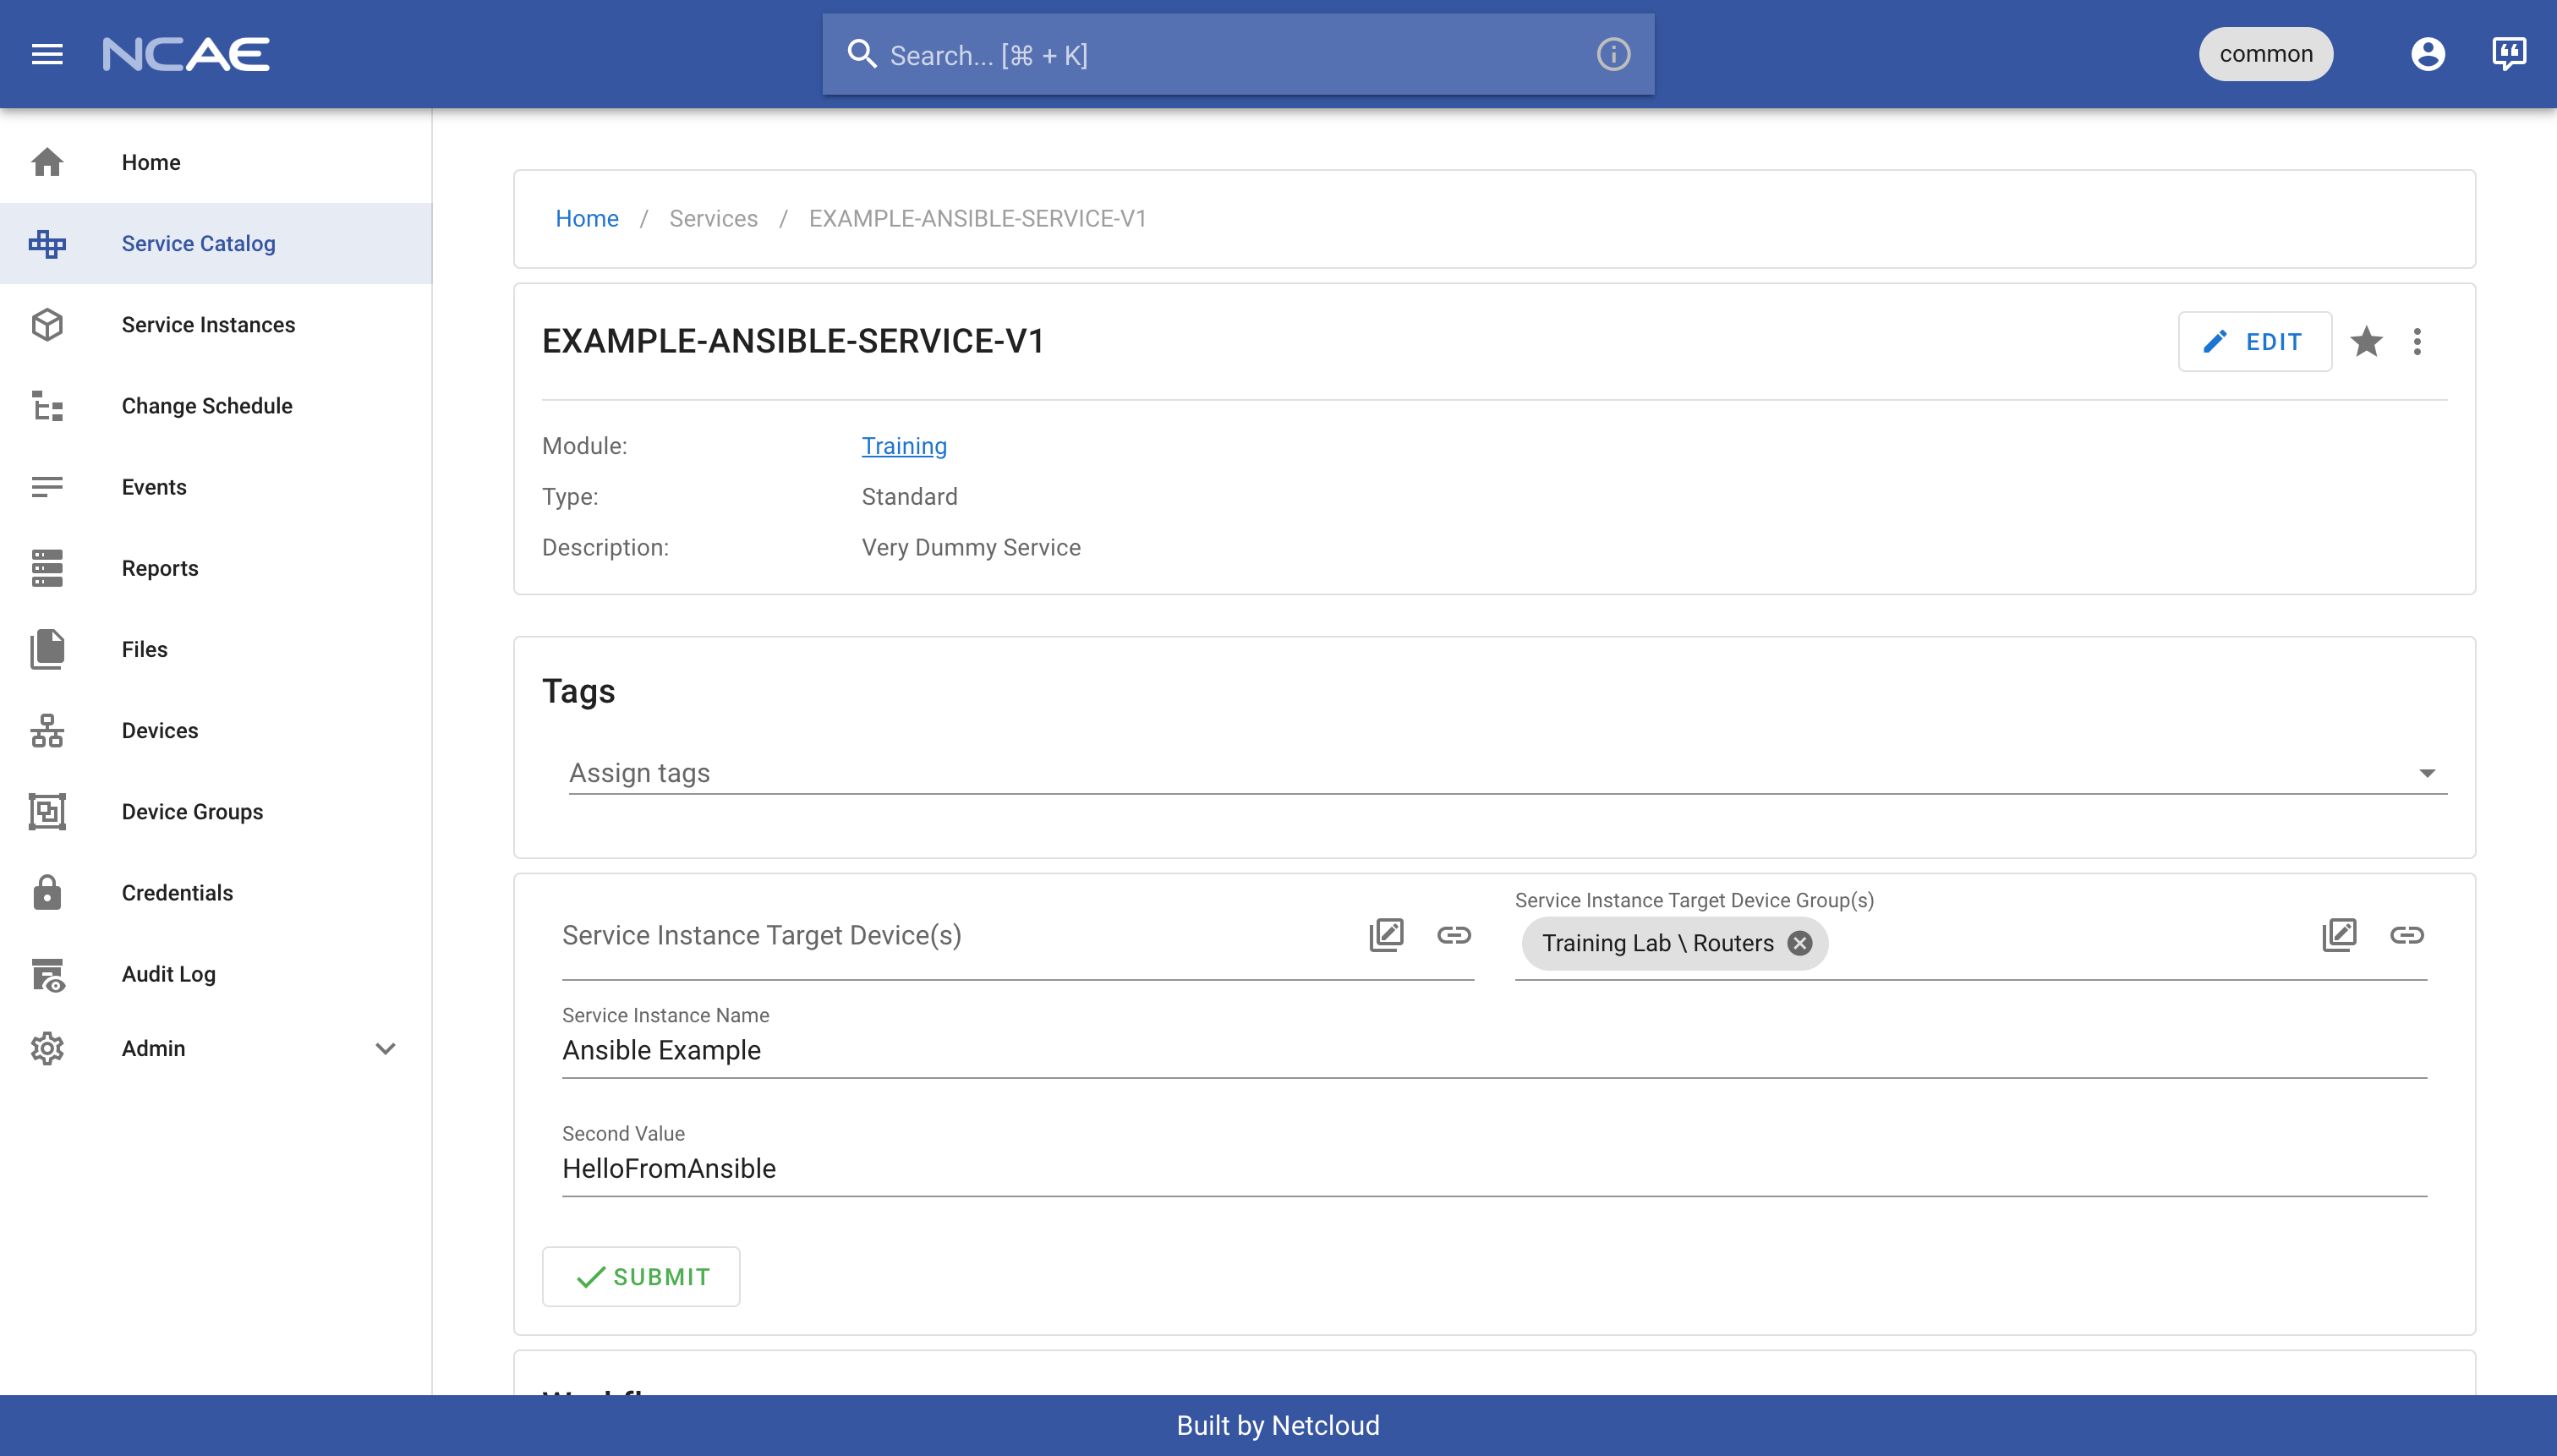
Lets give those a try! Head over to NCAE, “Service Catalog” and click on the “EXAMPLE-ANSIBLE-SERVICE-V1”. This will open the service details page, where you can fill out the form to launch a new instance:
- Service Instance Target Device Group(s): pick any group, e.g.
Training Lab \ Routers - Service Instance Name: should be
Ansible Exampleor any name you prefer - Second Value: should be
HelloFromAnsibleor a similar value (alphanumeric only, no spaces)
With everything filled out, your form should look like this, after which you can click “Submit” to create your service instance:
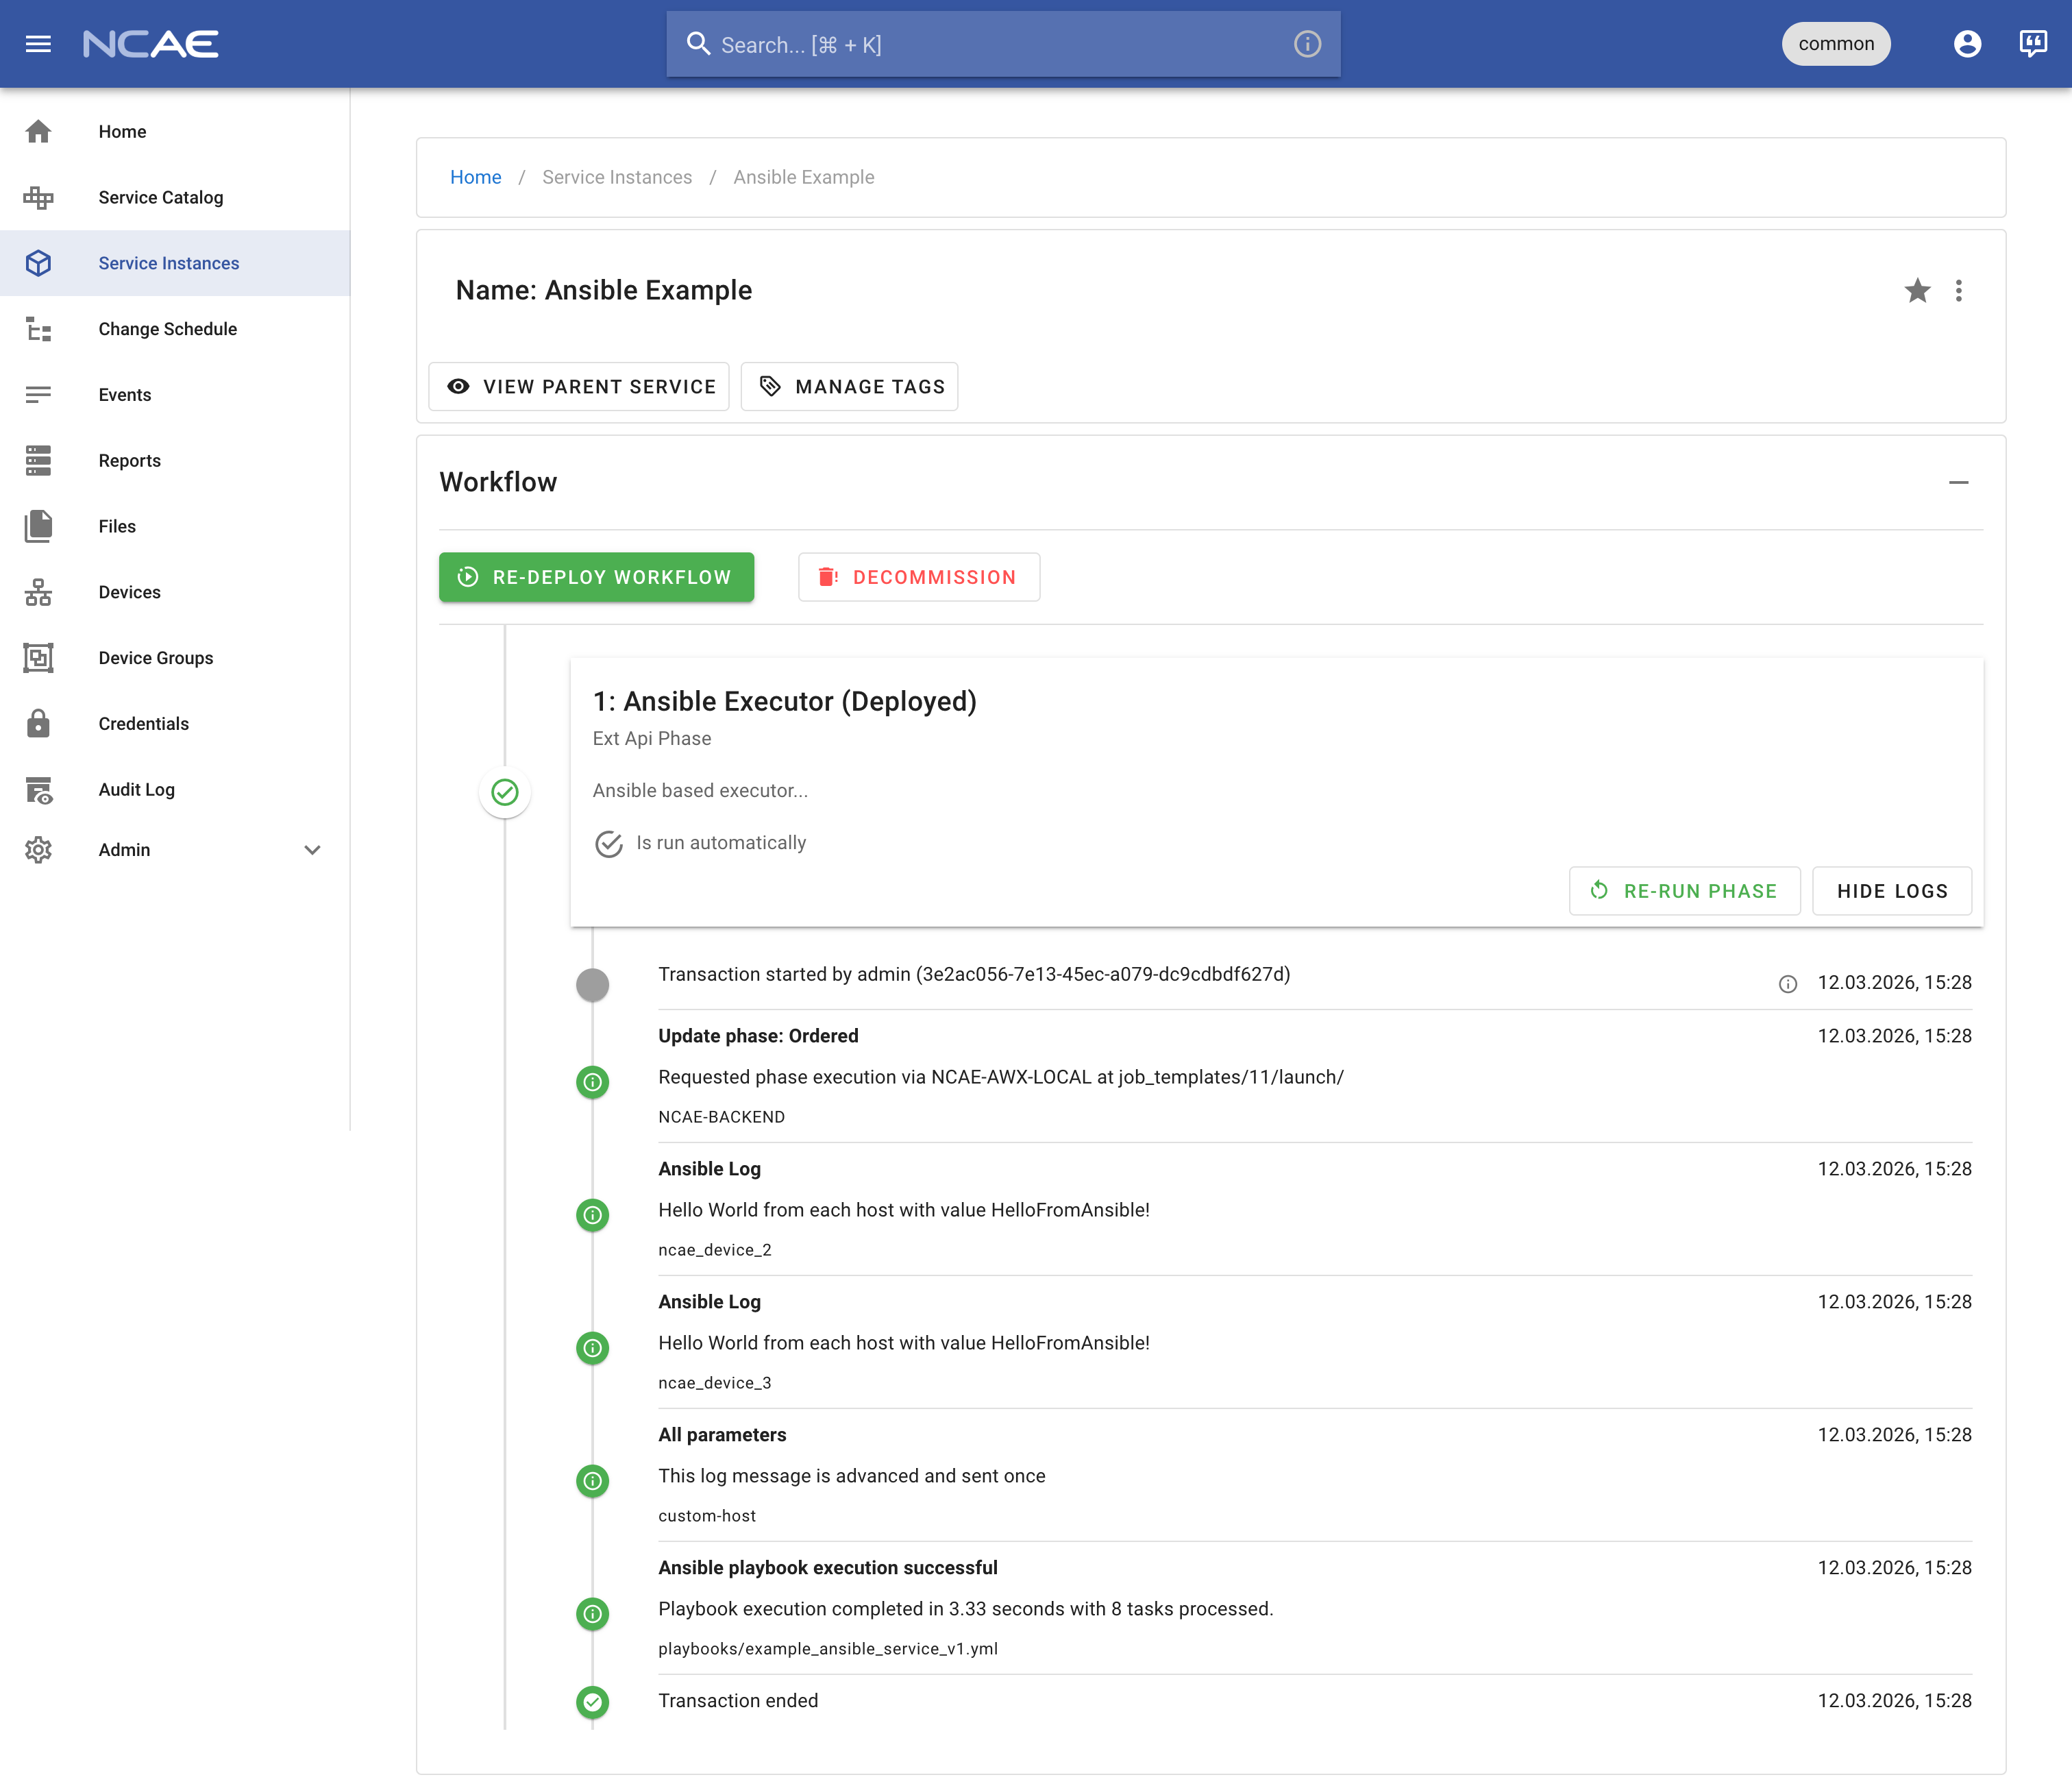
You will be automatically redirected to the newly created service instance, where you can watch the deploy progress and also show its logs while this is happening. Inspect the output and notice how the value you entered in the form is successfully executed on each device:
Repeat the same exercise with the EXAMPLE-PYTHON-SERVICE-V1, and ensure it executes properly as well. You can use the
same form values as for the Ansible service, just with a different name for the service instance. Understand the
difference in execution:
- Your Ansible service communicated with the integrated Ansible runner in your NCAE, which executed the Ansible playbook stored in your Git repository. The actual automation logic runs as part of the whole NCAE stack, and your previously deployed container is NOT involved in this process at all.
- Your Python service communicated with the container you deployed earlier, meaning the full automation logic happens inside your container. The container in turn can also communicate with the NCAE API to retrieve or send information, but the execution logic is fully decoupled from the NCAE stack.
In addition to the two example services, you should also test the two reports that have been created. Navigate to “Reports” in the left sidebar, and click on the “ExampleAsyncReport” to view it:
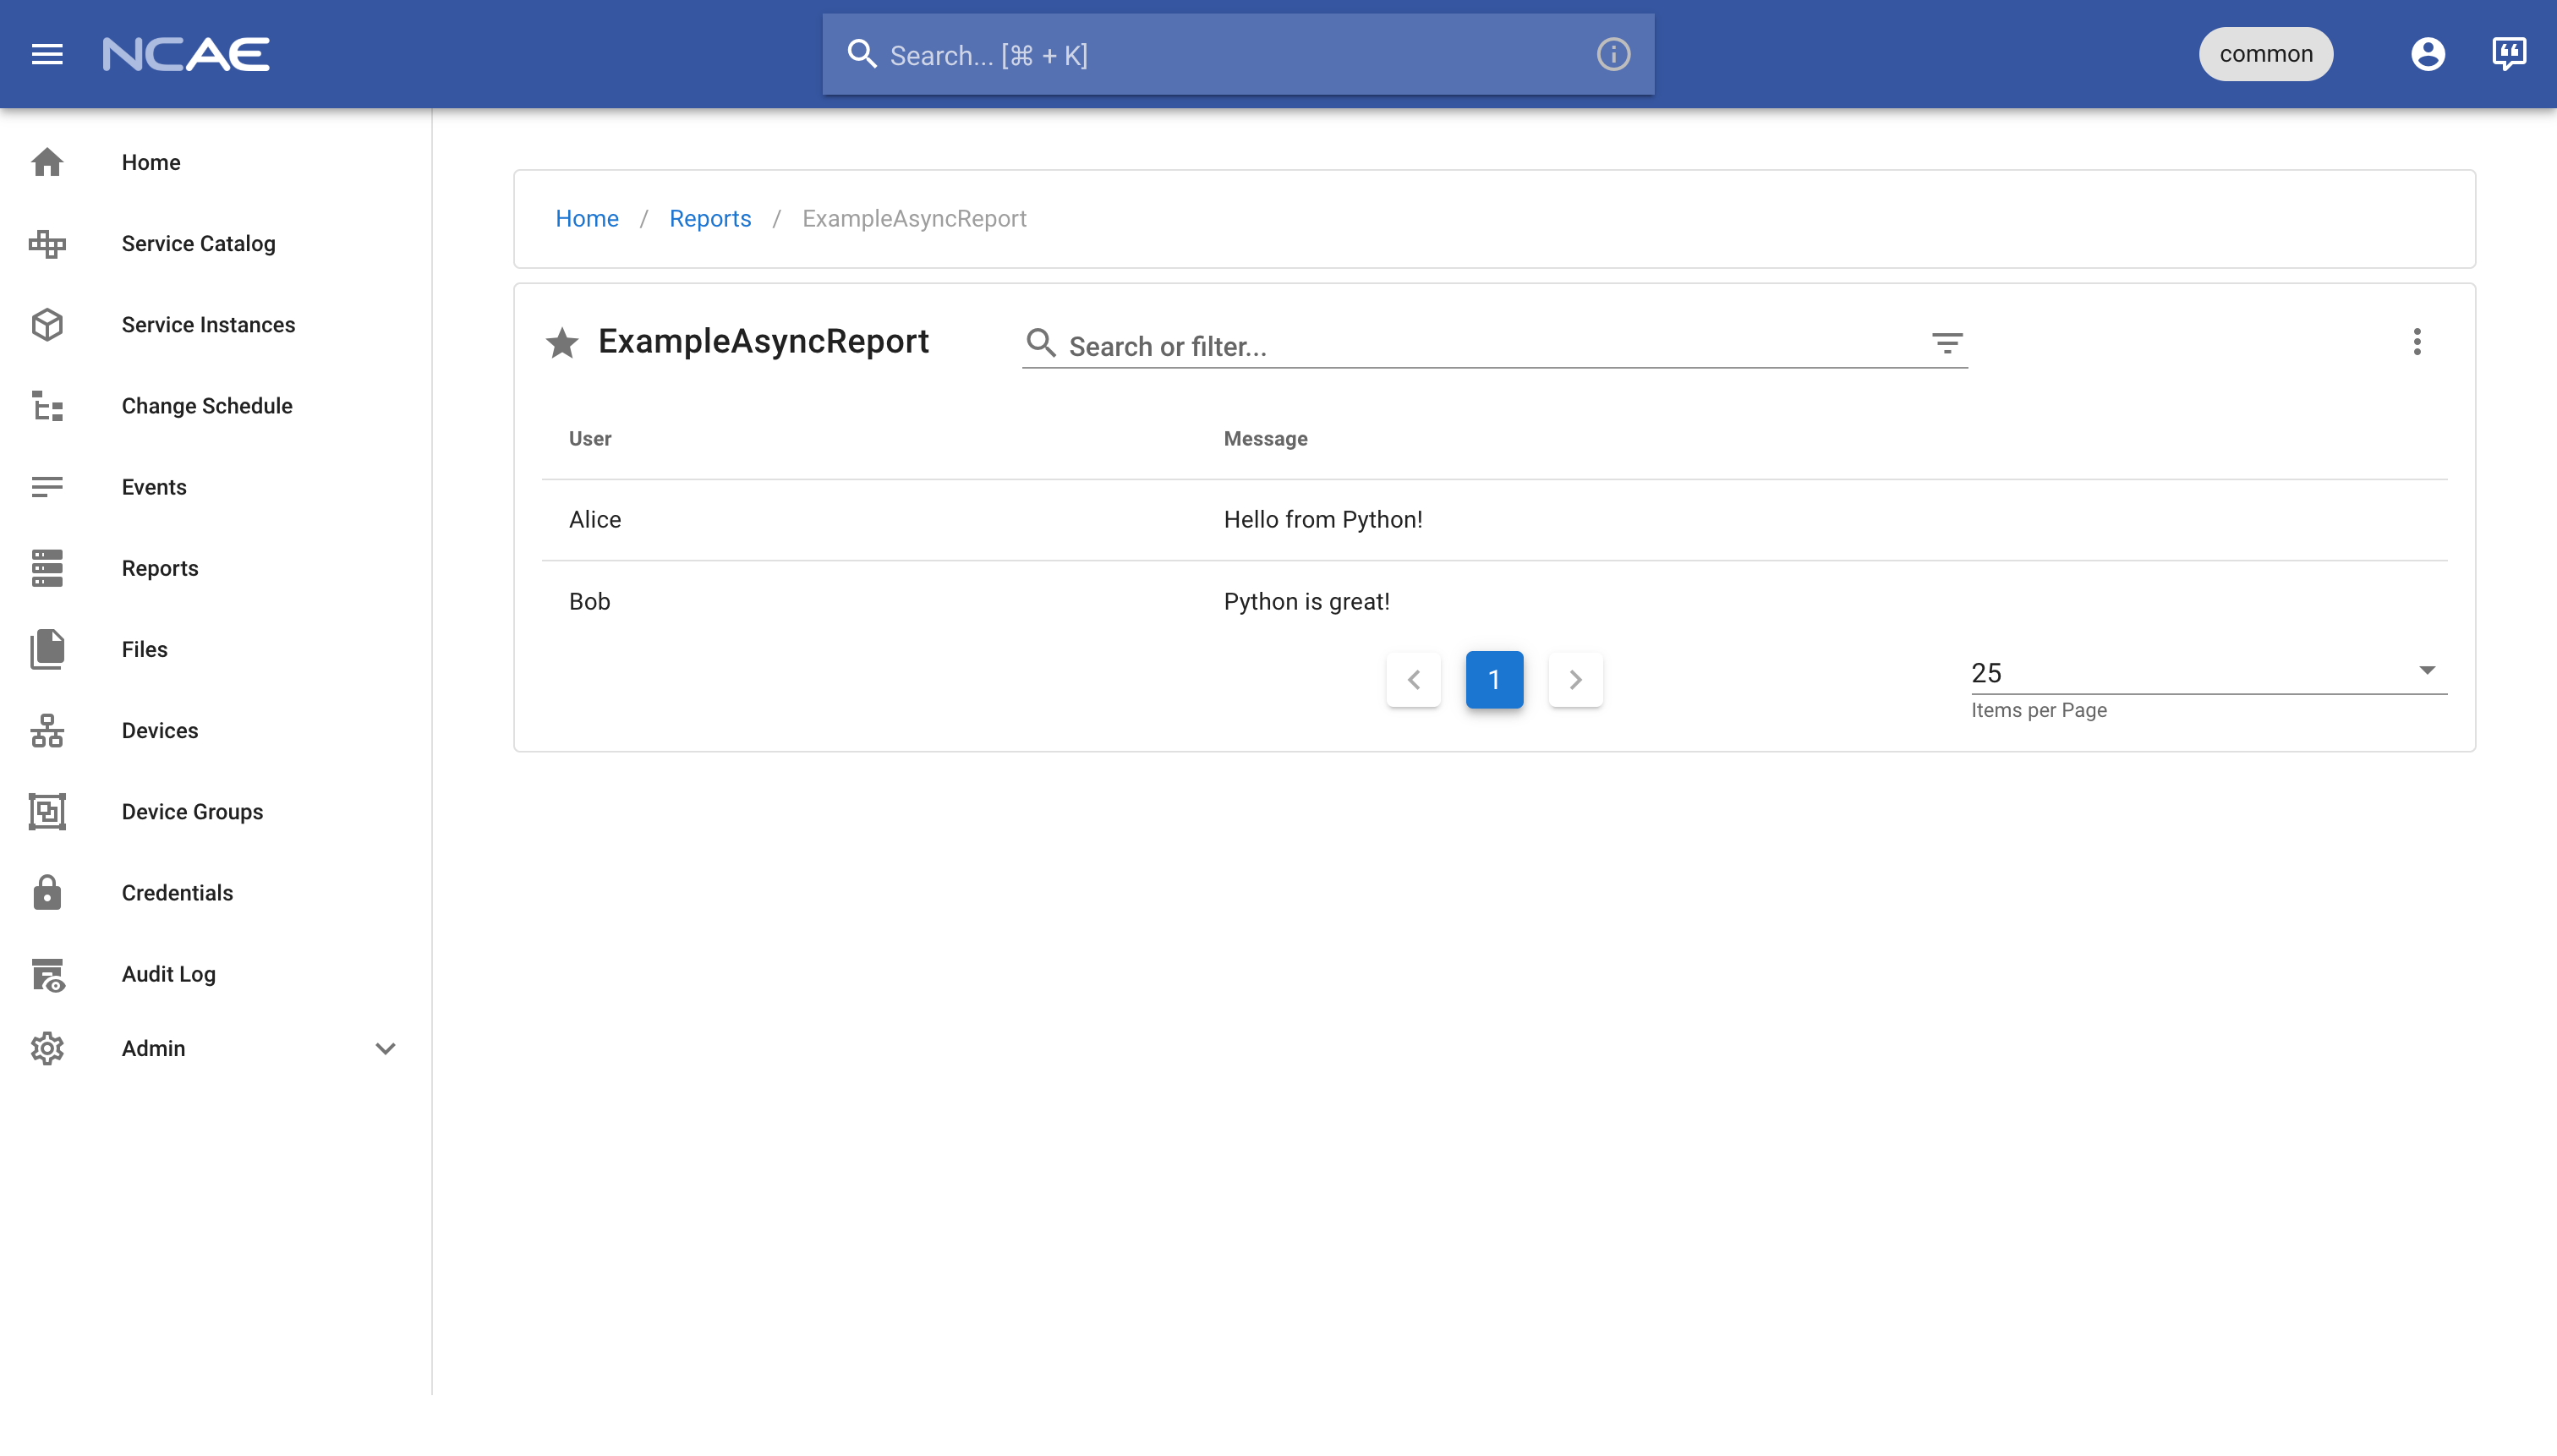
An asynchronous report does not actively fetch any data, instead it has to be provided with data from somewhere else. In
case of the default module template, the EXAMPLE-PYTHON-SERVICE-V1 is configured to provide the example data you are
currently seeing.
To complete your module testing, head back to “Reports” and click on the “ExampleSyncReport”, select devices and/or device groups of your choice, and click “Submit” to run the report:
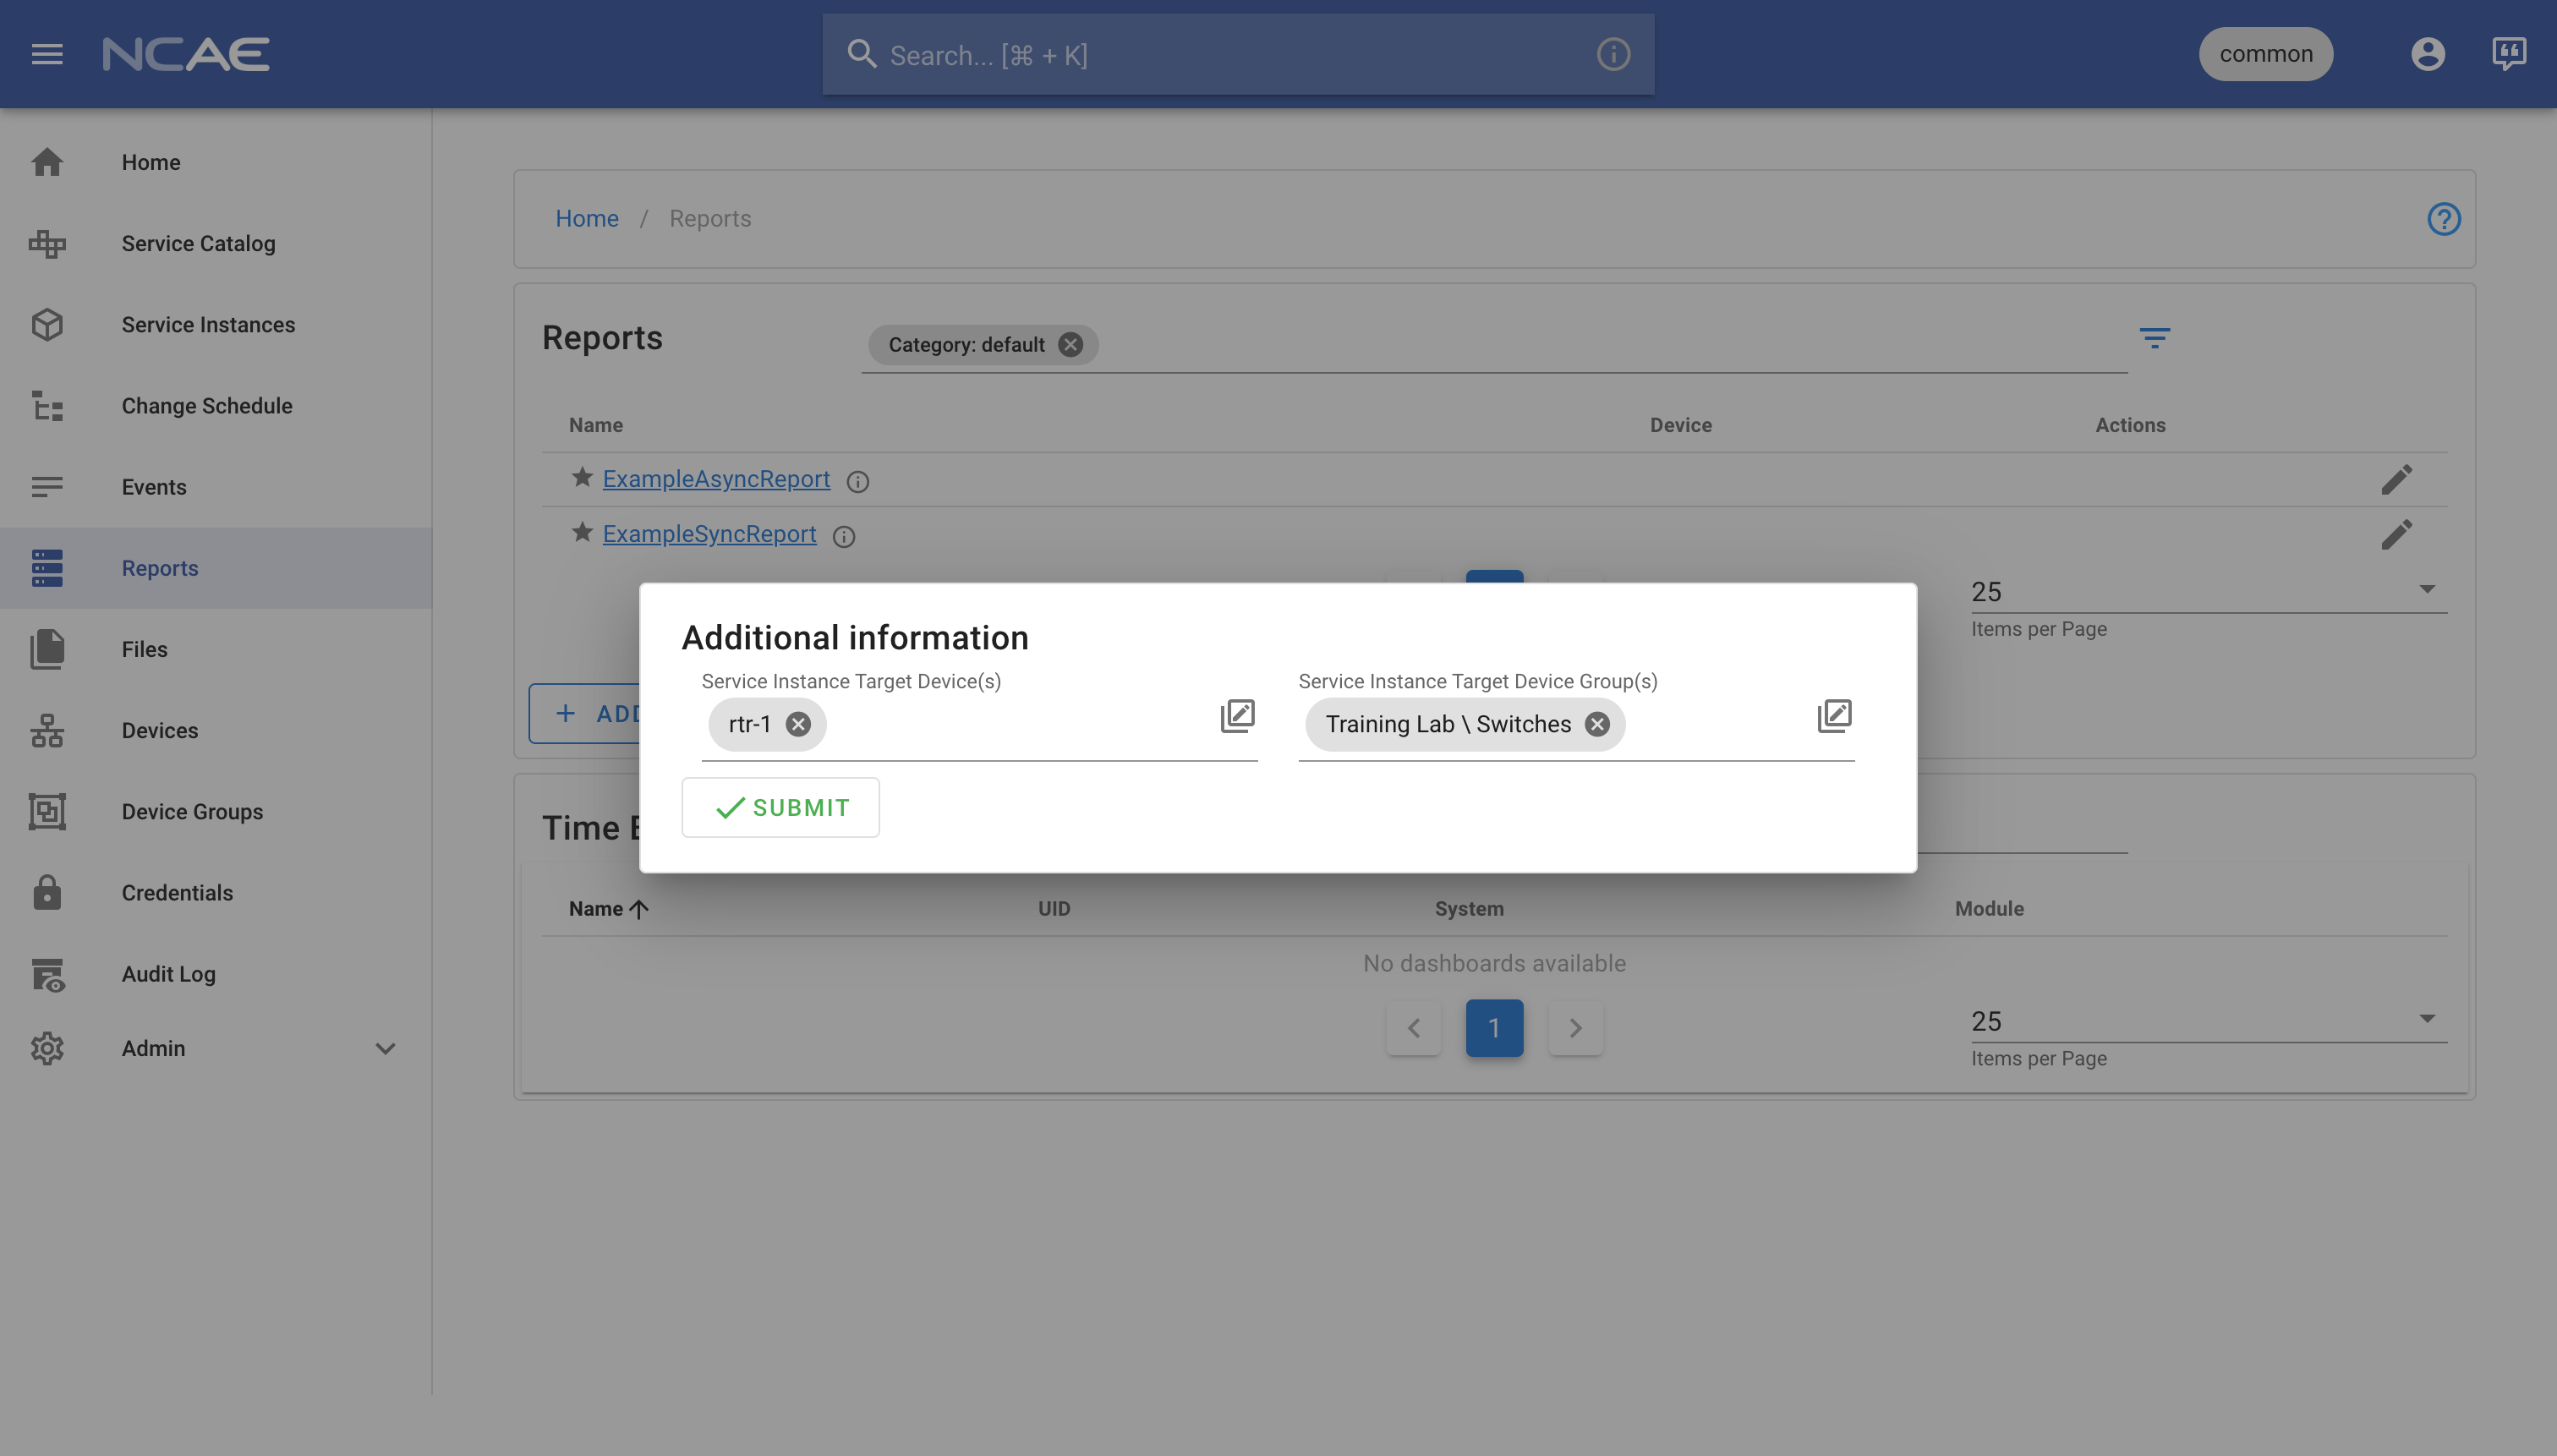
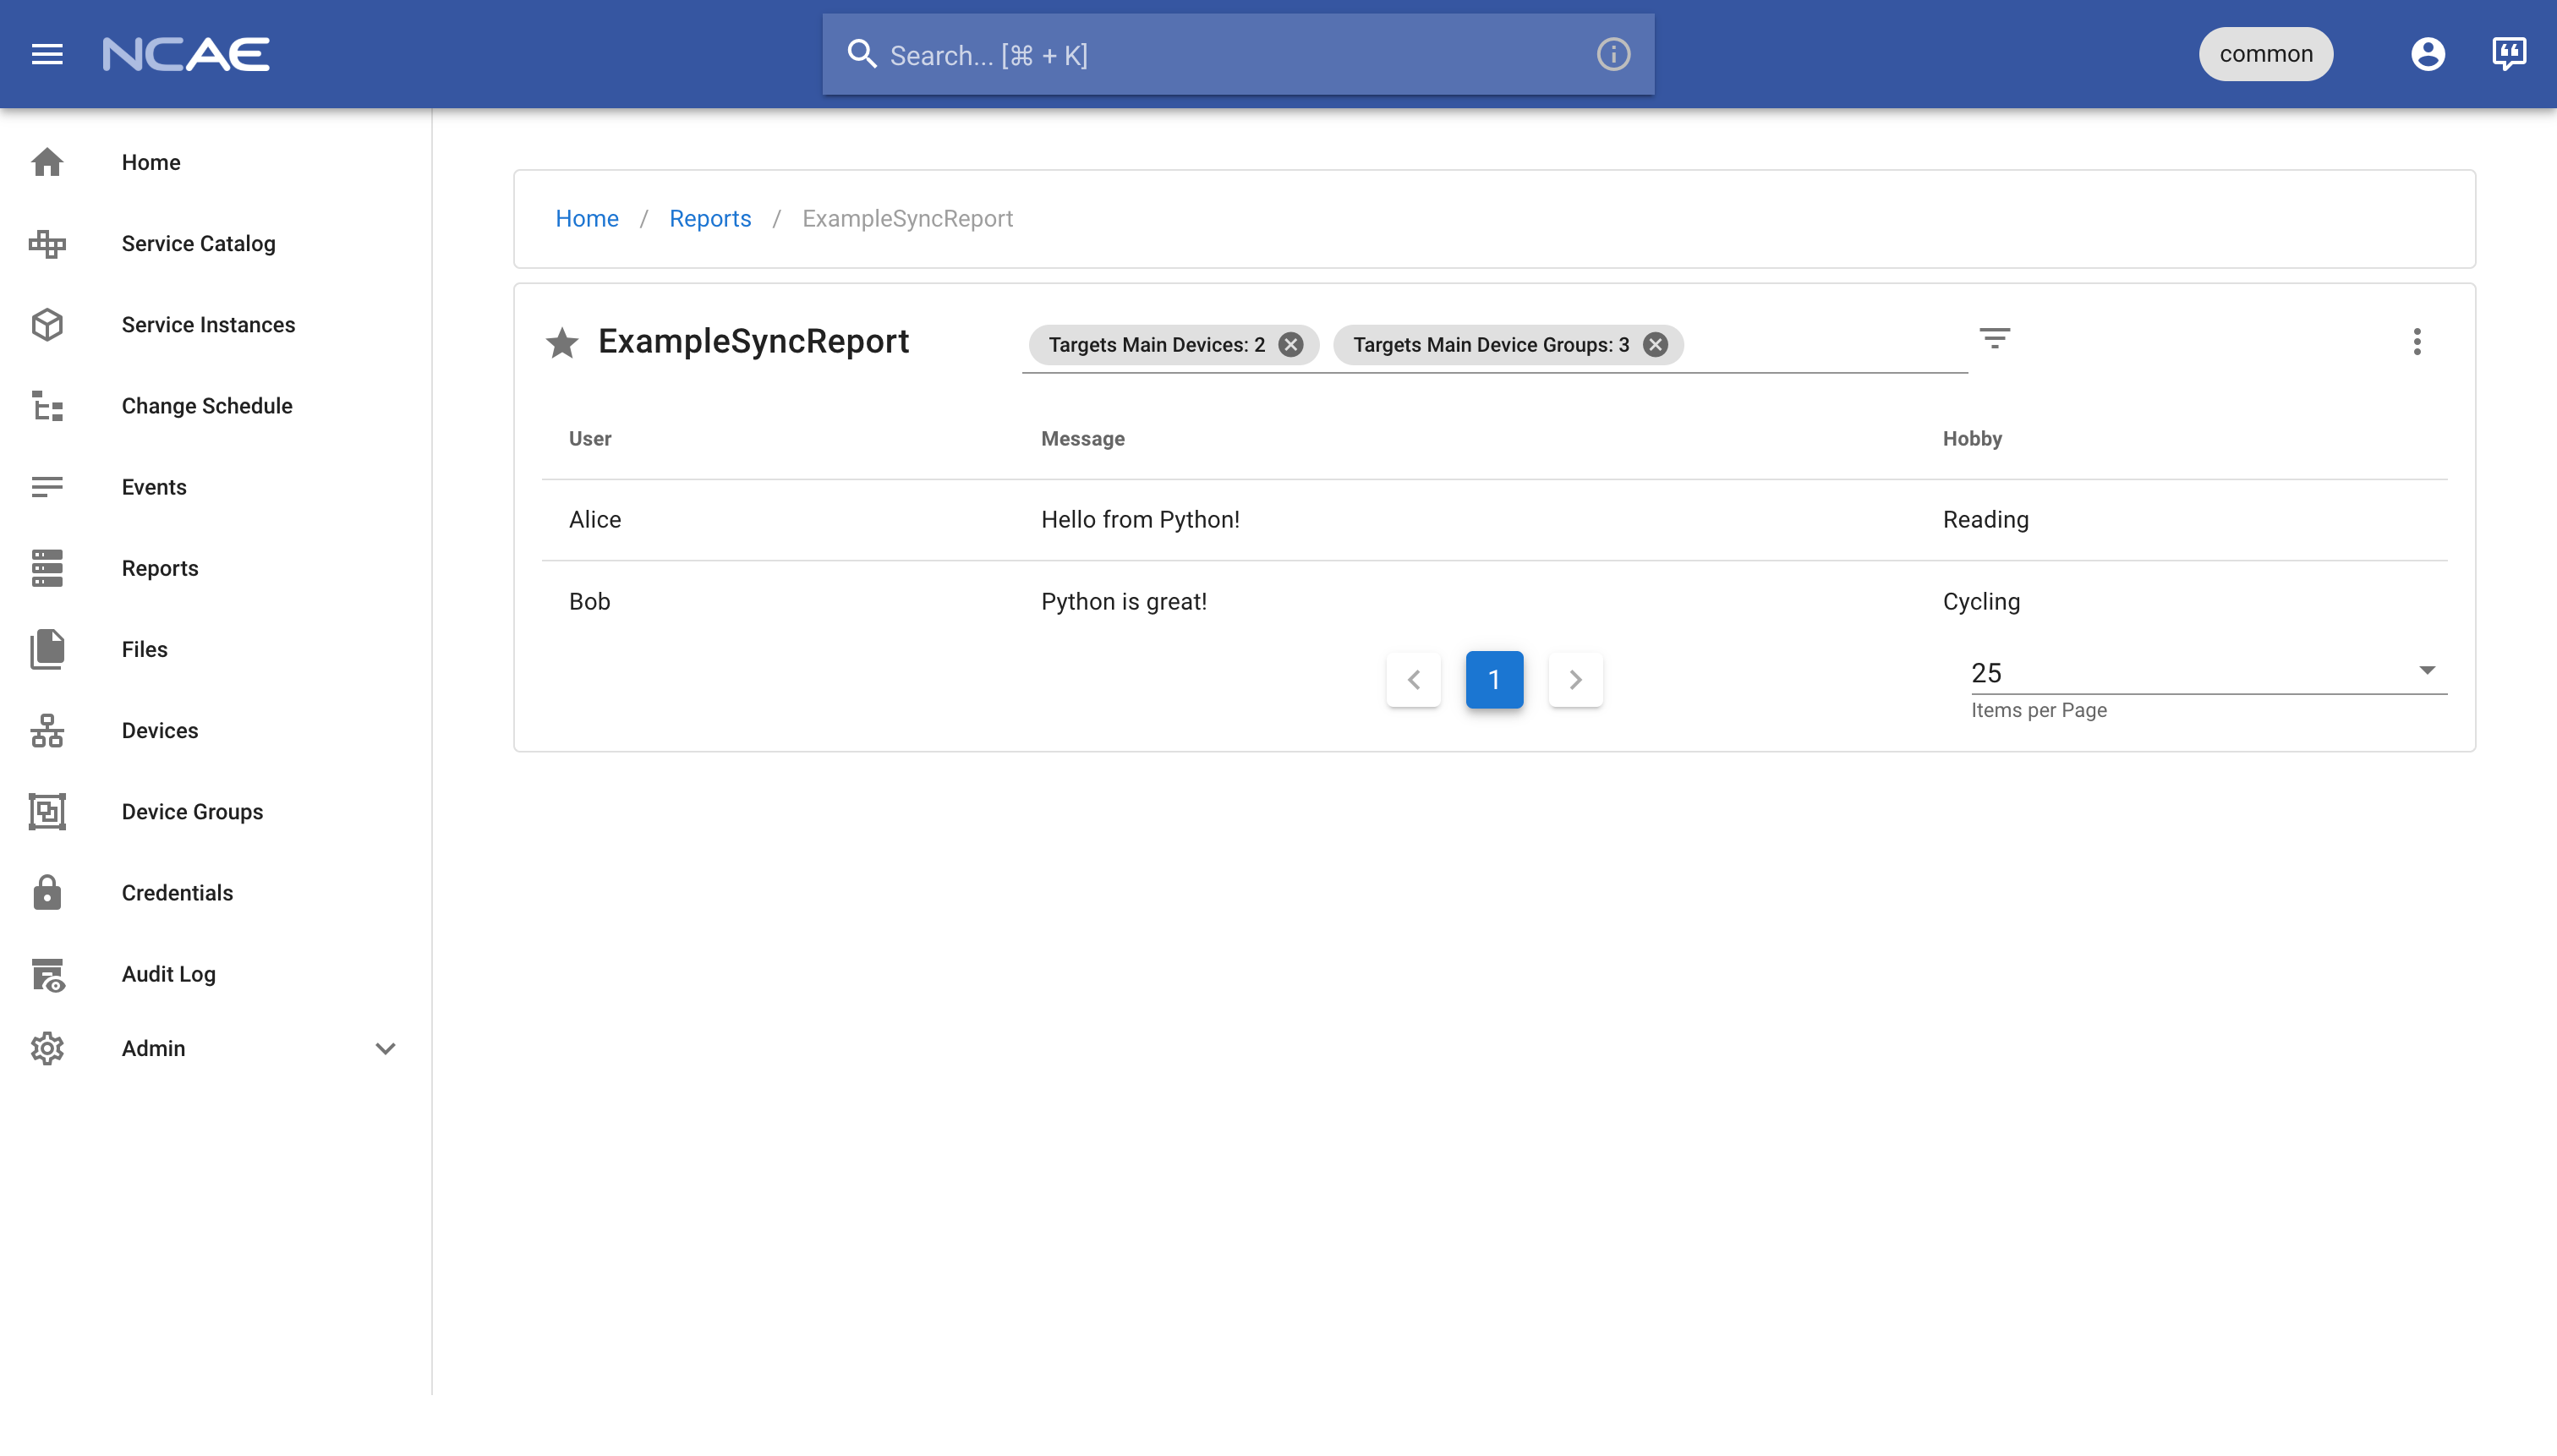
A synchronous report actively fetches data whenever it is launched, optionally also caching its response for a configurable timeframe. In the default module template, the synchronous report gets his data from the Python service within your container as well, which returns the data you are currently seeing in the report result.