Task 4 - Module Update
Goals
In this task, you will learn how to:
- Prepare your local development environment to work on your module
- Update all relevant systems with your changes, so that you can improve your module
- Run the updated example services from your module in NCAE
Python dependencies
This is not part of NCAE module development per se, but we will install python packages in this task - so a quick detour into the python world is required. If you are familiar with Python and its ecosystem (virtual environments, dependencies, lockfiles), you can skip this part and use your preferred approach.
One strength of Python is the number of available packages on the Python Package Index. A list of curated packages can be found on Awesome Python.
If you need to manage dependencies, uv is the recommended tool. Follow the installation instructions to install uv and then manage dependencies with this tool.
For the training, open a powershell terminal and run
powershell -ExecutionPolicy ByPass -c "irm https://astral.sh/uv/install.ps1 | iex"` 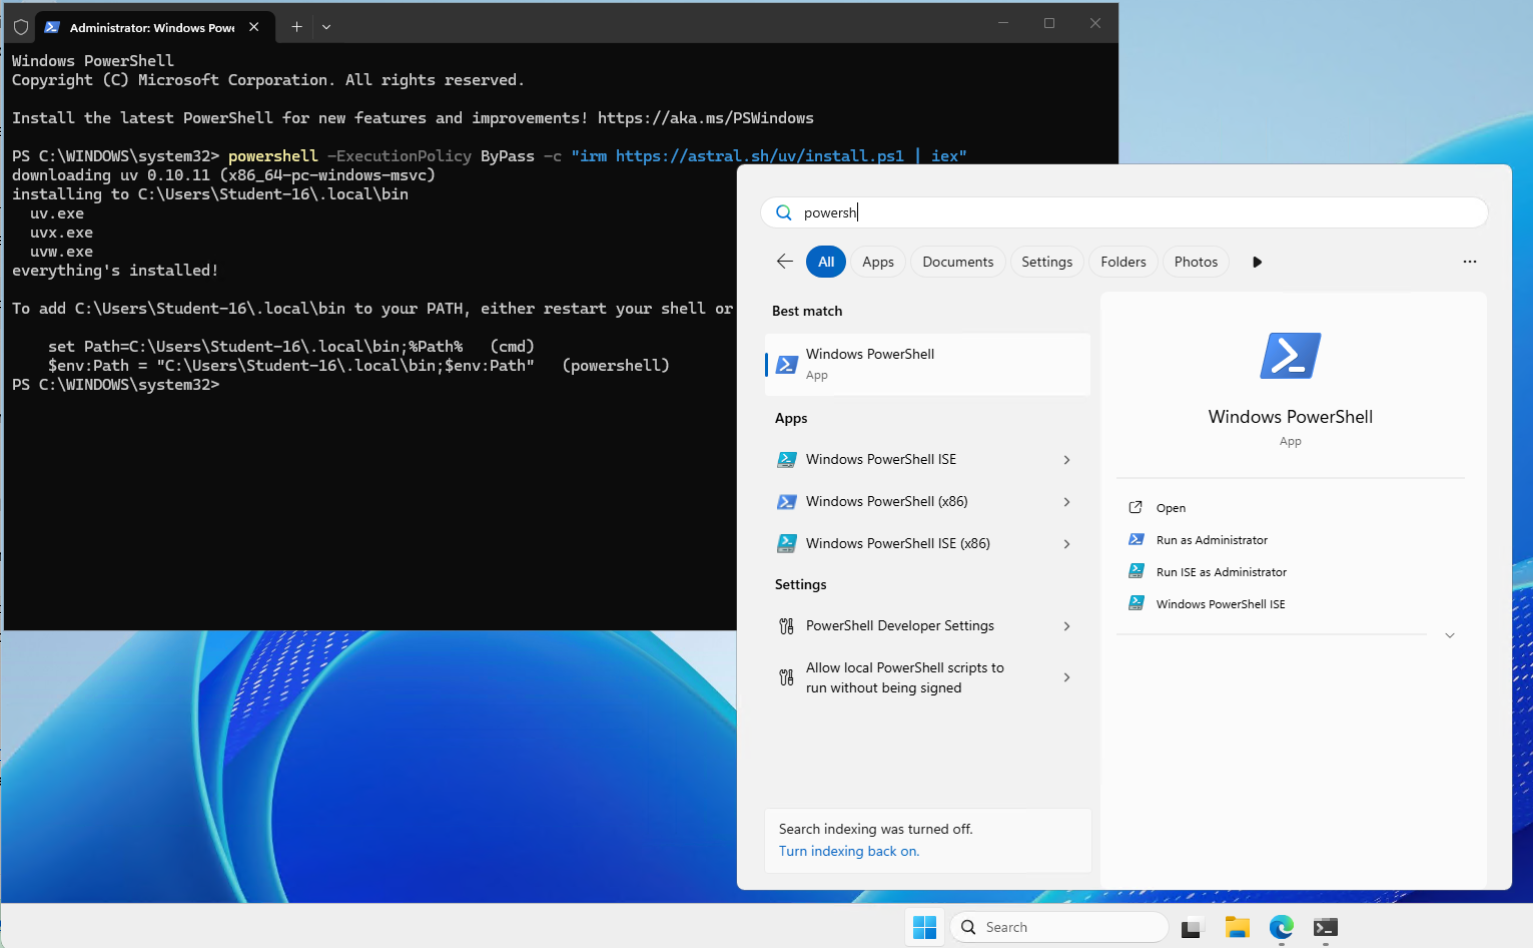
The most important commands are:
uv add <dependency- This adds the dependency topyproject.tomland installs it into your environment (that uv handles as well).uv sync- Synchronize the dependencies with the environment.uv run <command>(e.g.uv run ruff) - Run the command in the environment.
The uv guides (or the LLM of your choice) contain much more information.
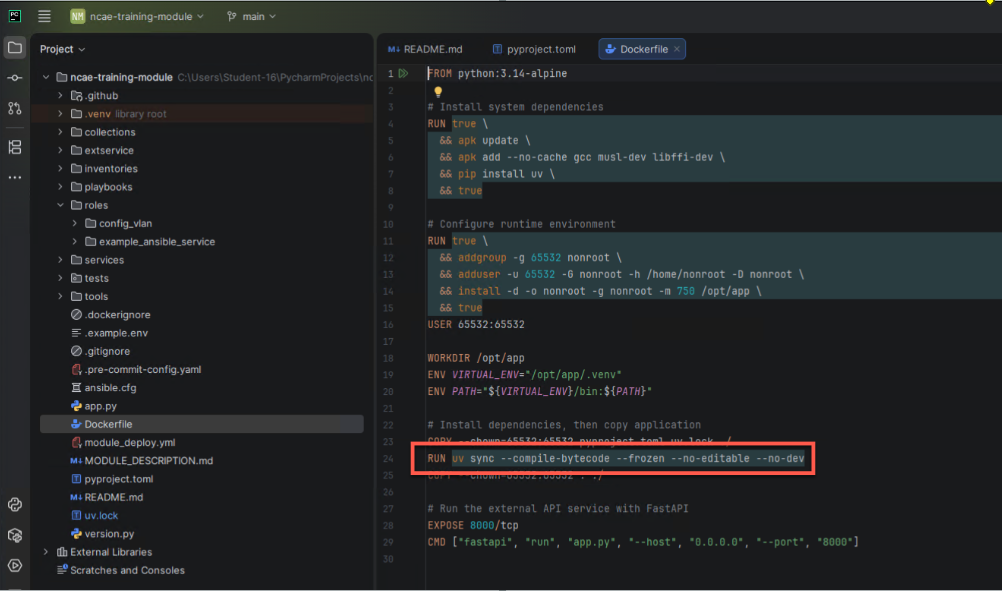
If you install dependencies in this way, the Dockerfile automatically picks up your changes during the build! So
it’s safe to install and use dependencies for this in your module development.
Setup your development environment
We have the setup for package management in place, so in this part we will:
- Get the Module code
- Create a Python Virtual Environment (venv)
- Install the Python dependencies
- Enable Pre-Commit. Pre-commit is a framework that automatically runs code checks and linters (hooks) before each Git commit, helping catch issues before they enter your codebase.
A note about IDEs
All examples and screenshots are made with PyCharm, but feel free to use any IDE (integrated development environment) you like/know. The concepts are the same for all editors.
Get the module code
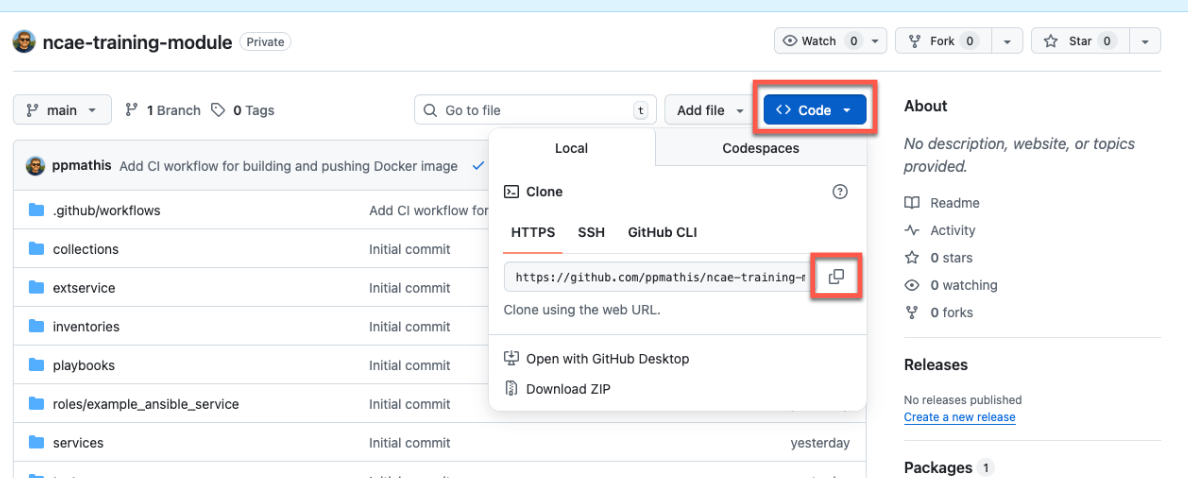
Open the GitHub page with your module code from the previous step, and copy the URL to get the code.
With your IDE, create a new project based on “Version Control”. If you do not see this dialog, select "File" > "Project from Version Control..." in the menu.
Paste the URL from GitHub and chose a directory of your liking.
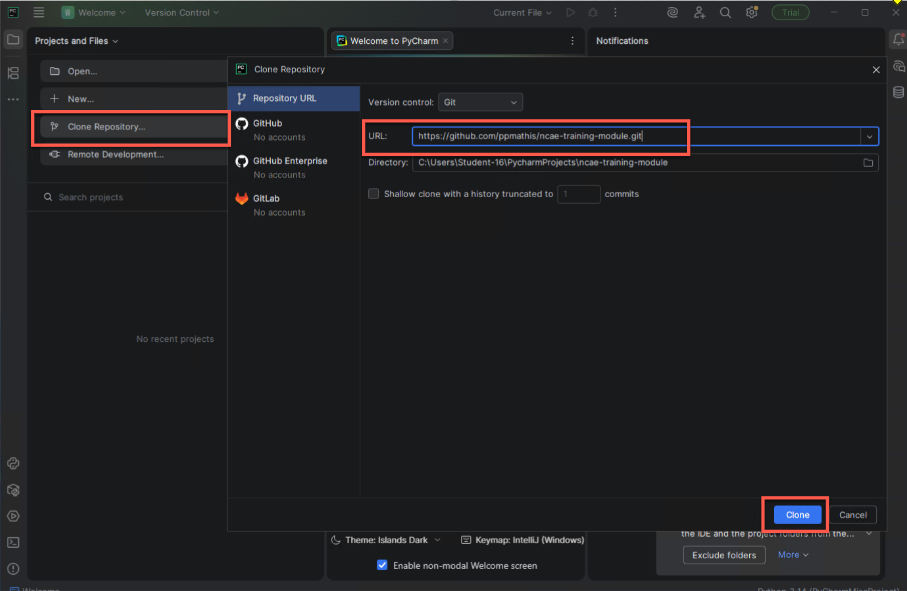
- URL: The URL that you have copied from GitHub
- Directory: Up to your liking. Most developers have a dedicated folder like
codewhere all their projects live.
Trust the Project:
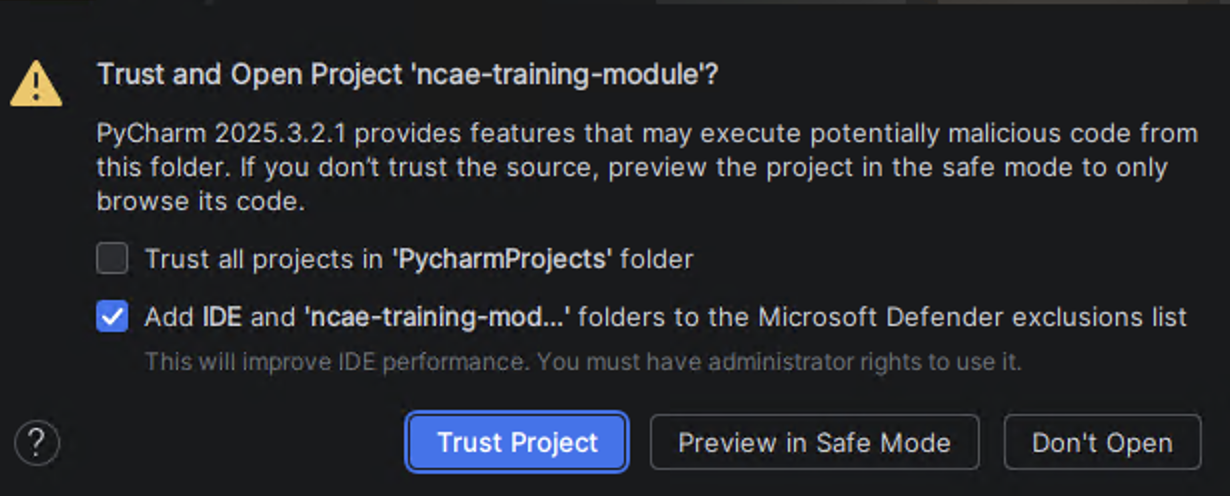
You will be asked to authenticate via GitHub; follow this process. You will then be greeted by the project Readme.
As we have installed uv previously, and this is well integrated with PyCharm this should work out of the box!
uv in the bottom right, follow the “Manual Python interpreter setup”.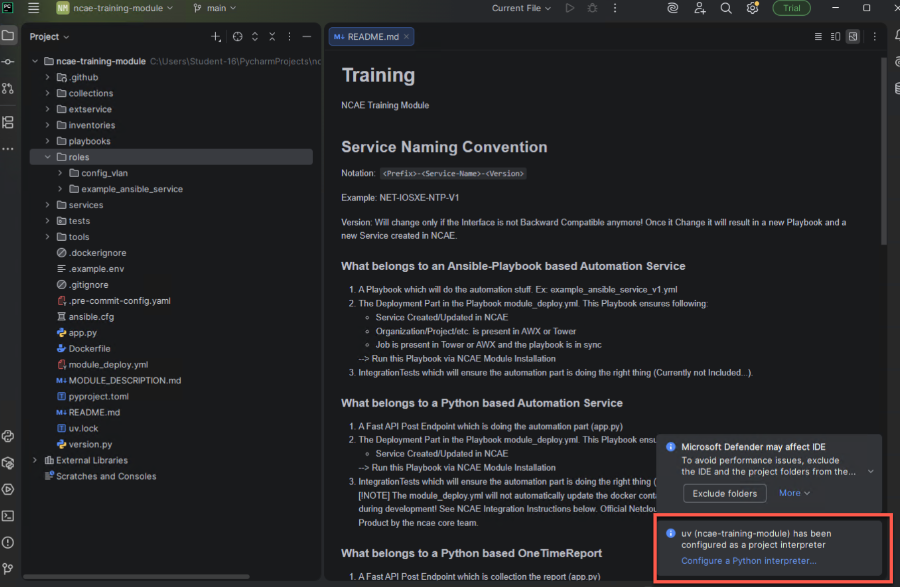
Install the projects dependencies
Python dependencies are managed in the pyproject.toml file. If you open this file, and right-click on the file
name tab, the dependencies can be installed with uv Sync.

This “locks” the dependencies and makes sure that this exact version is installed whenever uv sync is run. You can
open the generated uv.lock file if you are interested in the exact specification.
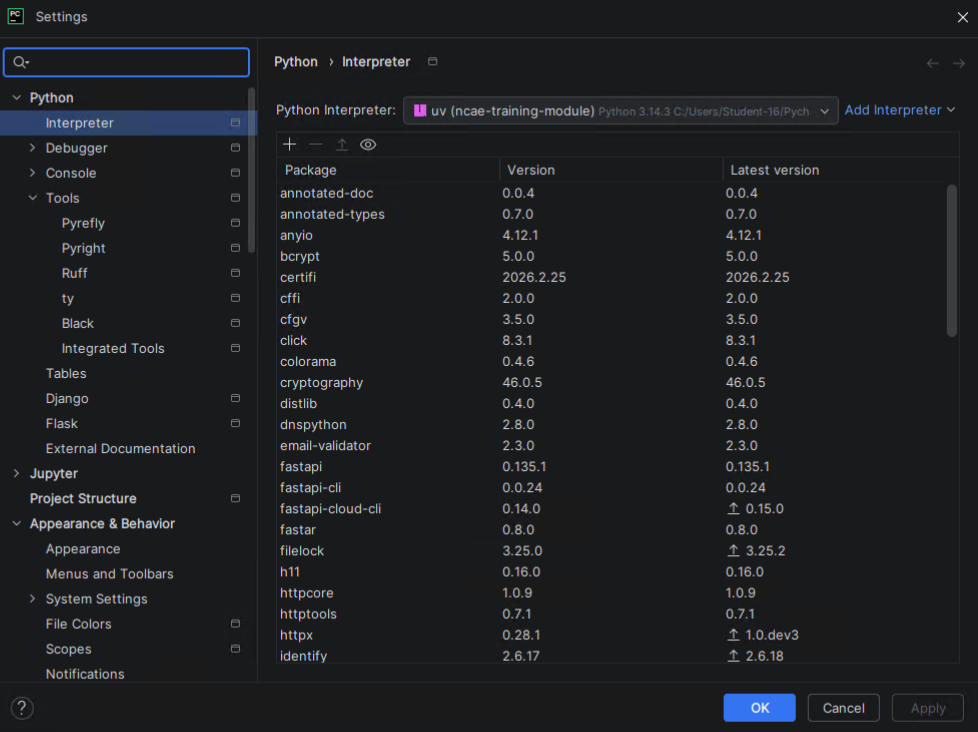
The installed dependencies can always be checked by hitting shift twice (a very useful shortcut!) and typing “interpreter”. Click on the entry “Interpreter - Settings”
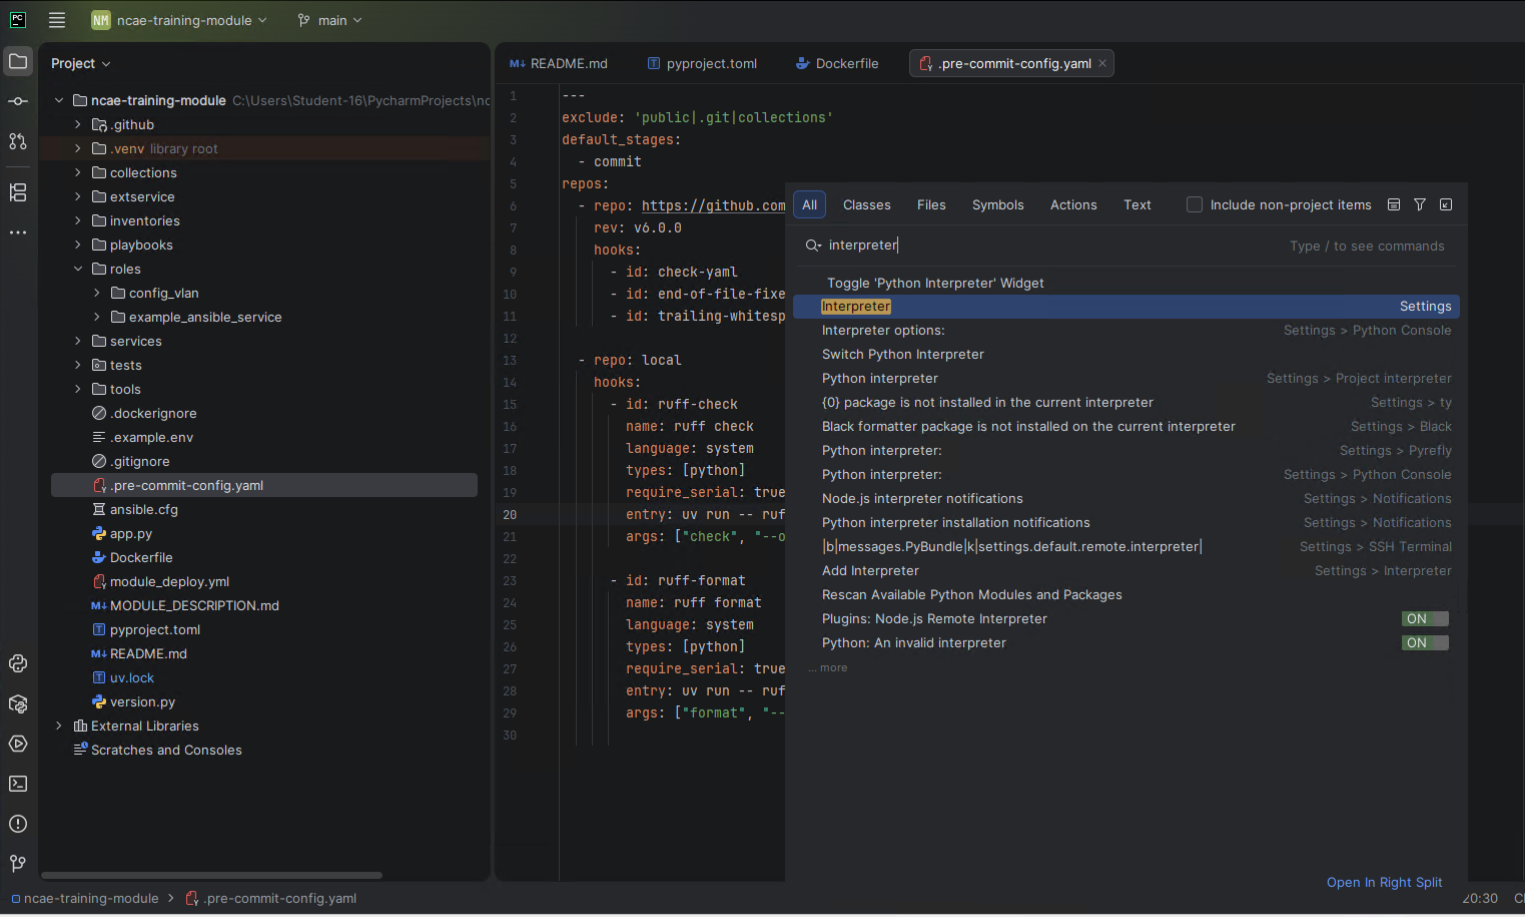
The project interpreter (uv) and all dependencies are now listed.
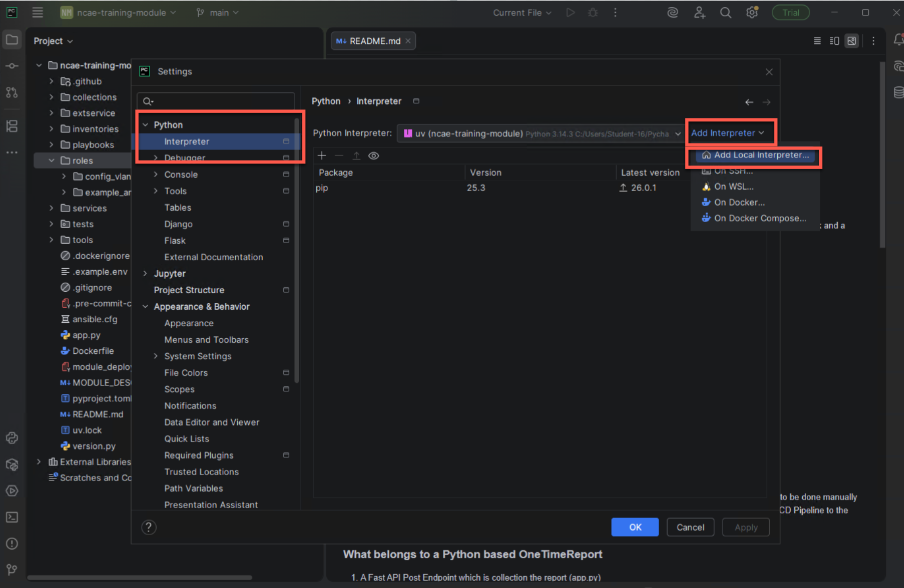
Manual Python interpreter setup
This is only required if uv was not picked up properly. Go to File > Settings and search for Python interpreter. Click on the Add interpreter dropdown and select Add Local Interpreter.
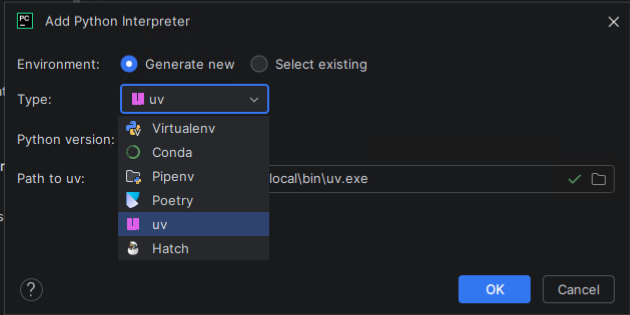
Select uv as type and hit OK .
Synchronize the dependencies in pyproject.toml as described above.
Install pre-commit
pre-commit is a widely used tool that helps with fast checks before pushing code. The module cookiecutter provides an initial configuration that is also asserted during the GitHub action run.
Install the pre-commit dependency by opening a terminal panel (Alt+F12), and paste this command:
uv add --dev pre-commit
Enable pre-commit hooks with pre-commit install:

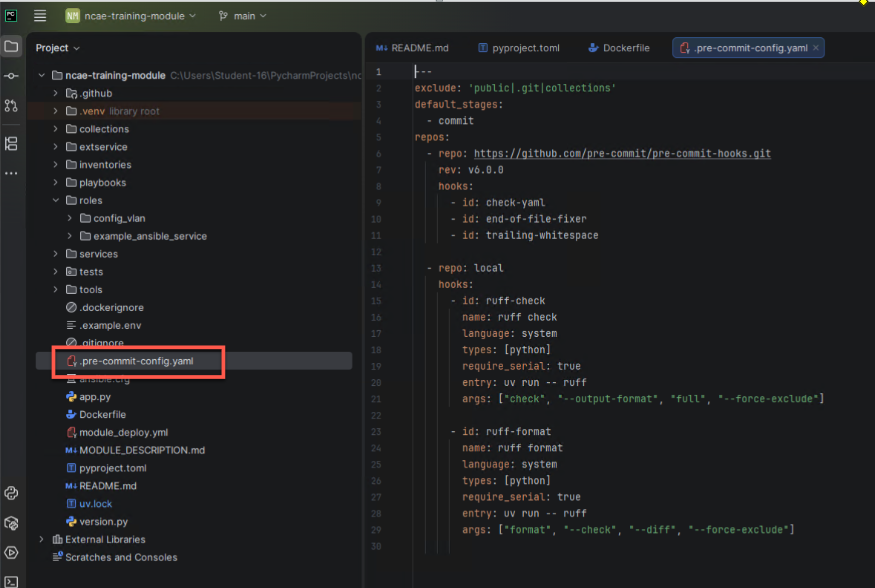
This installs a hook, so that the tools specified in .pre-commit-config.yaml are run before each “git commit”
action - informing you about mal-formed code.
Extend to the module
The previous steps are tedious - but once in place, this is an excellent base for development!
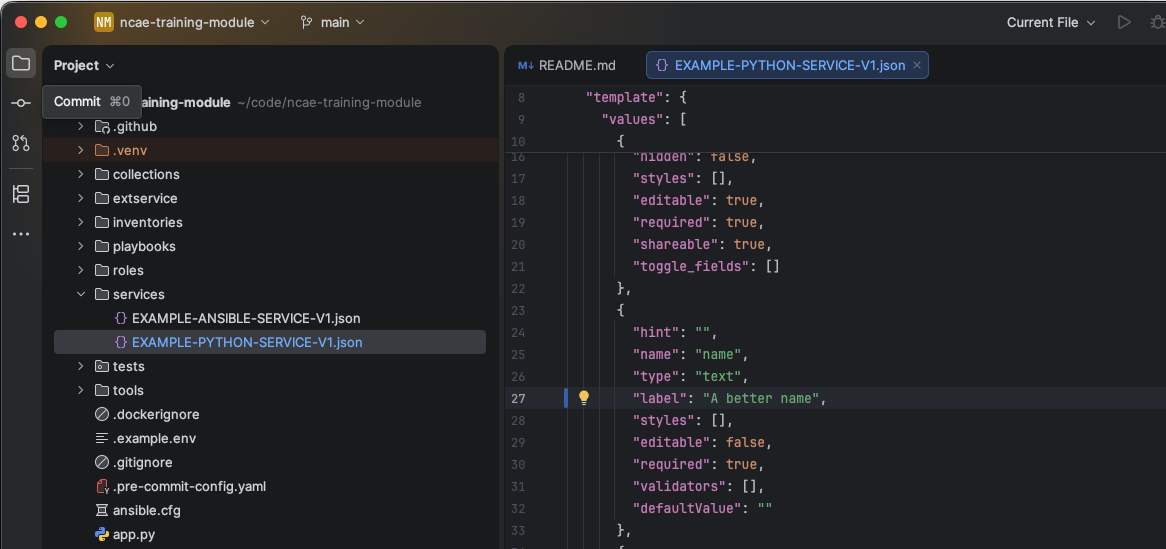
As a first step, let’s update the service provided by the module. The label “Service Instance Name” needs an update, it is too verbose!
Open the file EXAMPLE-PYTHON-SERVICE-V1.json int the services folder and change it to a better name.
To submit the changes, a commit is necessary. Select the “commit” icon on the top left, or select Git > commit in
the top menu. The commit panel is now on display.
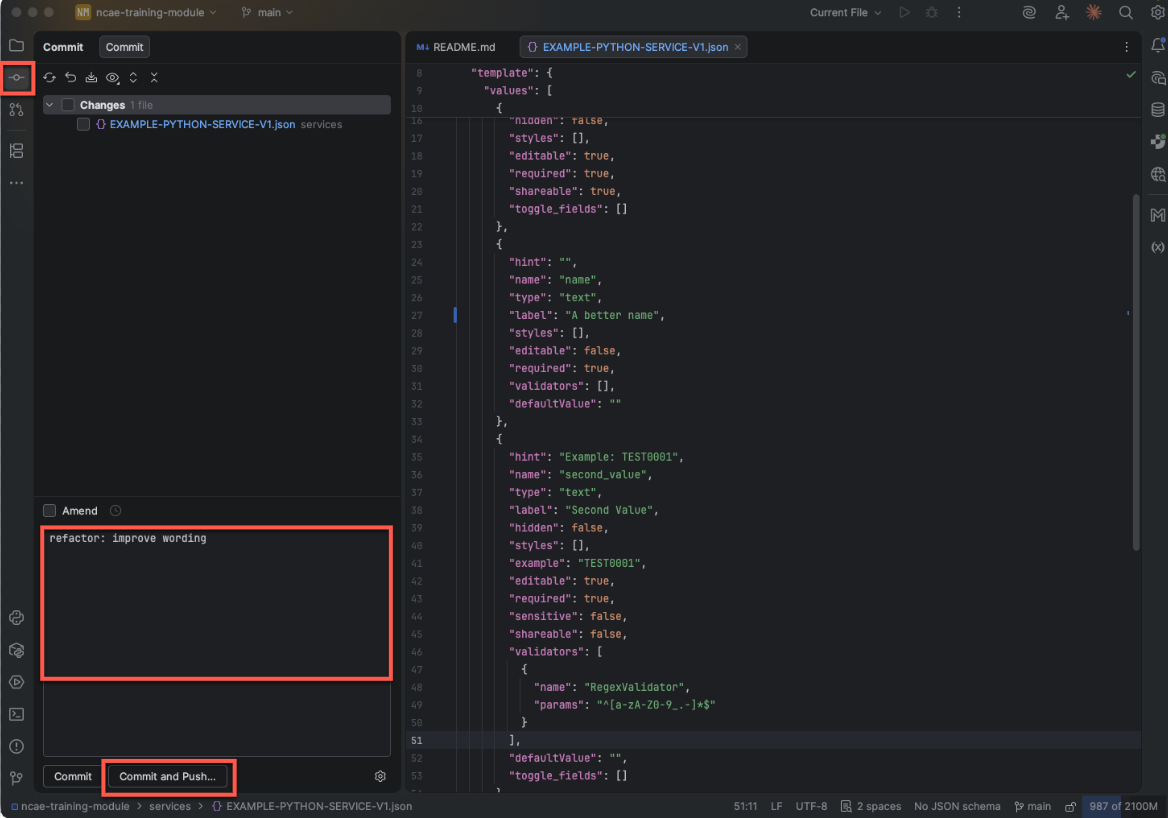
The pane is split into two windows: the top one shows the changed files, the bottom one lets you add a commit
message. To view the changes, right-click on the file on the top window and select Show Diff. If you are happy
with the change, make sure that the file is checked!
As commit message, you can type anything that helps you understand the reason for the change at a later point in time. For this example,
refactor: improve wording can be used.
To commit the changes and push them to GitHub (where the pipeline runs), select Commit and Push.... In
the next dialog, simply hit “push” again.
- Files: Make sure that all desired files are “checked”. Unchecked files are not in the commit.
- Commit message: Should be
refactor: improve wording
View your changes on GitHub
Now, head back to GitHub. Your commit will show up! The orange circle in the middle indicates that the pipeline is
running. When clicking this icon, you will see the pipeline status. If you click on the right (3 Commits), you will
jump to a list with all commits.

Wait for the Action to succeed, like in Task 3.
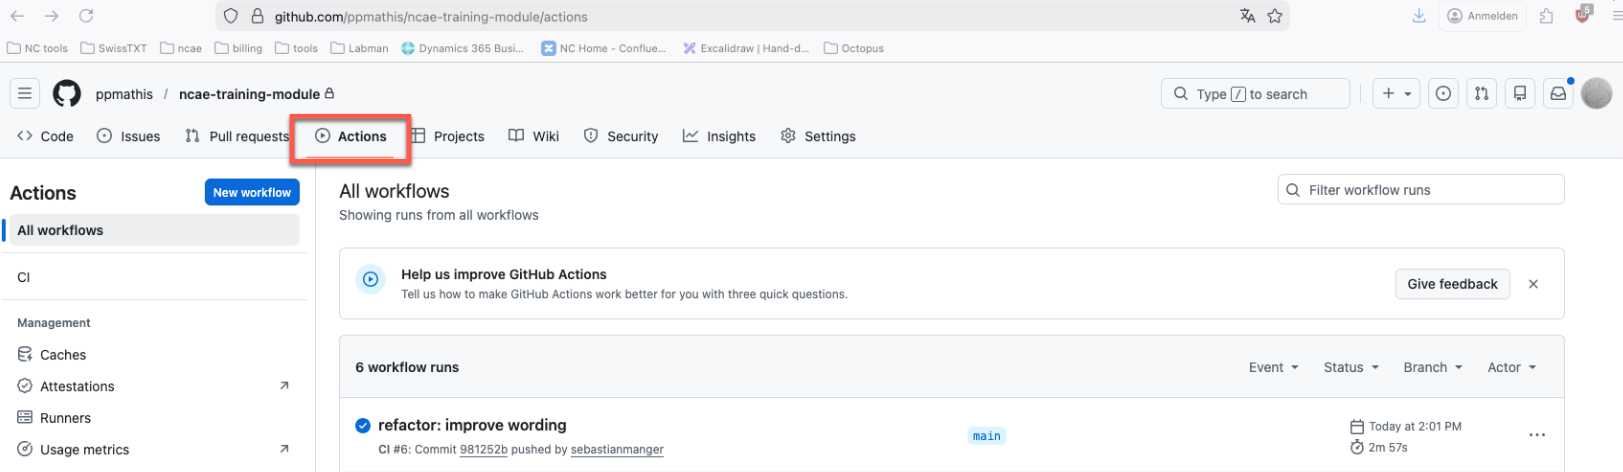
This means that the docker image is updates, and the NCAE core is ready to update the module.
Update the Module in NCAE
The actual development work is made in the module. To let NCAE core reflect these changes, the Module must be updated.
Open your NCAE instance in the browser, go to Admin > Modules and select the “update” action.
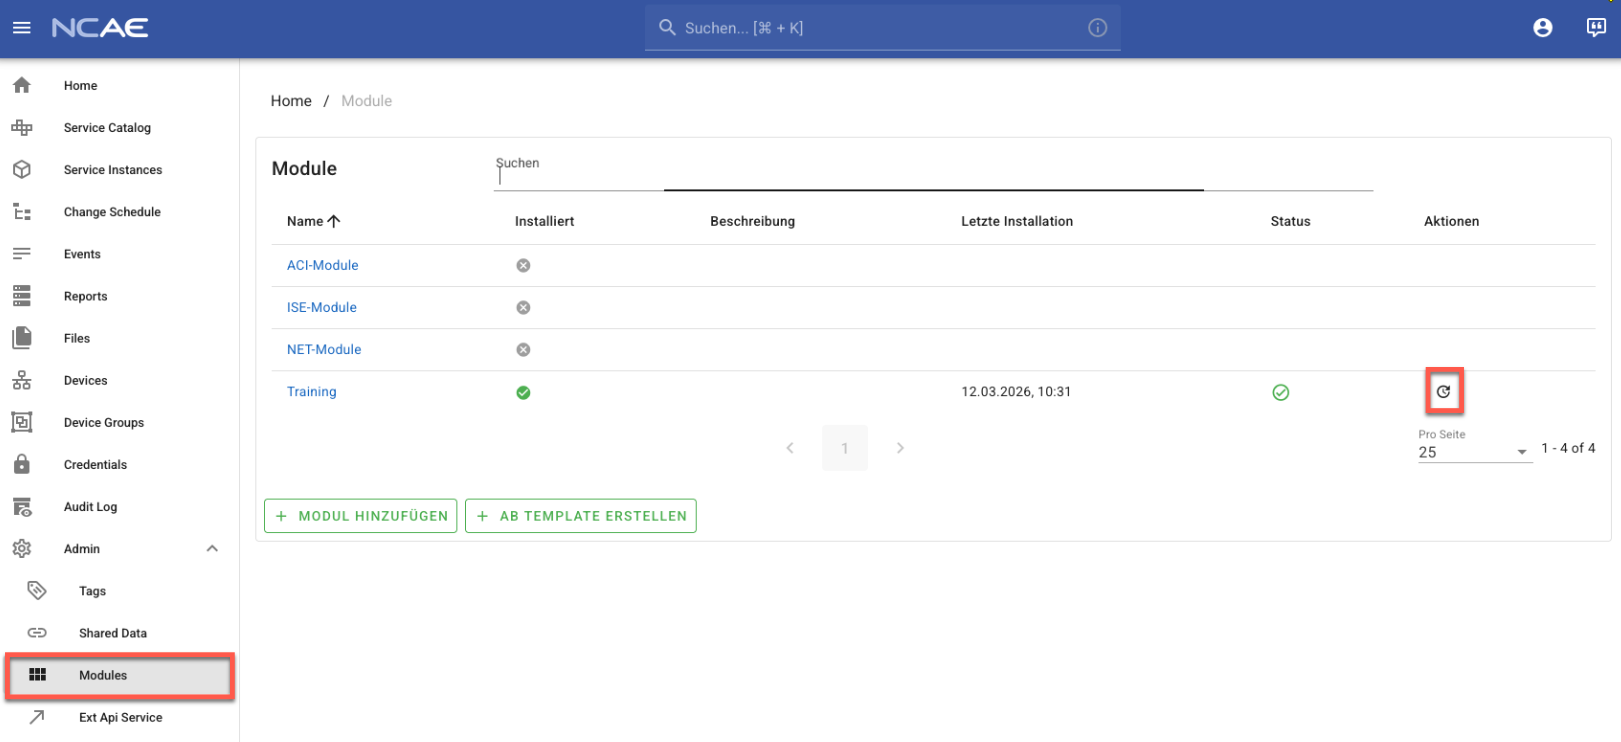
The same functionality is also available on the module detail view: “Aktualisieren”
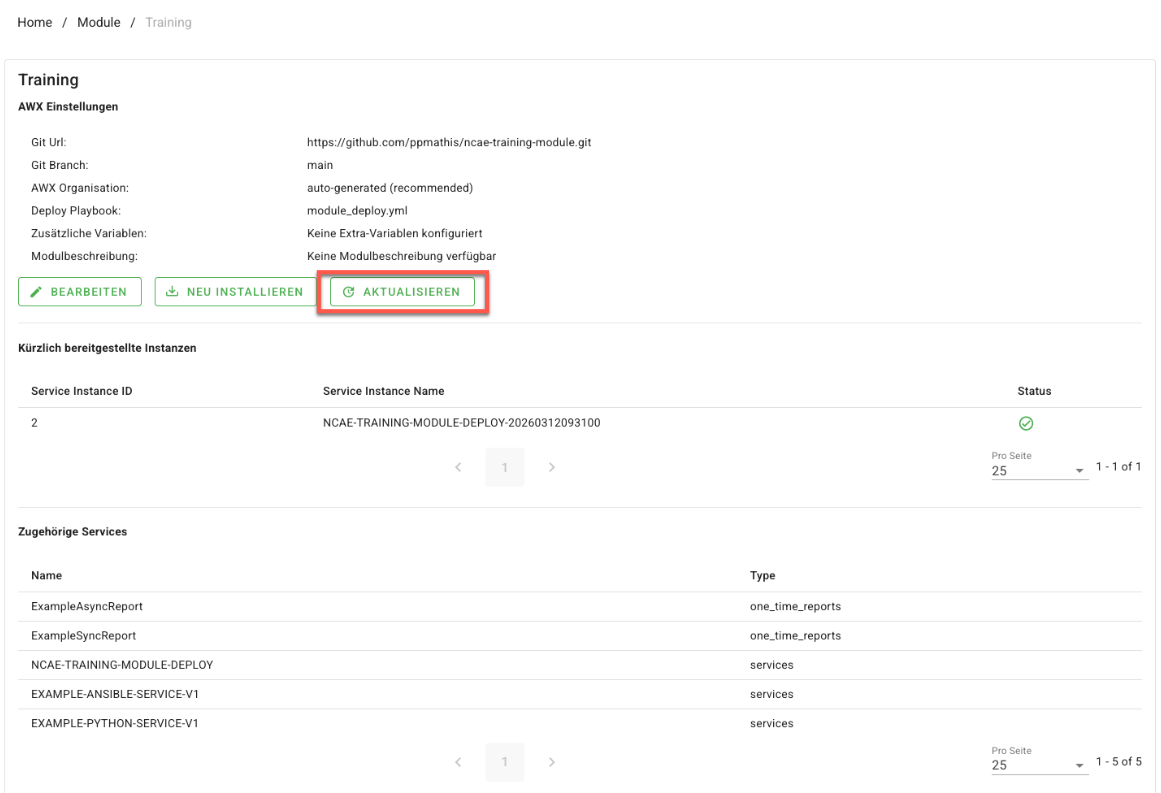
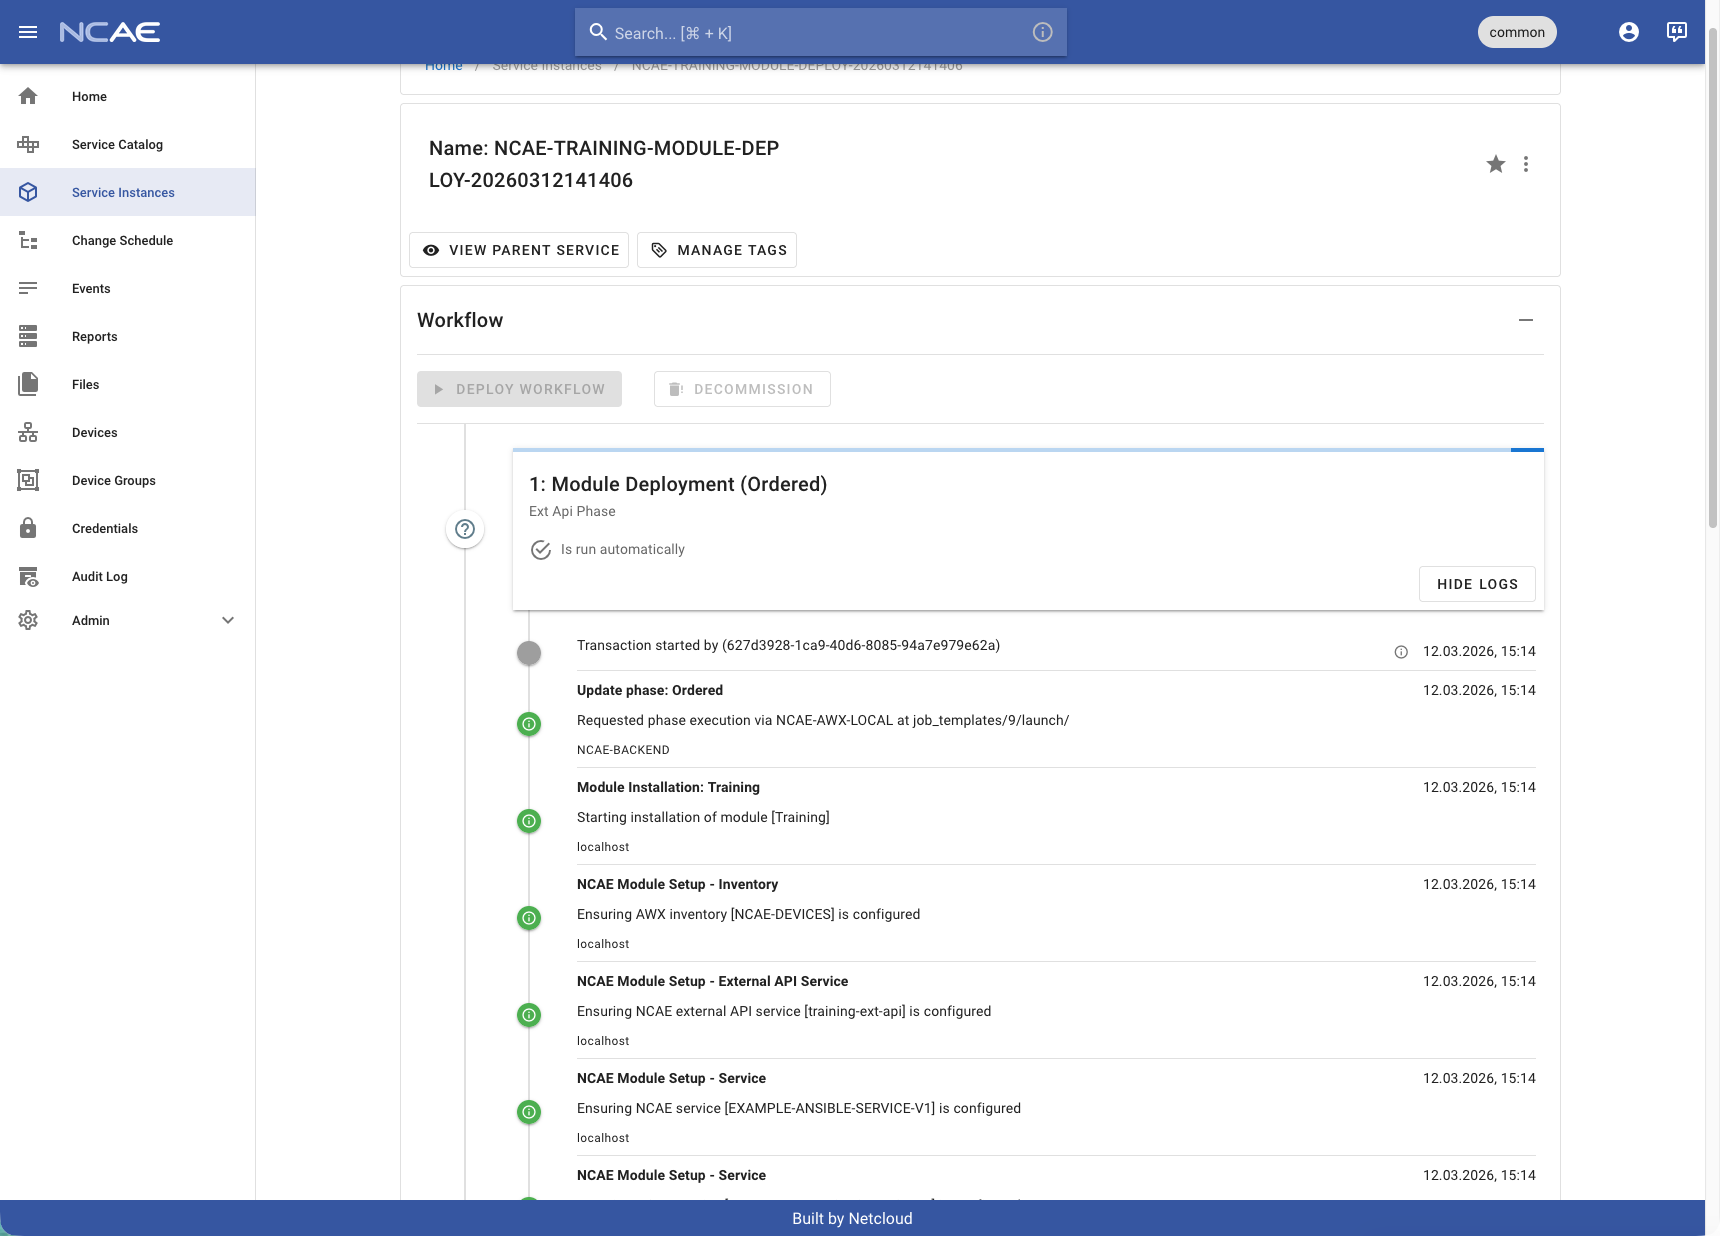
After updating the Module, the Service to install the module is re-deployed. So on the module detail view, click on the first Service Instance Name to follow the update of the module.
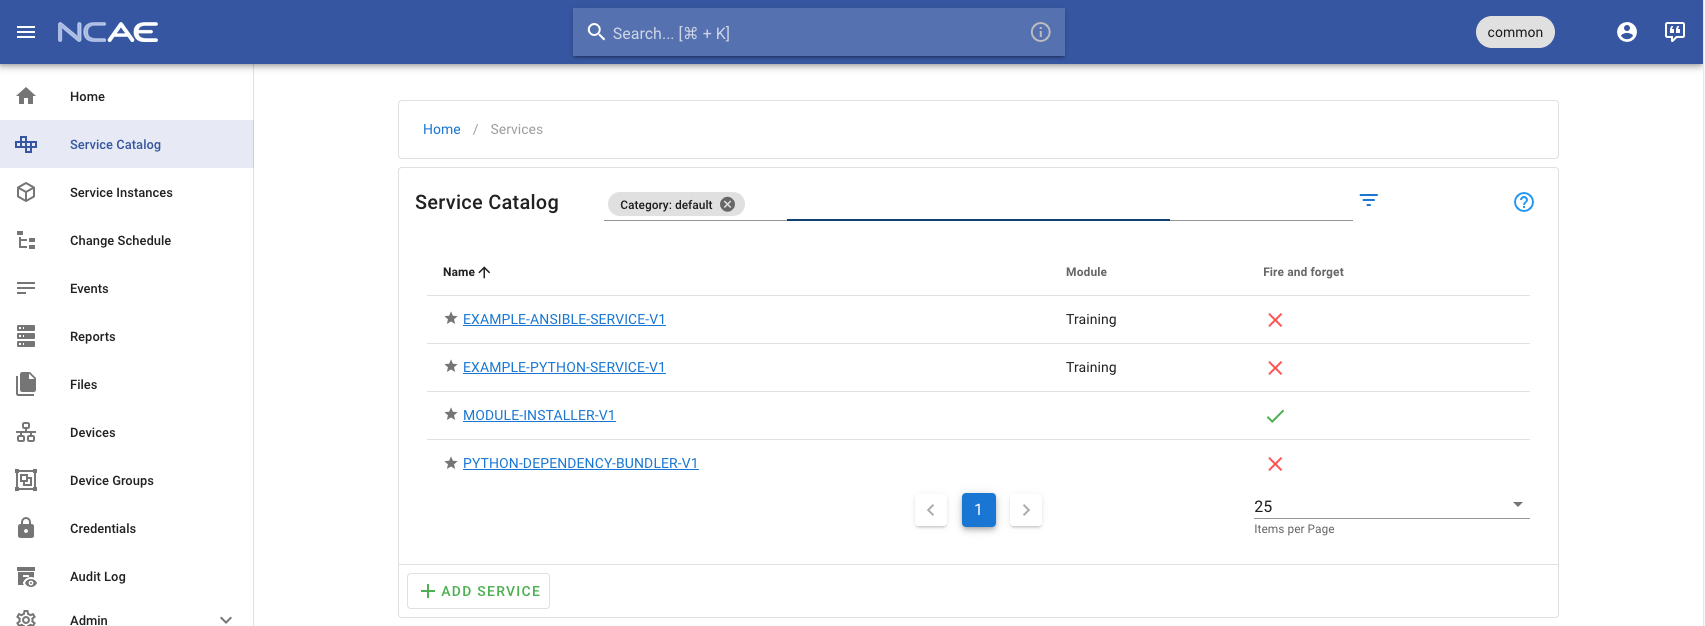
After the service is successfully deployed, head back to the Service list and, click on the “EXAMPLE-PYTHON-SERVICE-V1”. The field is now labeled “A better name”!
Congratulations! Now is the time to reflect, think about the images in the powerpoint and re-iterate why distributed systems are powerful, but very complex. We are always happy to help, especially after the training. And once the ground work is in place, you can really focus on your domain/problems.
Summary
- The files in the
servicesare picked up by the Module installation from AWX. - Changes are handled in an “upsert” approach. New configuration files are added; existing ones are updated.
- The
servicesfolder contains the structure (Services, Phases)
Development loop
During development, you typically want to keep the main branch clean so that you can apply hotfixes at any time.
To achieve this, new features are started on “feature branches”. The workflow of a typical NCAE module therefore is:
- Create a new feature branch based on
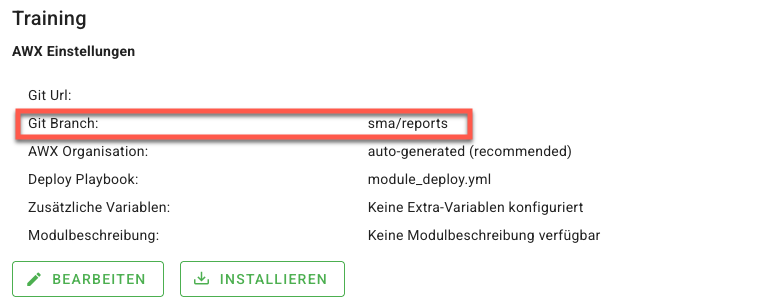
main. All work happens in this branch. - In the NCAE core, update the Module configuration and point the branch to your feature branch.
- Push your module branch and update the Module in NCAE as often as needed.
- Once you are happy, merge your feature branch into main - and update the Module configuration in NCAE again.